Building, Configuring and Executing a Workflow Step.
This sample will illustrate how to write a new workflow step, how to configure it using the Configuration Manager, use the step in a workflow definition and then have the step execute using a workflow instance.
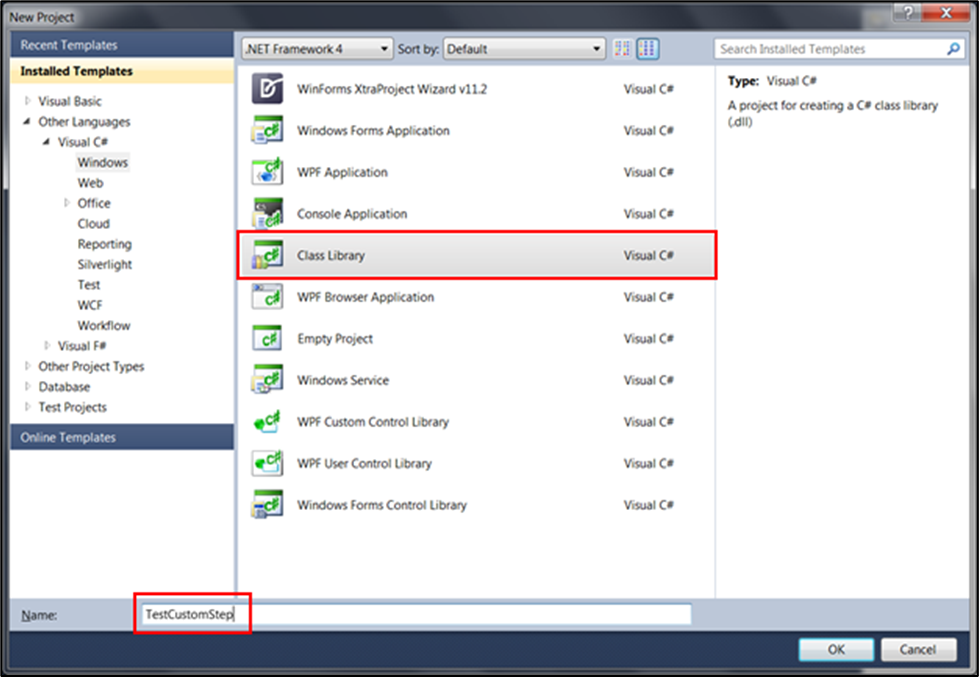
Start Microsoft Visual Studio 201x and select “New Project”. Select “C#” as the language and select “Class Library” as the project type. Also select .Net Framework 4.6.1 from the top dropdown. This example is going to use C# as the development language. This same example can be also written using Visual Basic .Net.
For the name of the project, provide “TestCustomStep”.
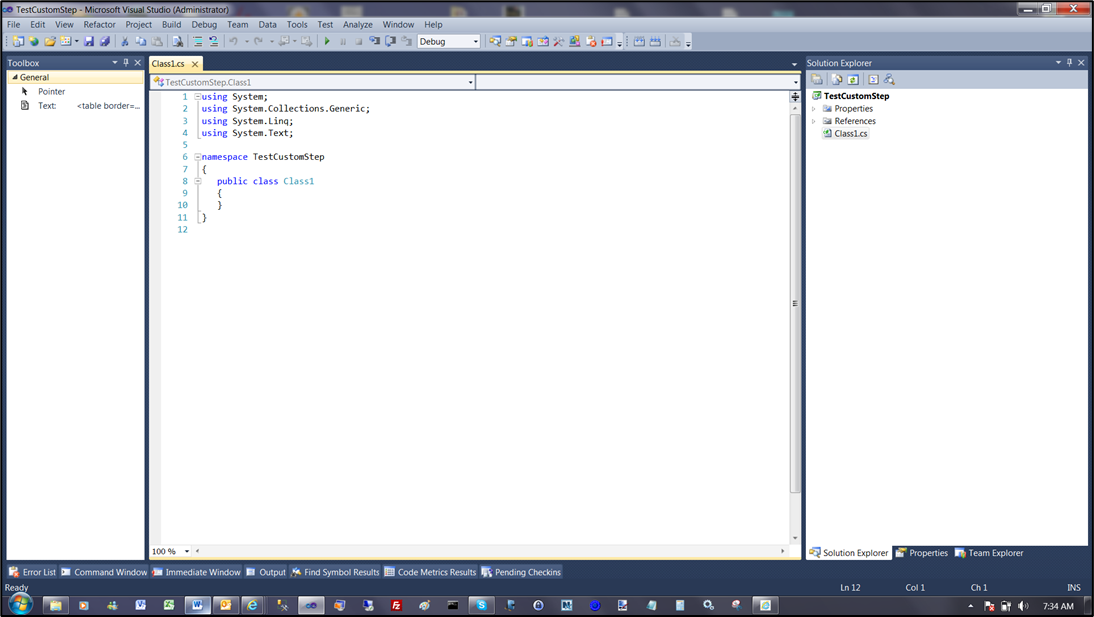
Once the project is created, select “Class1.cs” and rename the class to “clsRandom100.cs”

References can be added automatically using NuGet package manager.
If you never heard of this product before you ma want to familiarize yourself with, NuGet.org as it is becoming very popular. Many developers use this website to include API packages to their software projects. Why should teams use NuGet? Typically when you want to use an API, you have to know what libraries/DLLs to reference; with NuGet all you have to do is to find the package and click install, then the NuGet package manager automatically downloads the selected package and its dependencies and simply adds them to your project.
FlowWright now includes the NuGet package, you can access it from here. By adding the NuGet package to your Microsoft Visual Studio project, you automatically get all the required API files to use the FlowWright API. The following files will be added automatically:
- cDevDEAPI.dll - high level API
- cDevDecisionEngine.dll - engine and the low level API
- deDataAccess.dll - data access layer API
- cDevDBErrorProvider.dll - error logging API
- cDevCache.dll - caching provider API
- cDevAuthentication.dll - authentication provider API
- deDataAccess.dll - data access provider API
There are many advantages to using the NuGet packages in projects, most important is the ability to easily upgrade to the newest version of FlowWright when it becomes available. Simply go to the NuGet package manager and click "update" on the package.
The following video shows how to add the FlowWright NuGet package to a Visual Studio project.
NuGet takes the guesswork out of API libraries; use FlowWright API NuGet package today for your projects to see improved results.
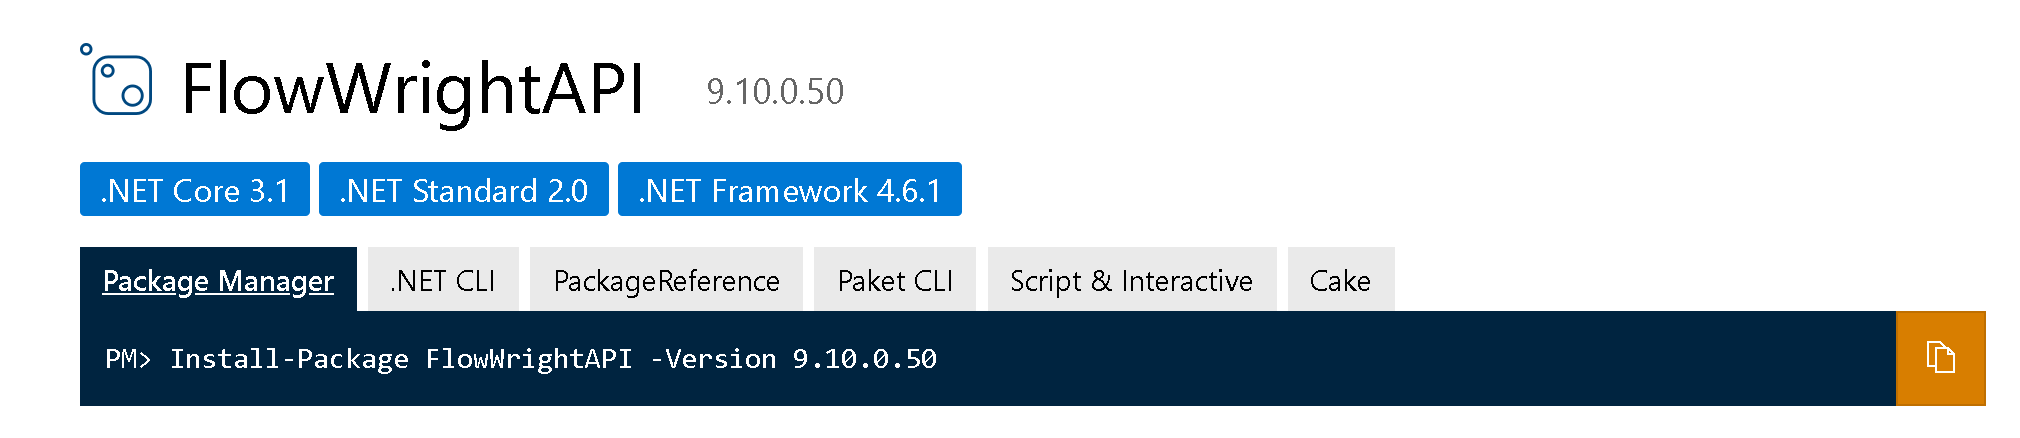
If you are using FlowWright v9.10 or below, then use the following NuGet package within Microsoft Visual Studio:
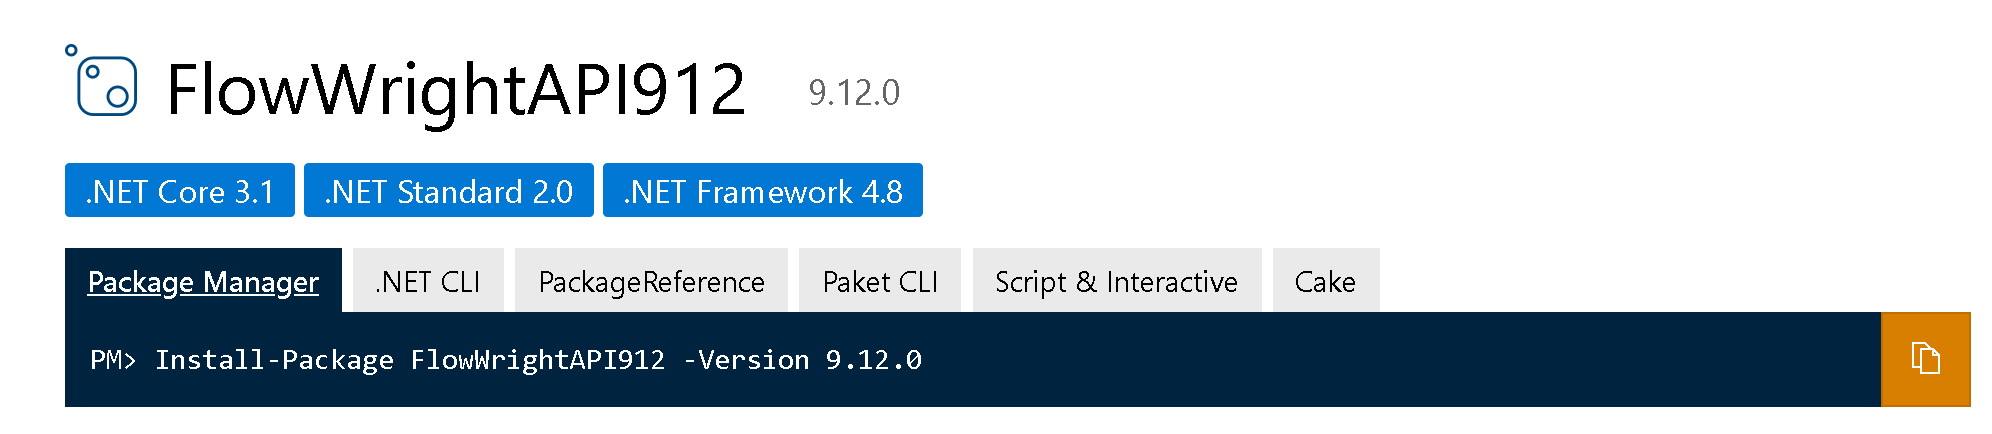
If you are using FlowWright v9.12.x, then use the following NuGet package within Microsoft Visual Studio:
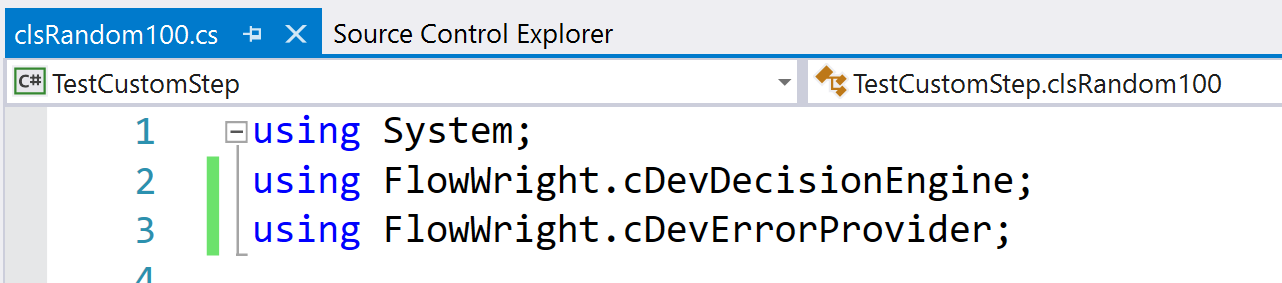
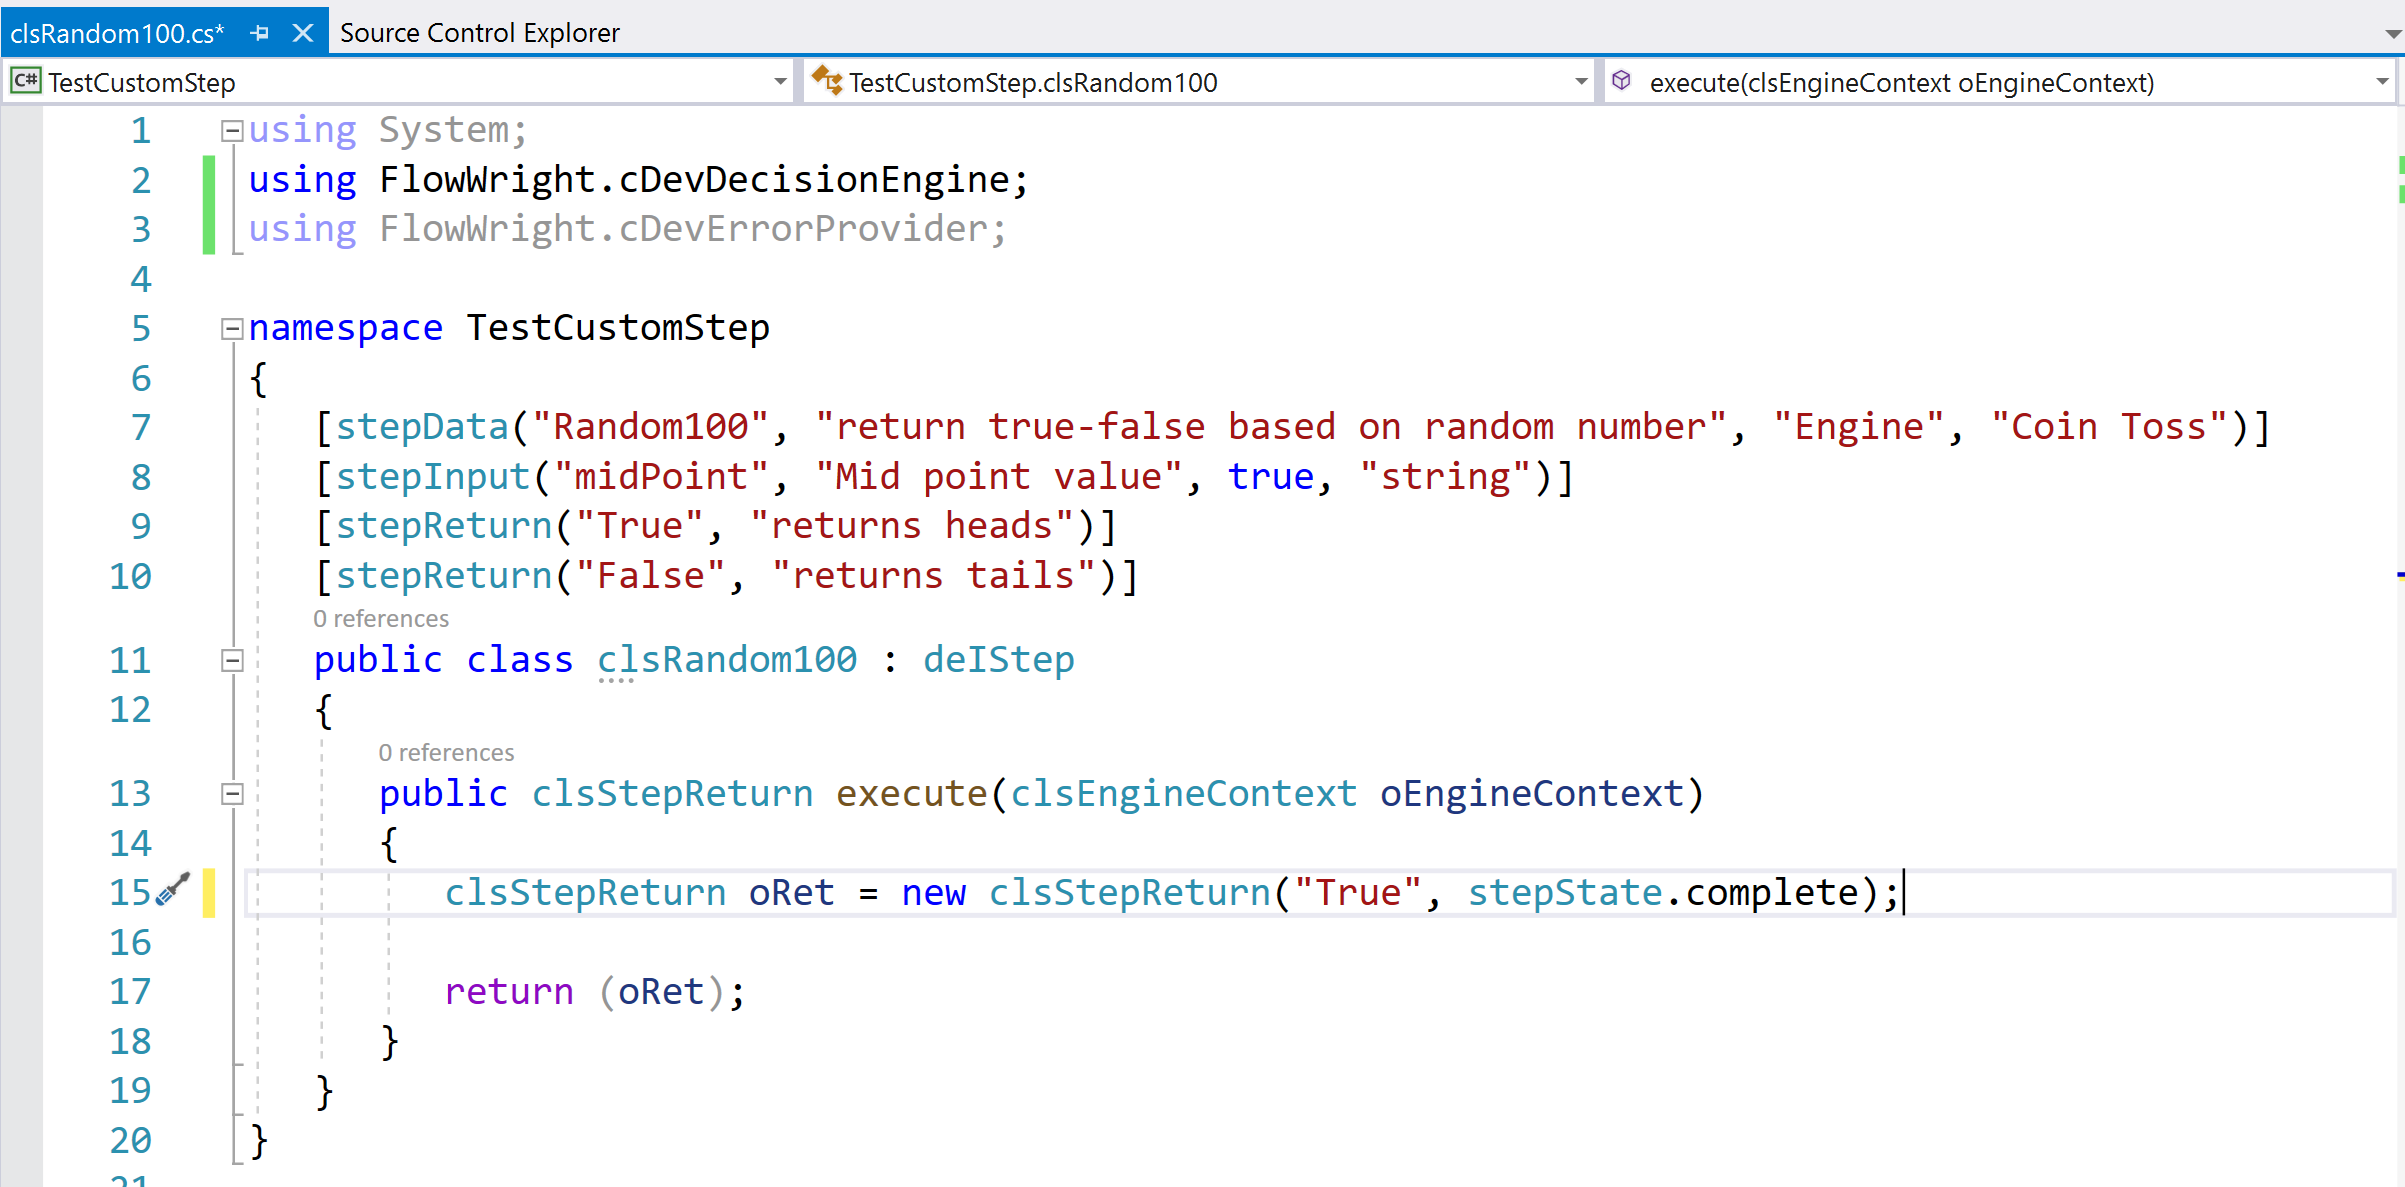
Add a using statements for referenced namespaces.
Next, let’s place some custom attributes on the class so that FlowWright is able to auto configure the step.
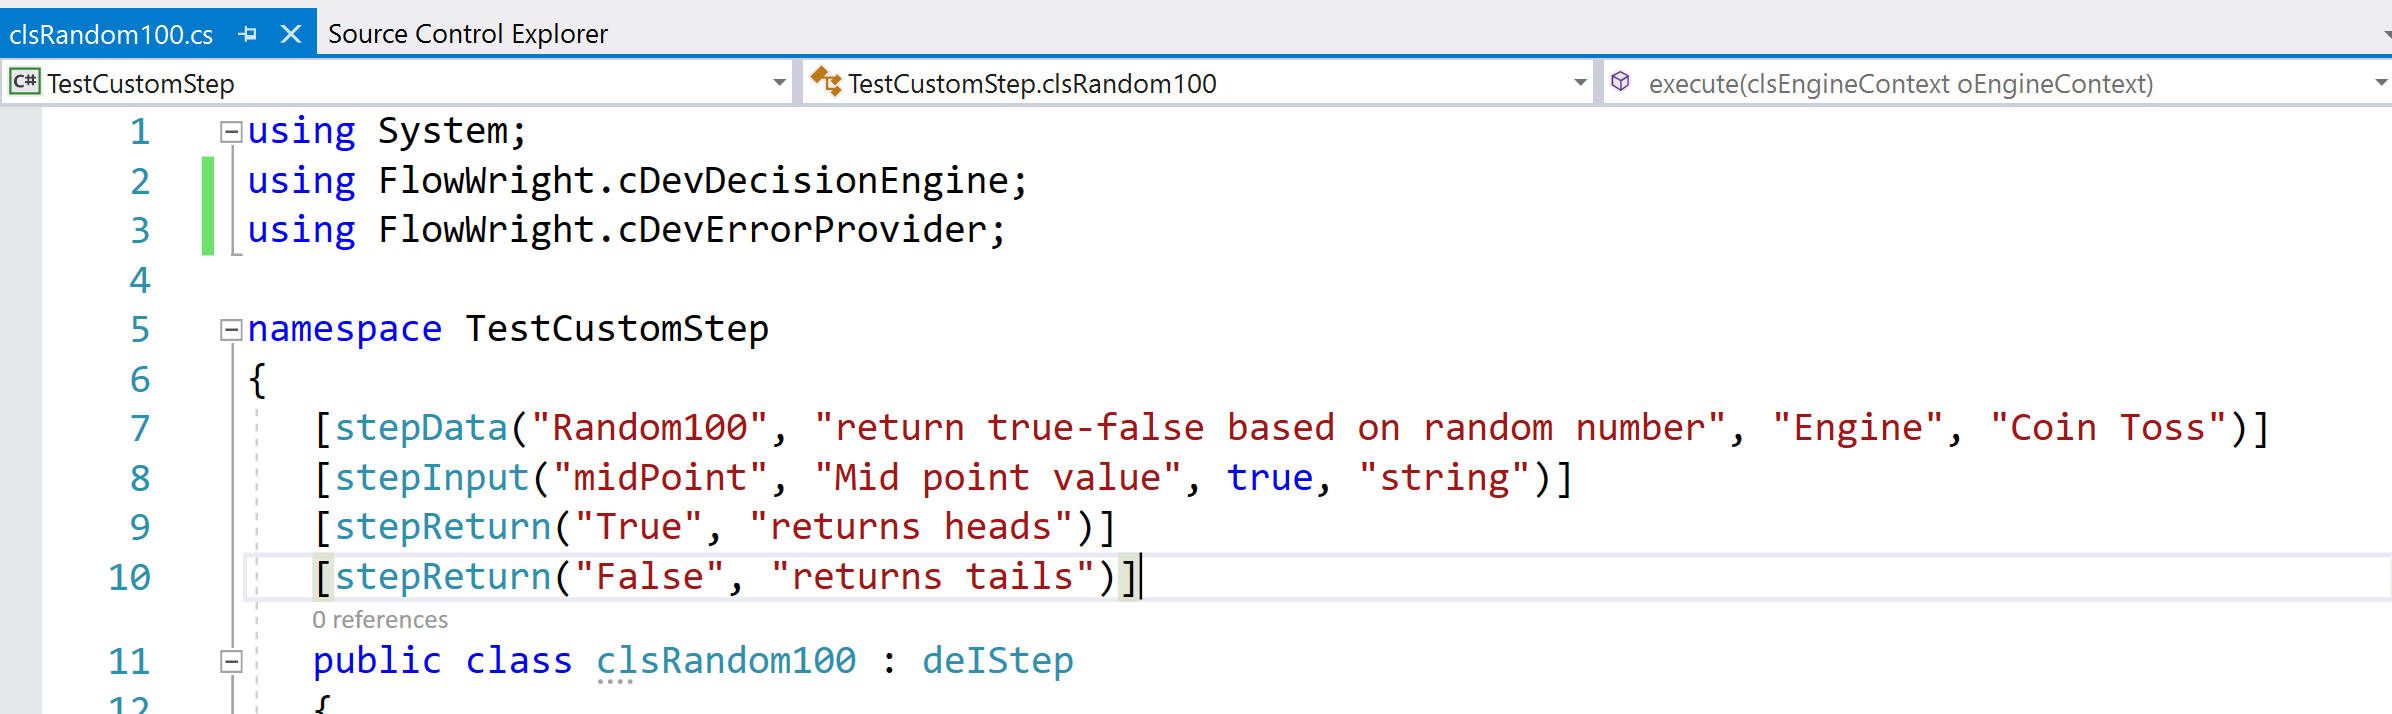
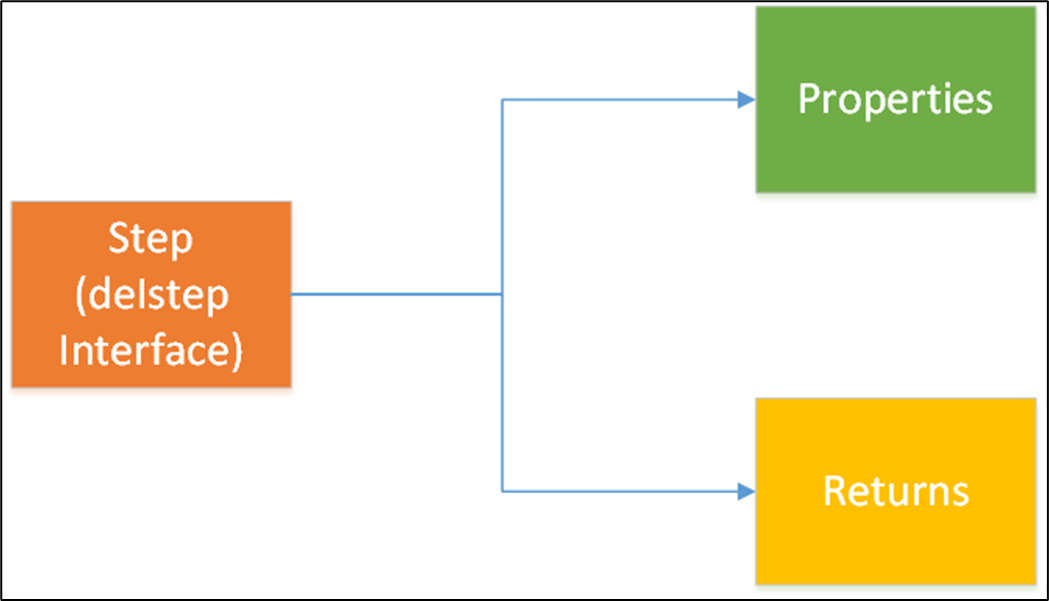
Let’s start building the class, first implement the interface called: “deIStep”. In order to implement the interface, we have to implement the “execute” method. This step is going to take one input parameter called “midpoint”. It’s going to generate a random number between 1 and 100, if the generated number is less than mid-point, then it will return a value of “True”, otherwise return a value of “False”.
Define a variable called “iMiddlePoint” with a value of 50. Setup a return object called oRet. Also let’s get the property value of “midpoint”.
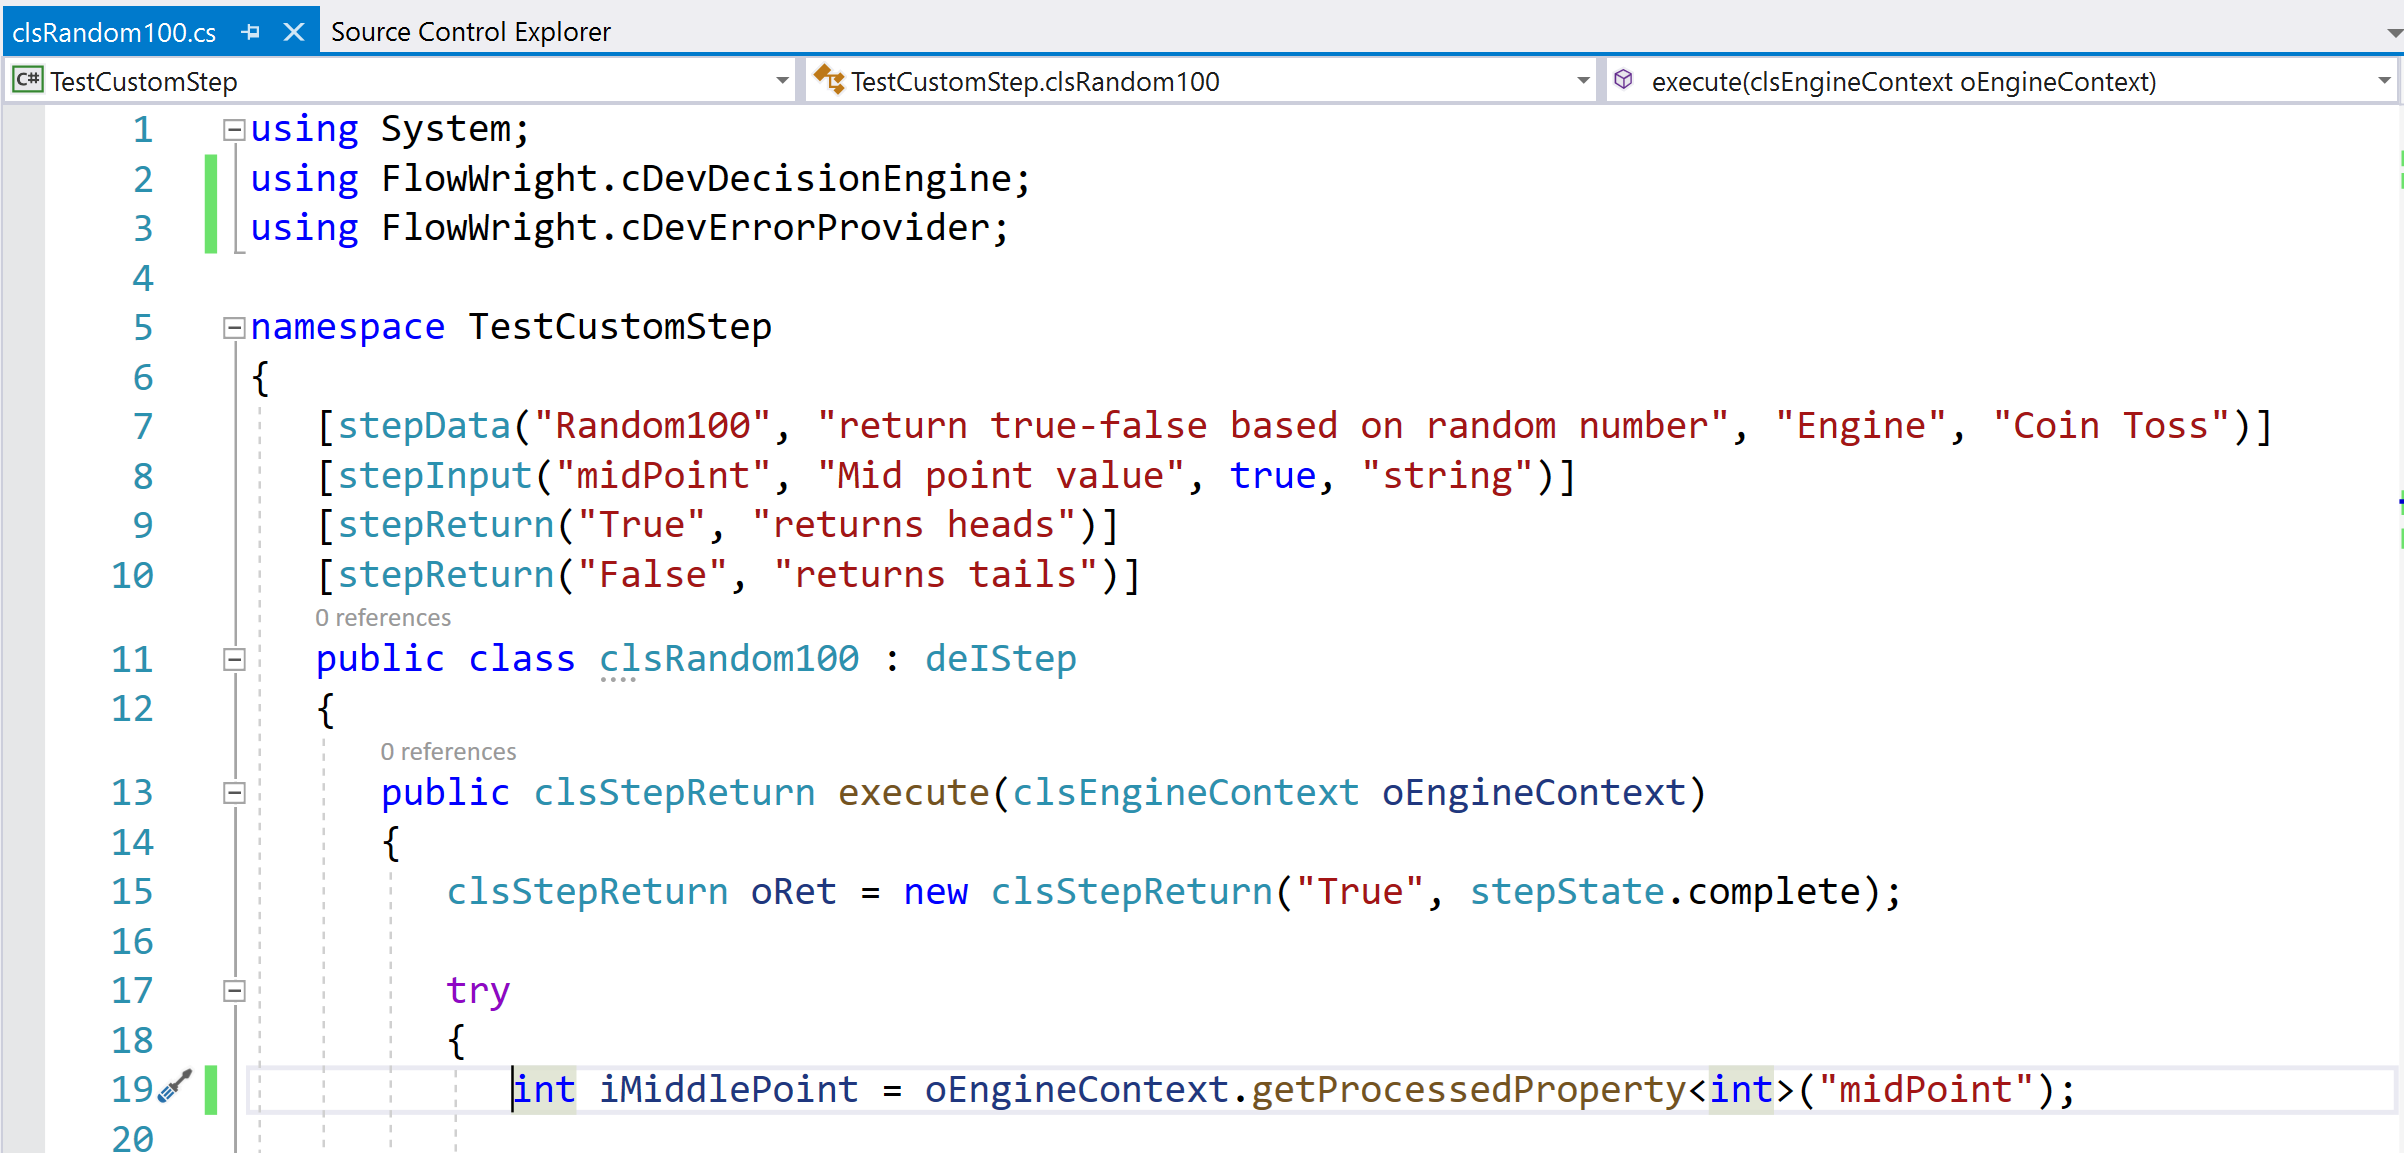
Next, let’s try to get the value of midpoint as an integer.
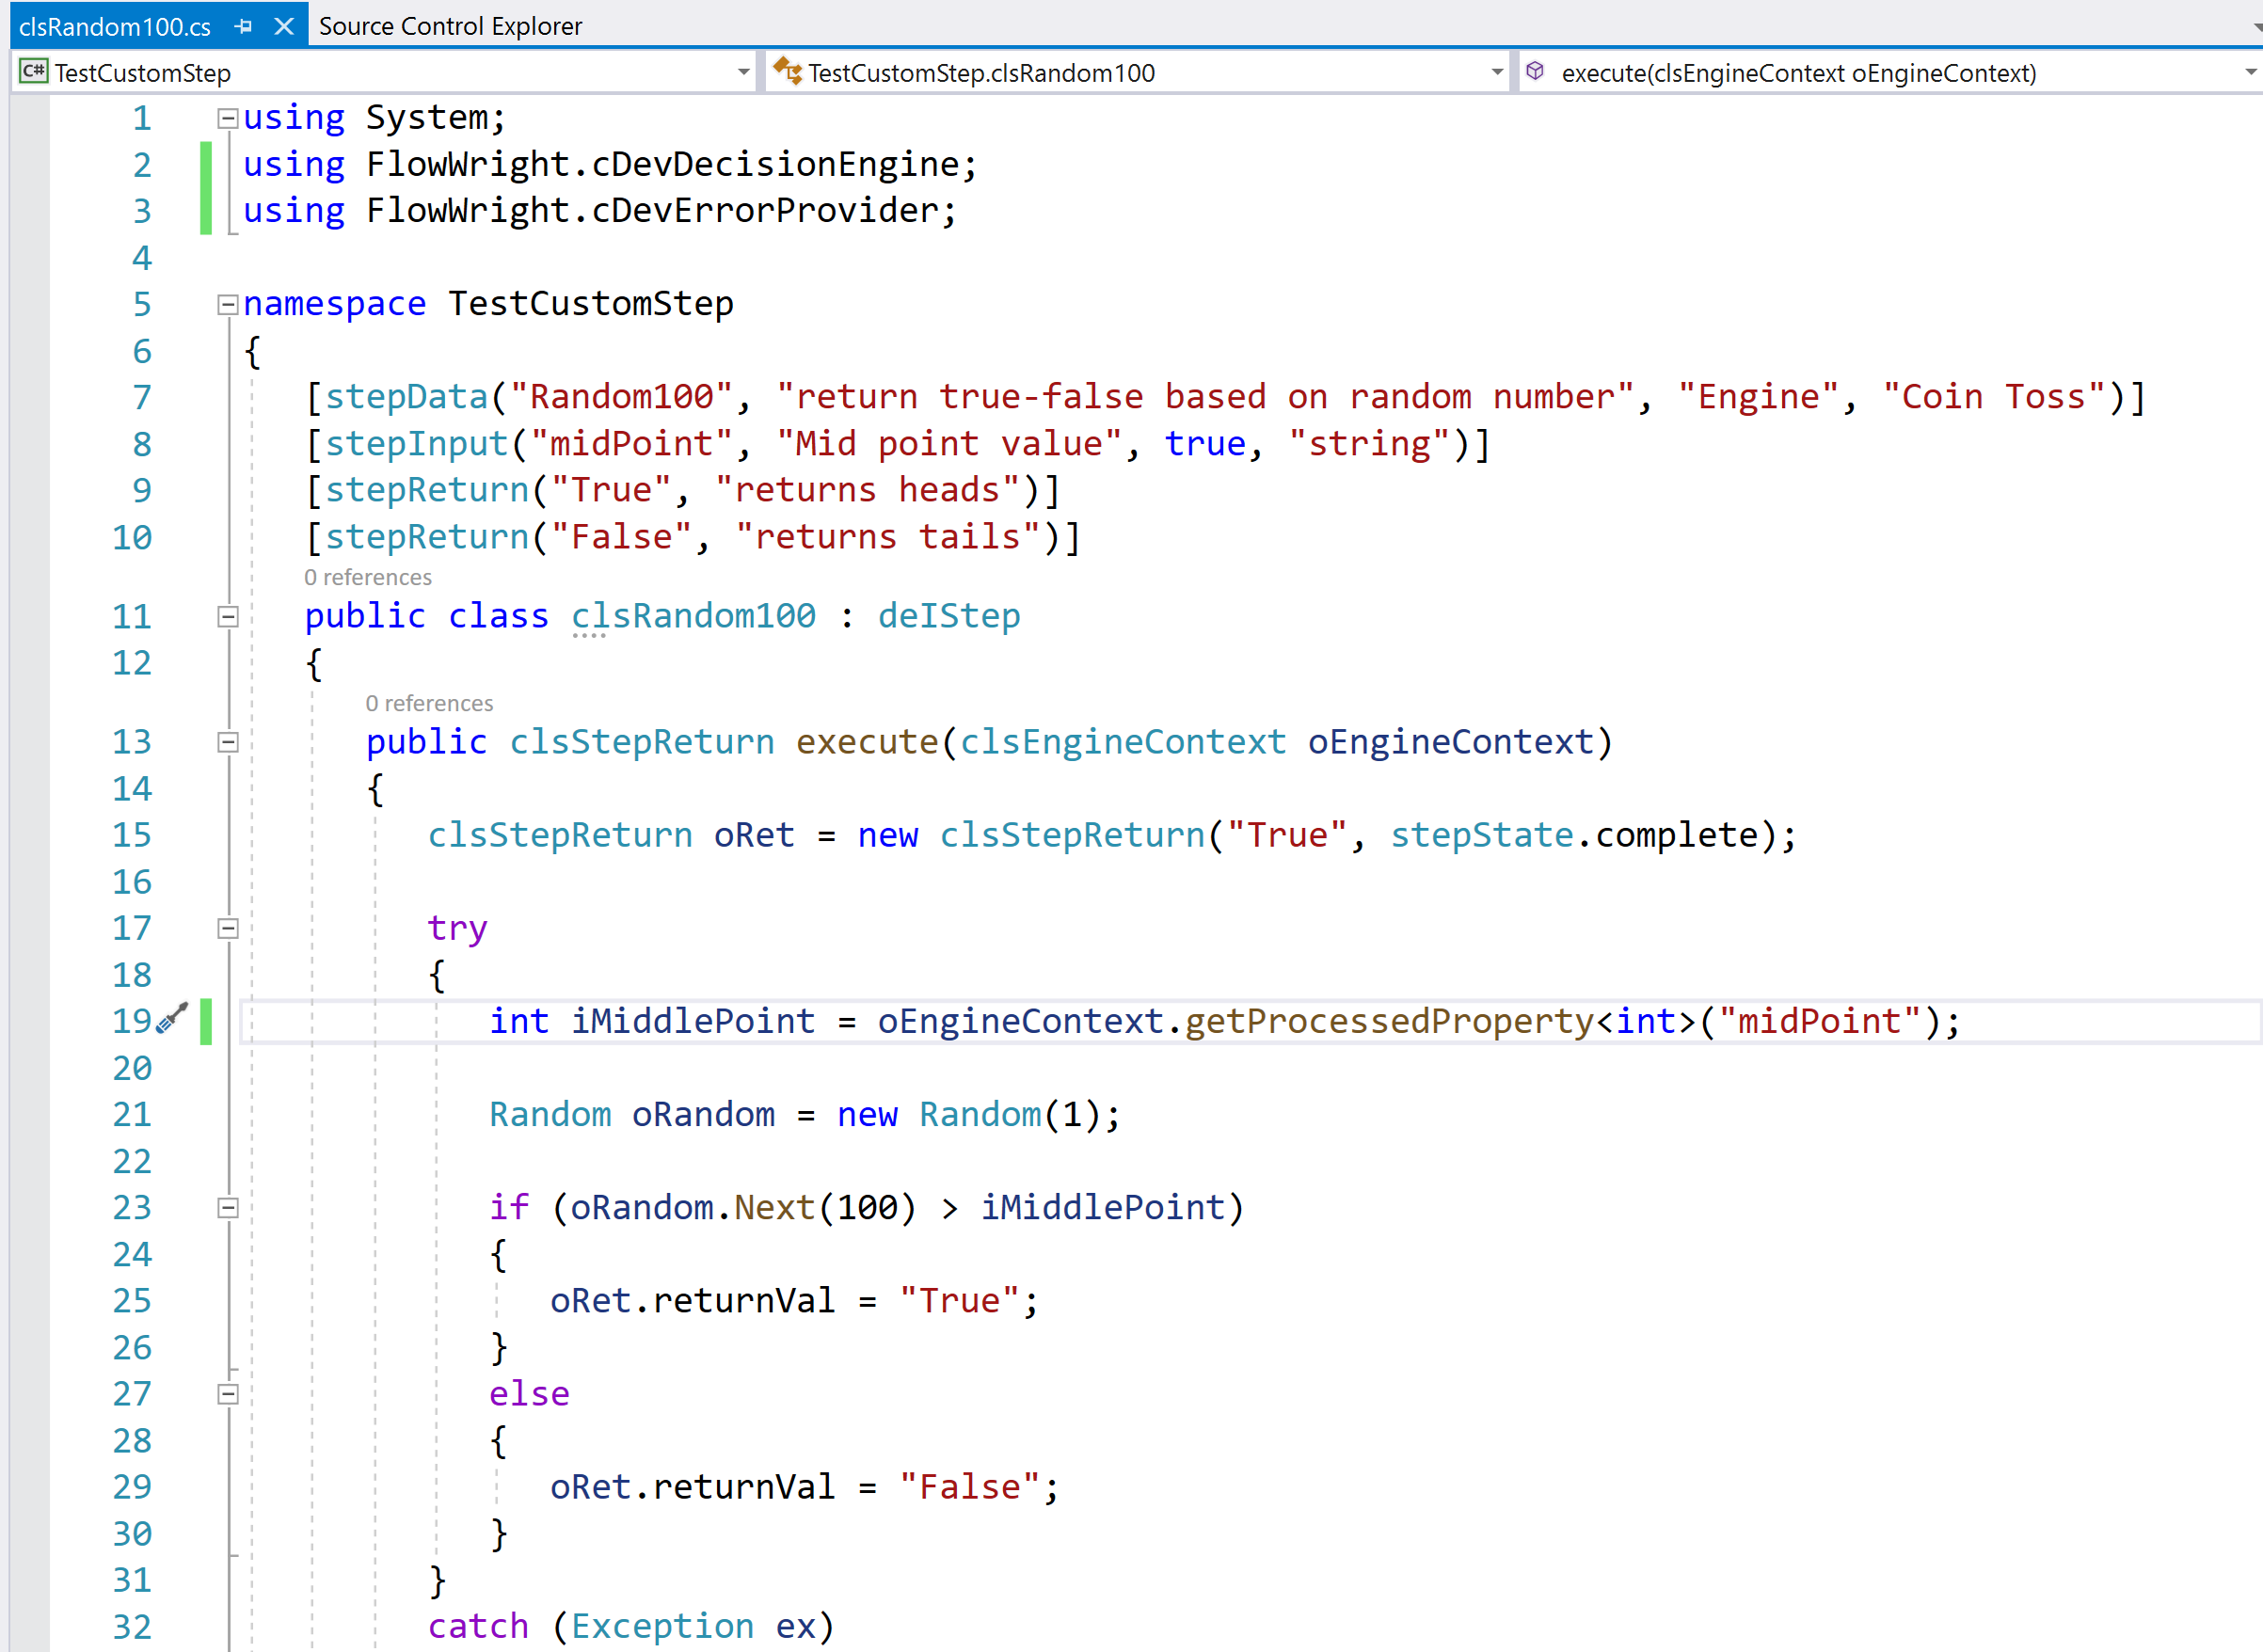
Next, generate a random number between 1 and 100. Check if the generated number is greater than the midpoint number, if its greater, then return “True”, else return “False”.
Now that the step is complete, compile the project to create the DLL. Navigate to the directory where the DLL was compiled to and select the DLL: “TestCustomStep.dll”. Right click on the file and select “Copy” from the context menu.

Copy the step dll to the following directory: “C:\inetpub\wwwroot\cDevWorkflow\bin”.

First let’s setup an icon for the new step. Create any icon that is 40 x 40 pixels and in PNG format, also name the icon same as the step name. Copy the file to the following directory “C:\inetpub\wwwroot\cDevWorkflow\images”.
For this sample Copy the file called “Random100.png” to the following directory: “C:\inetpub\wwwroot\cDevWorkflow\images”.

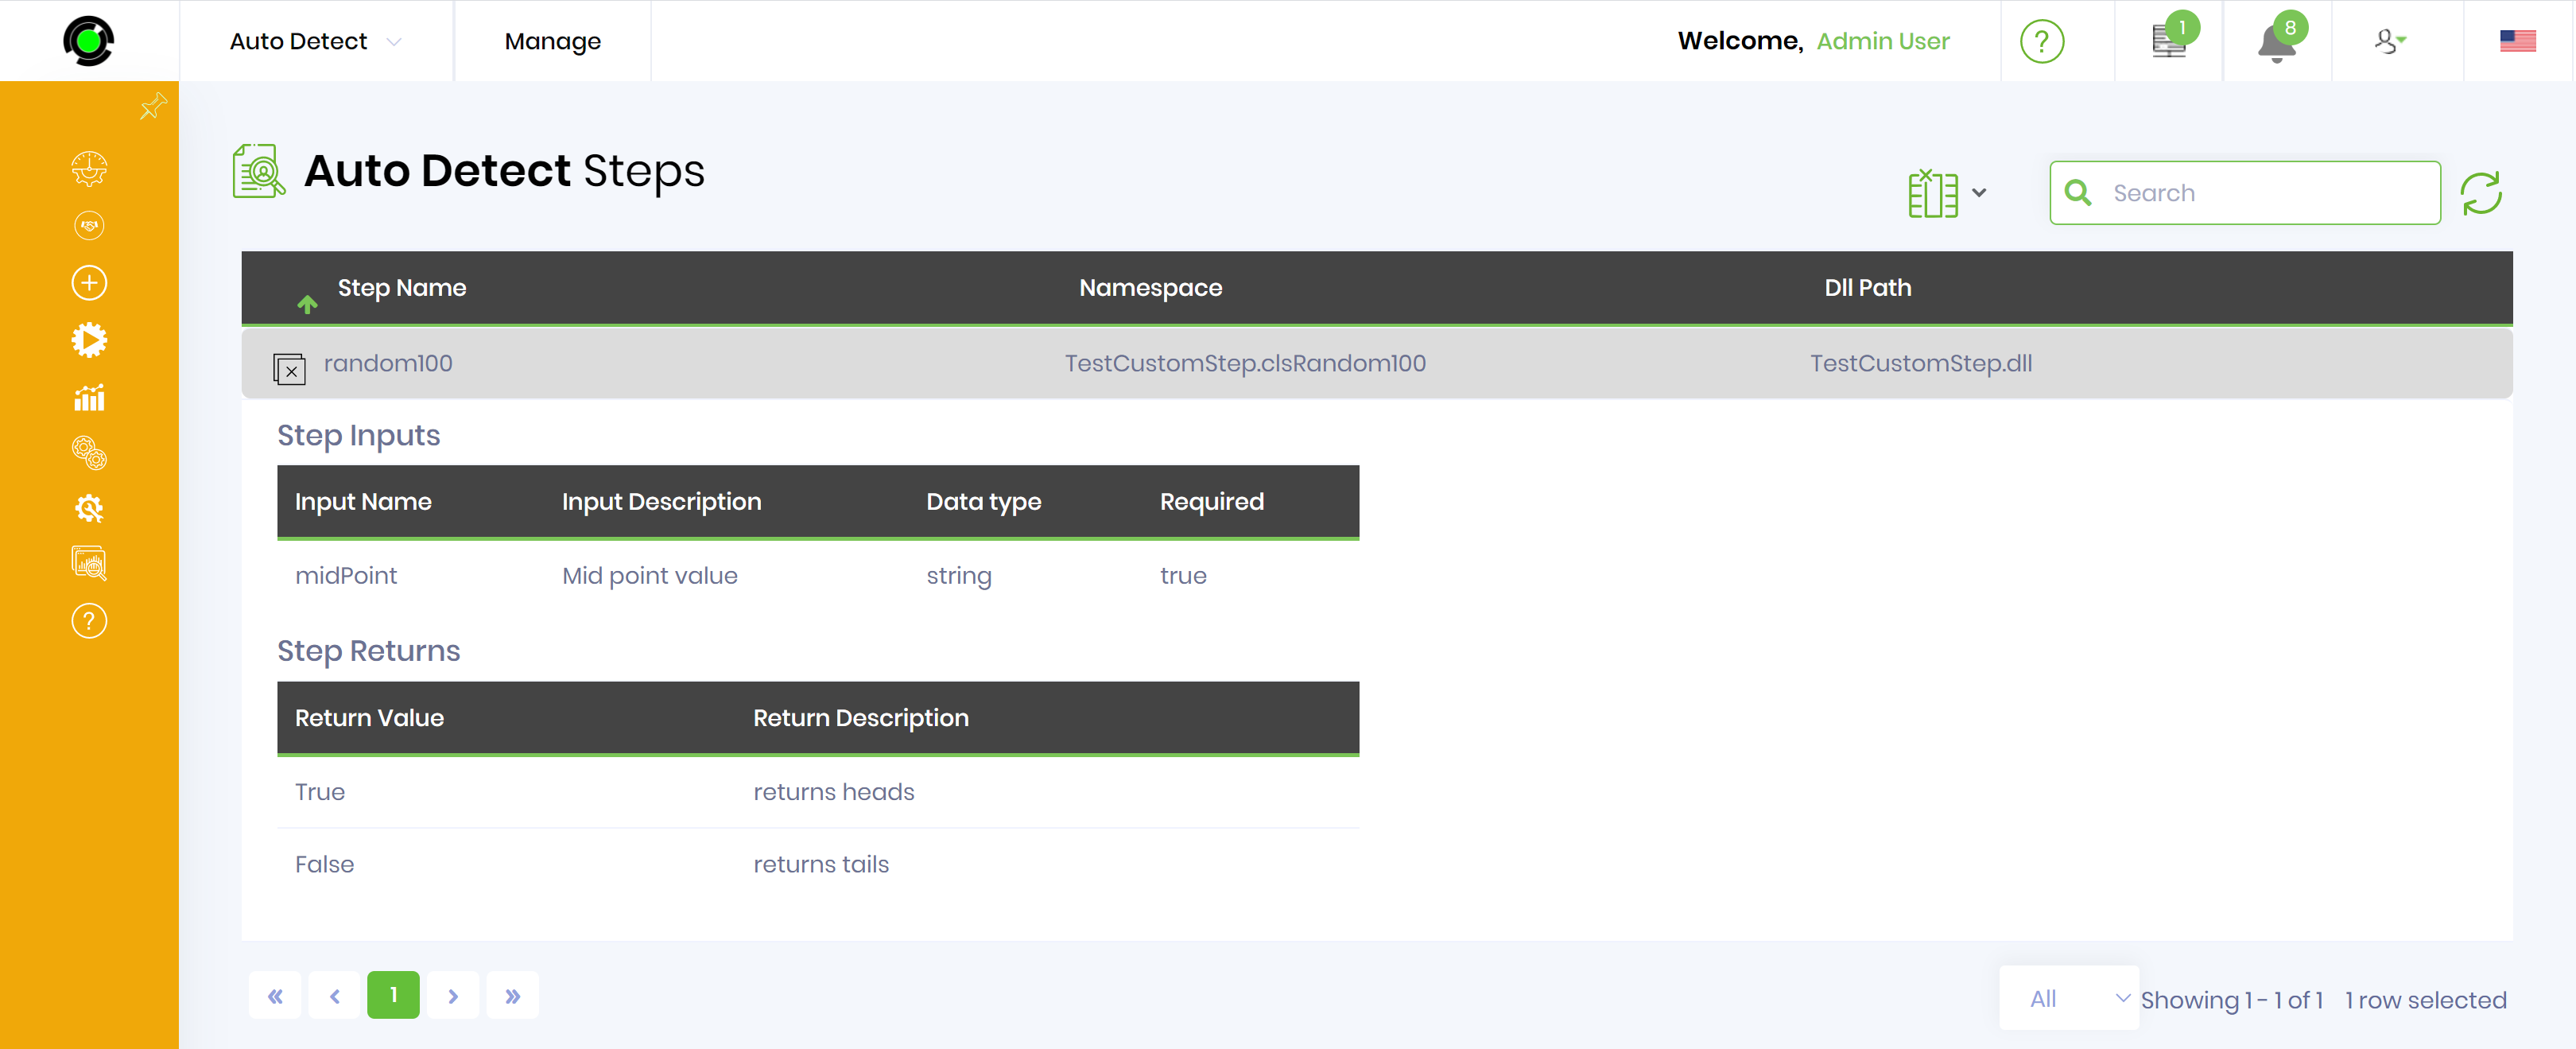
Navigate to the “Steps” menu item and use the auto configure feature of FlowWright to auto configure the step:

Click the + button next to the “random100” to view the step’s meta data information such as description, inputs and returns. Select the “randdom100” step and select “Manage->Configure” menu item, the step will be automatically configured within FlowWright.
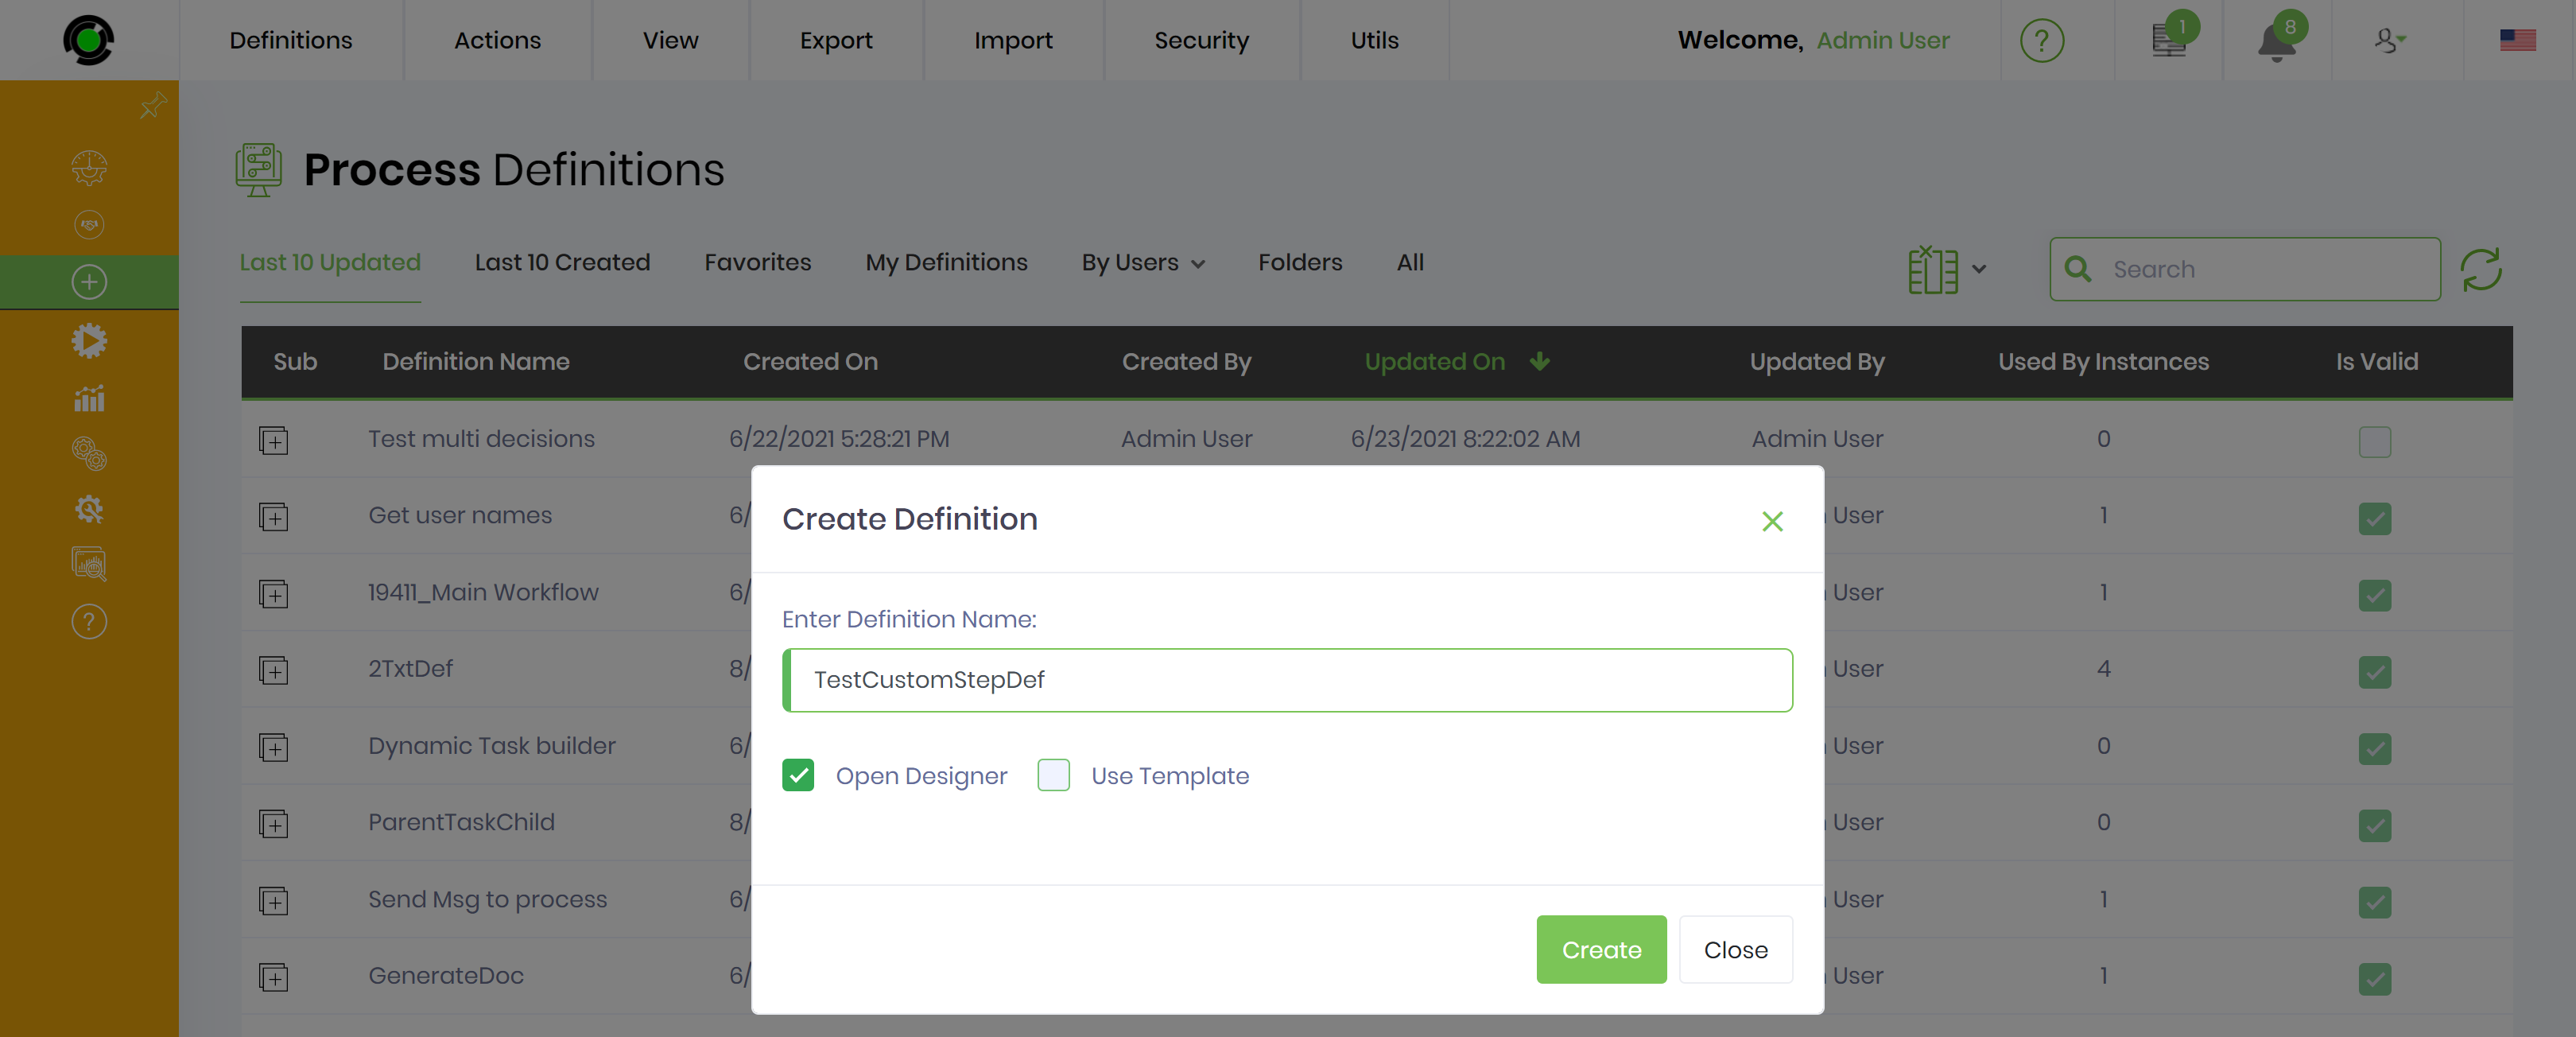
Now that the step is fully configured, let’s us the new step in a Workflow definition and instance. Create a new Workflow definition called “TestCustomStepDef”. Enter the new definition name and click the “Create” button to create the Workflow definition.
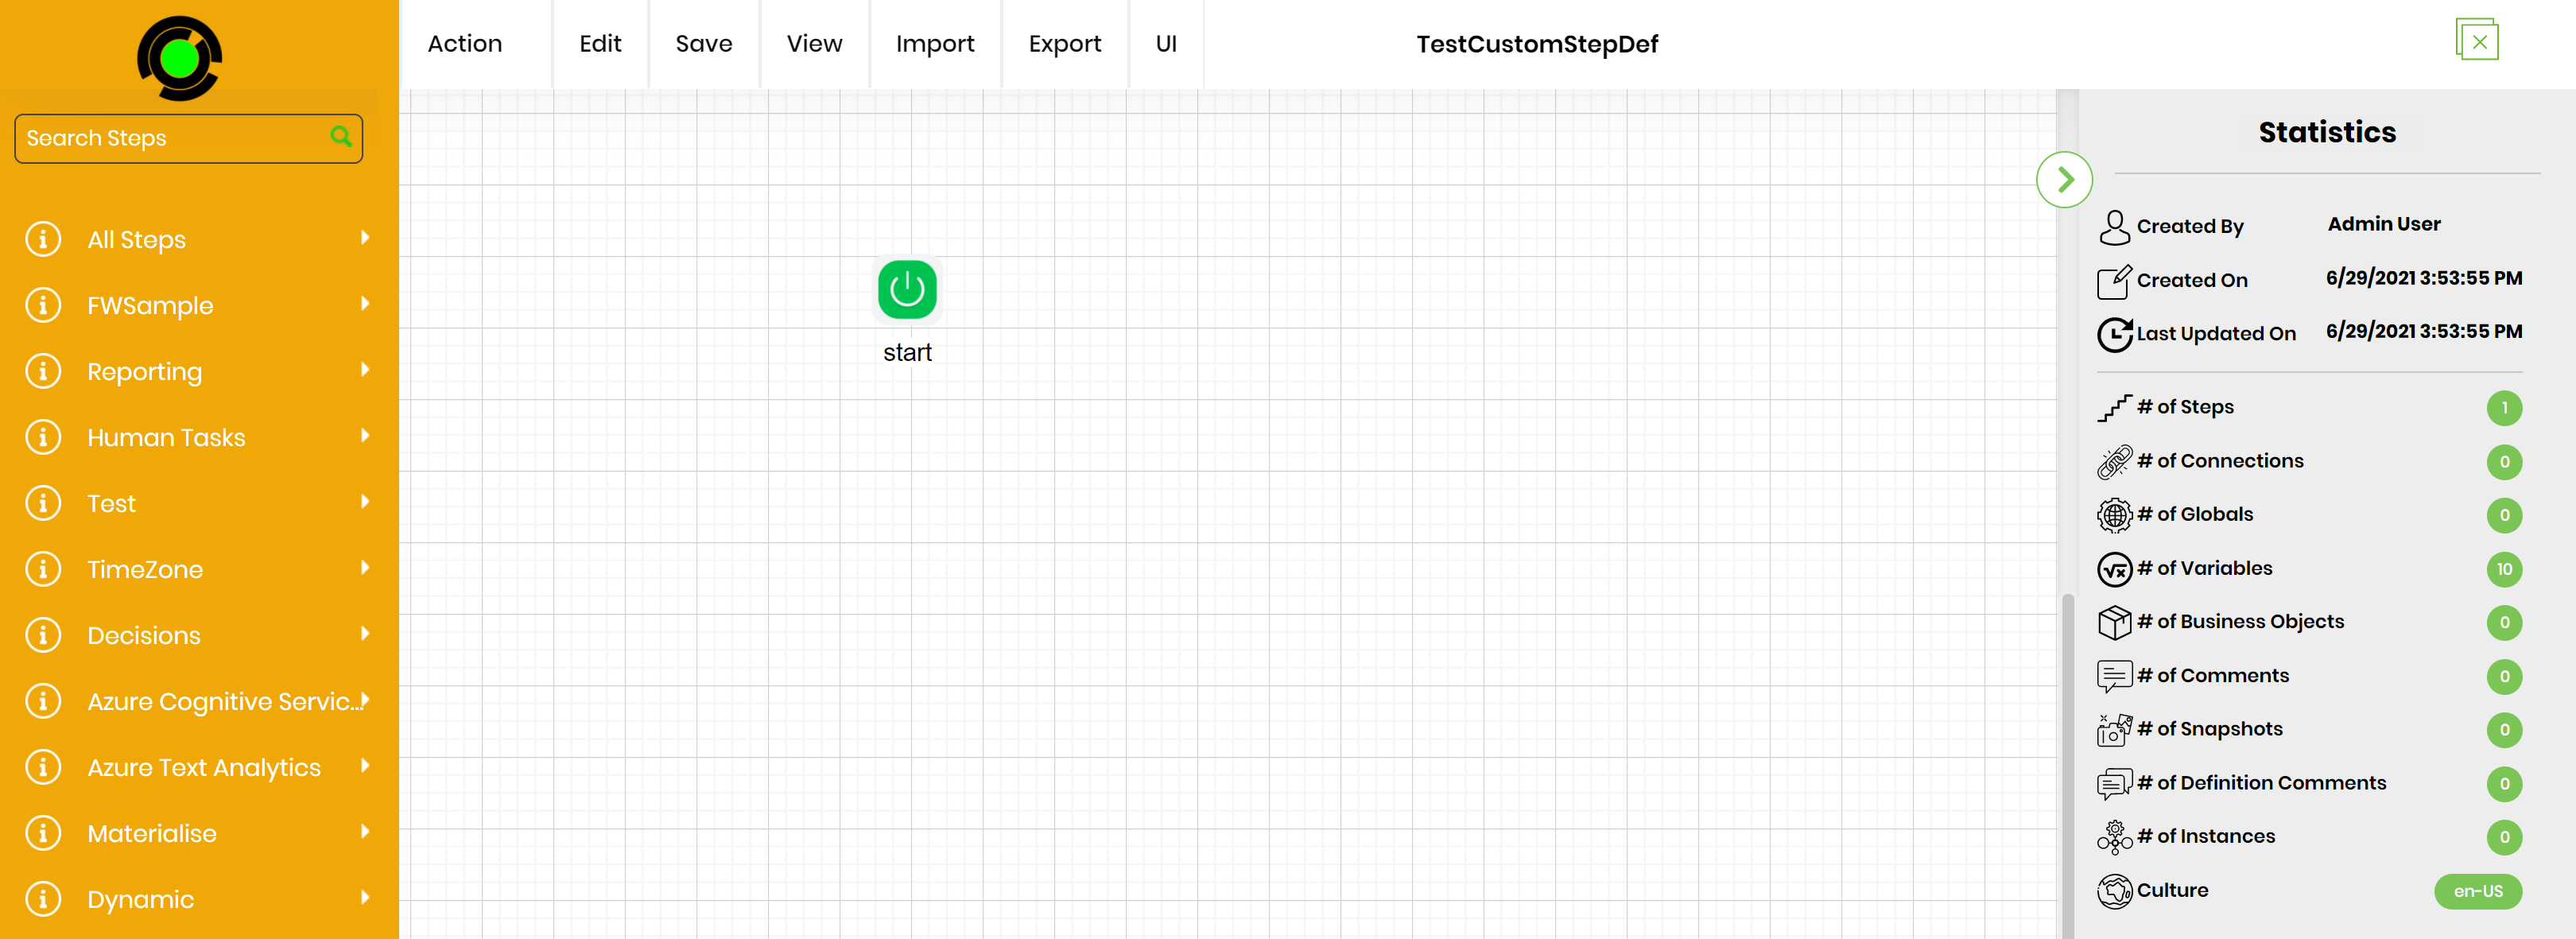
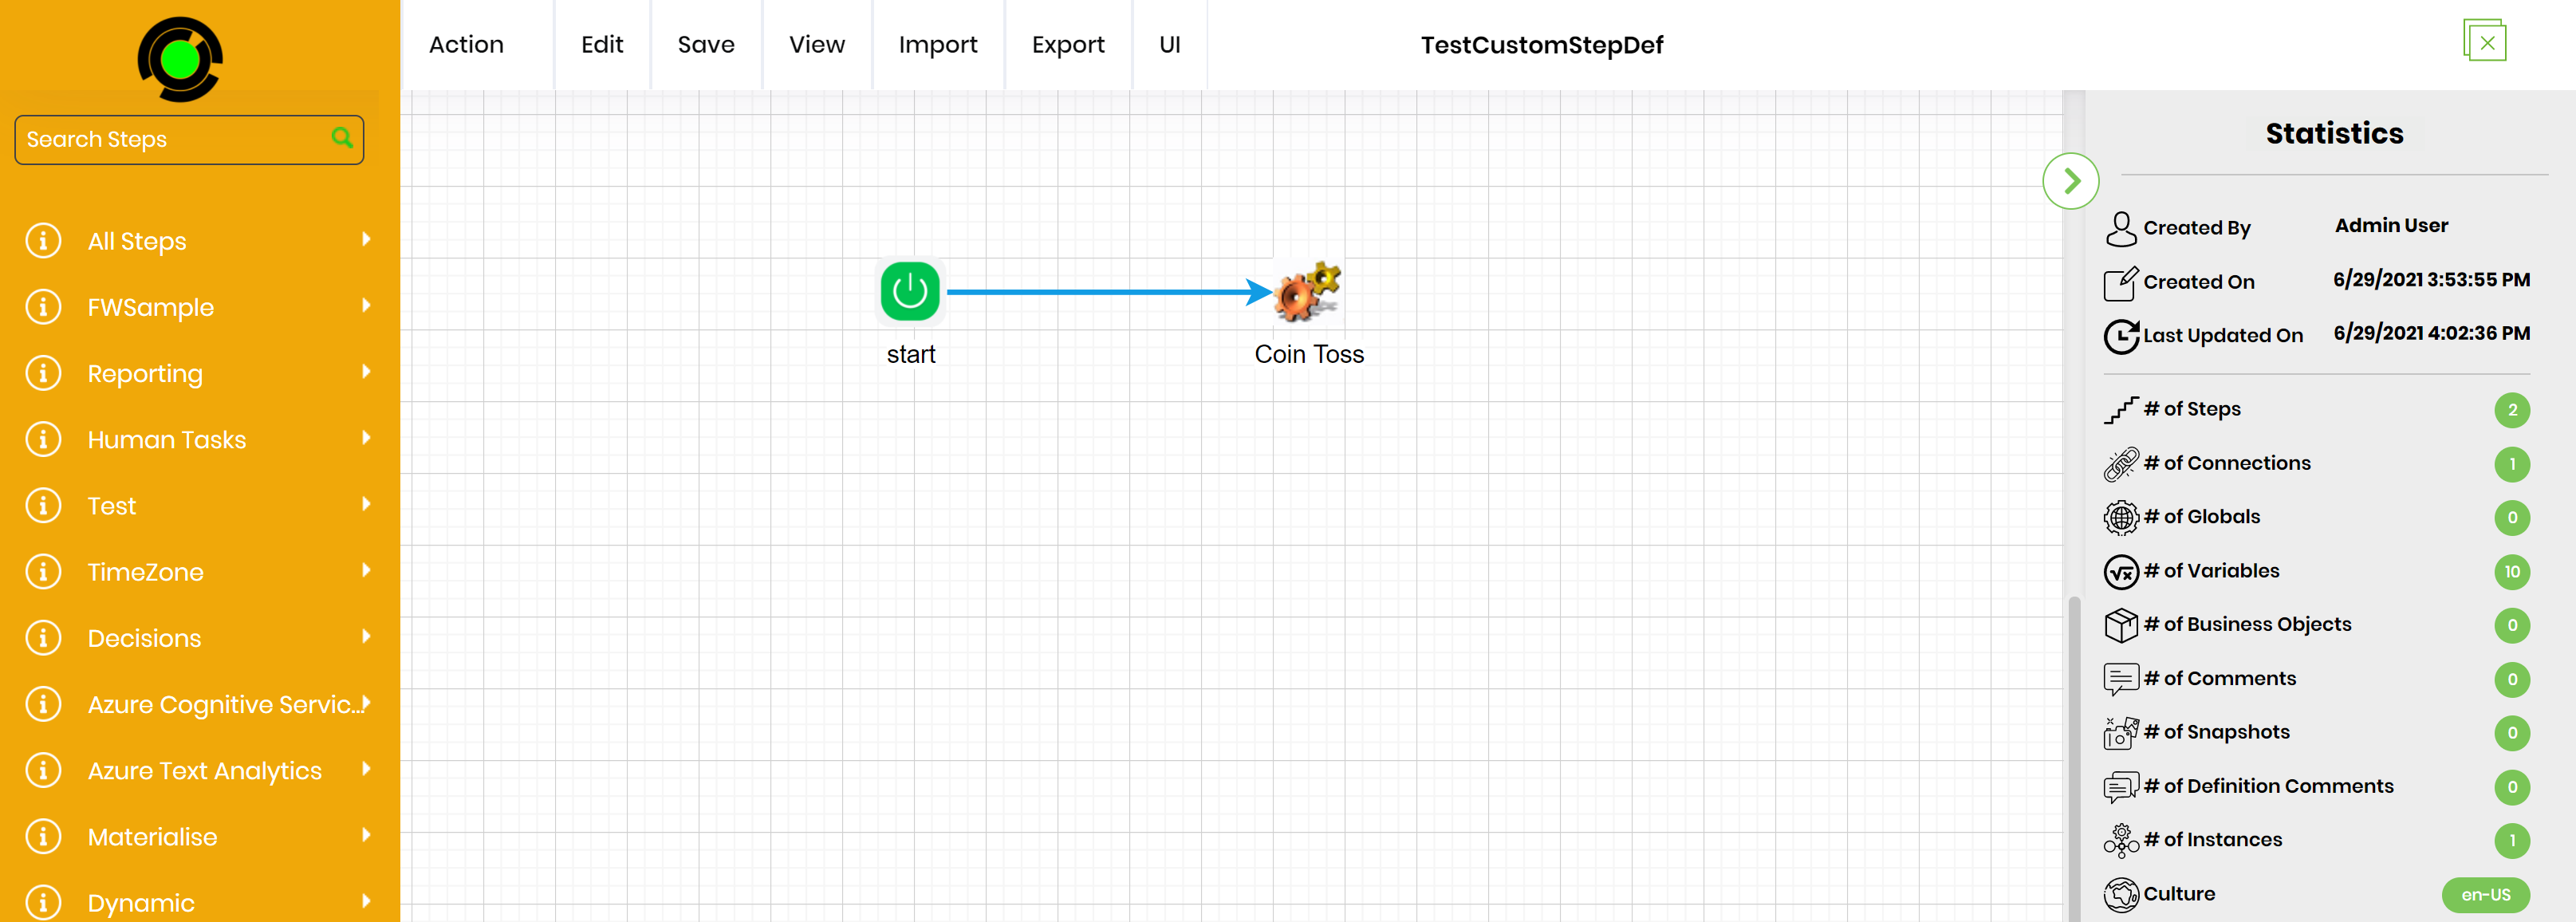
Once the workflow definition is created, workflow designer should open, as shown below:
The new custom step should now appear on the toolbox of the designer. Drag the step and drop it anywhere on the canvas. Then join the “Start” step to the custom step “ramdom100”, as shown below:
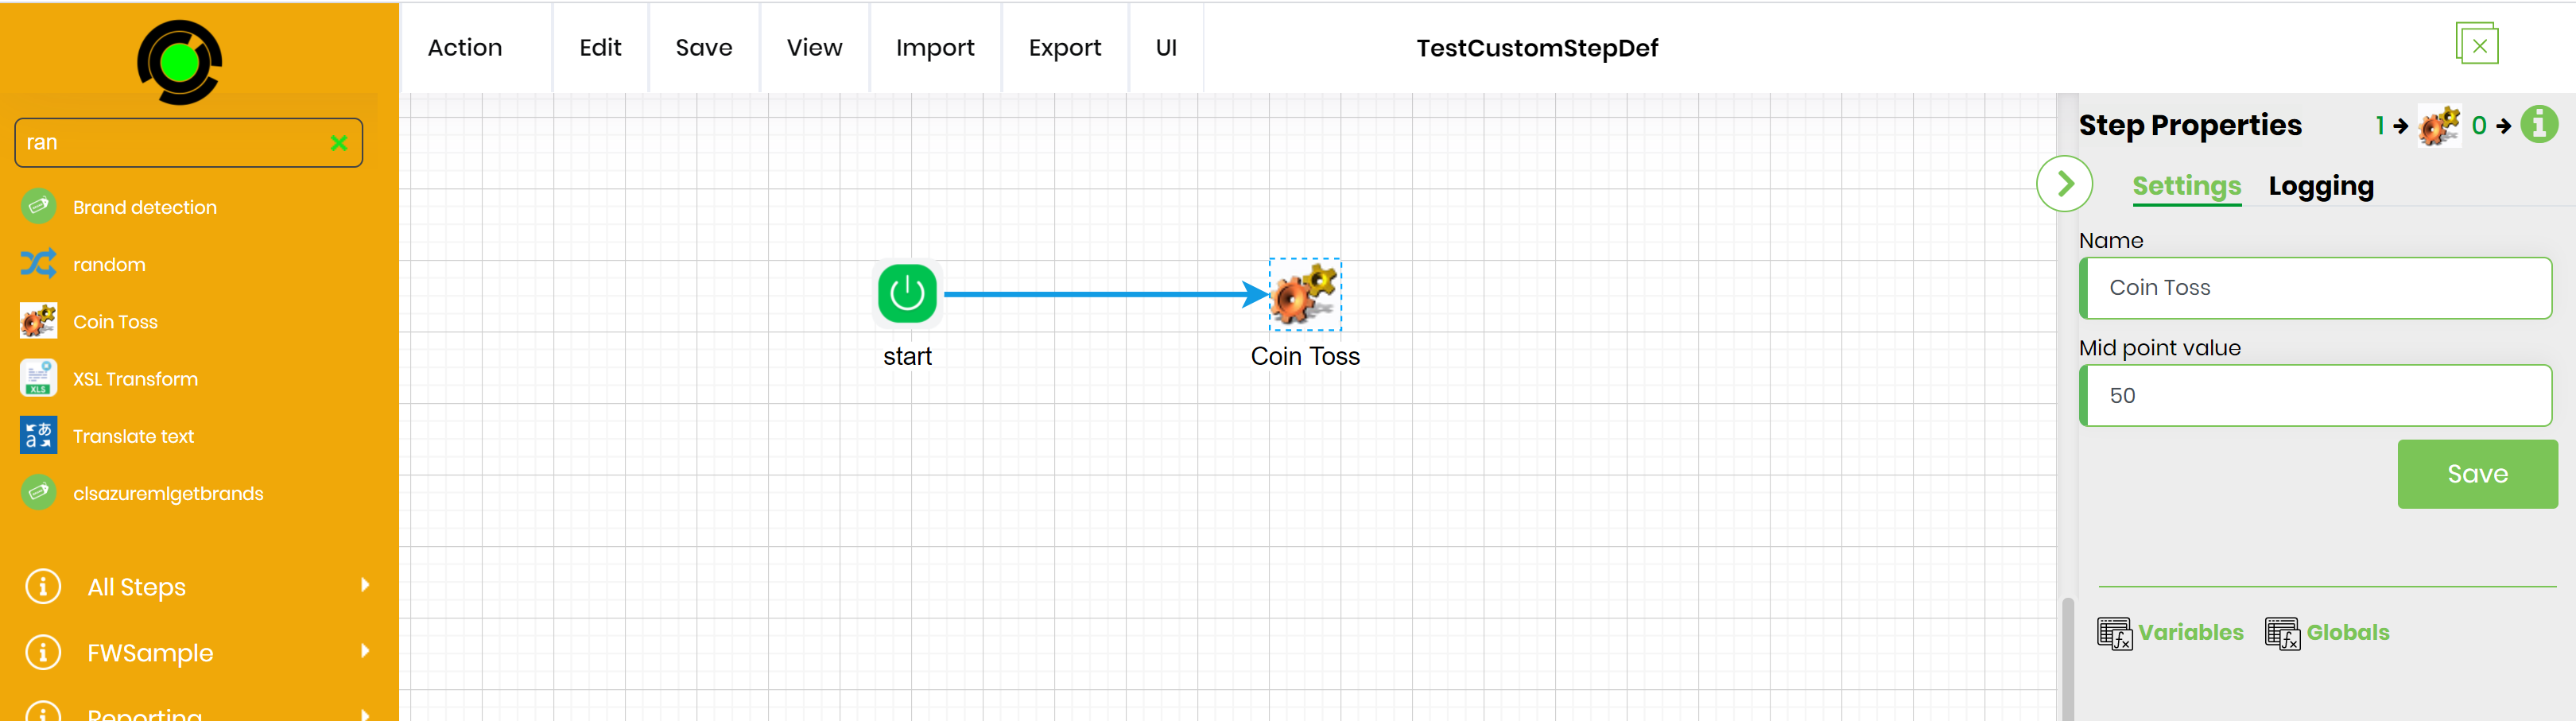
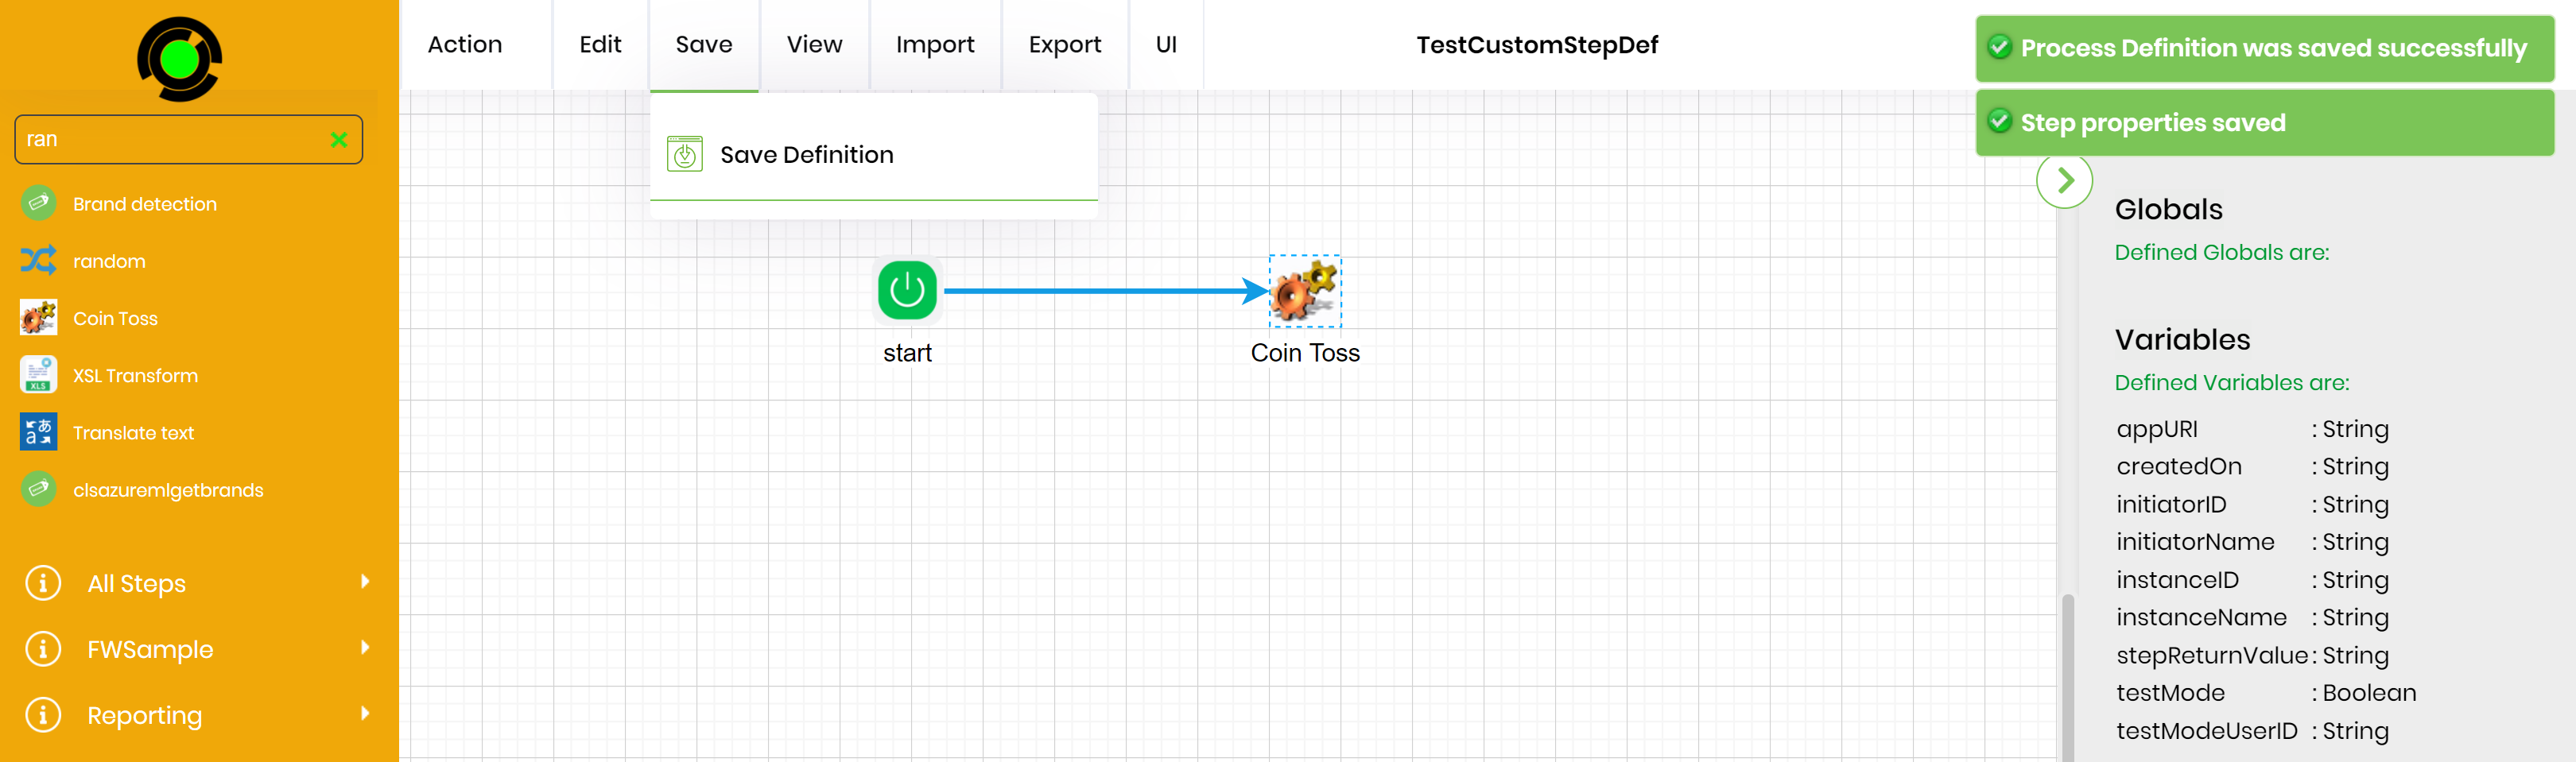
Configure the custom step “random100” with the shown values on the below graphic. Let’s save the definition by selecting “SaveSave Definition” menu item.
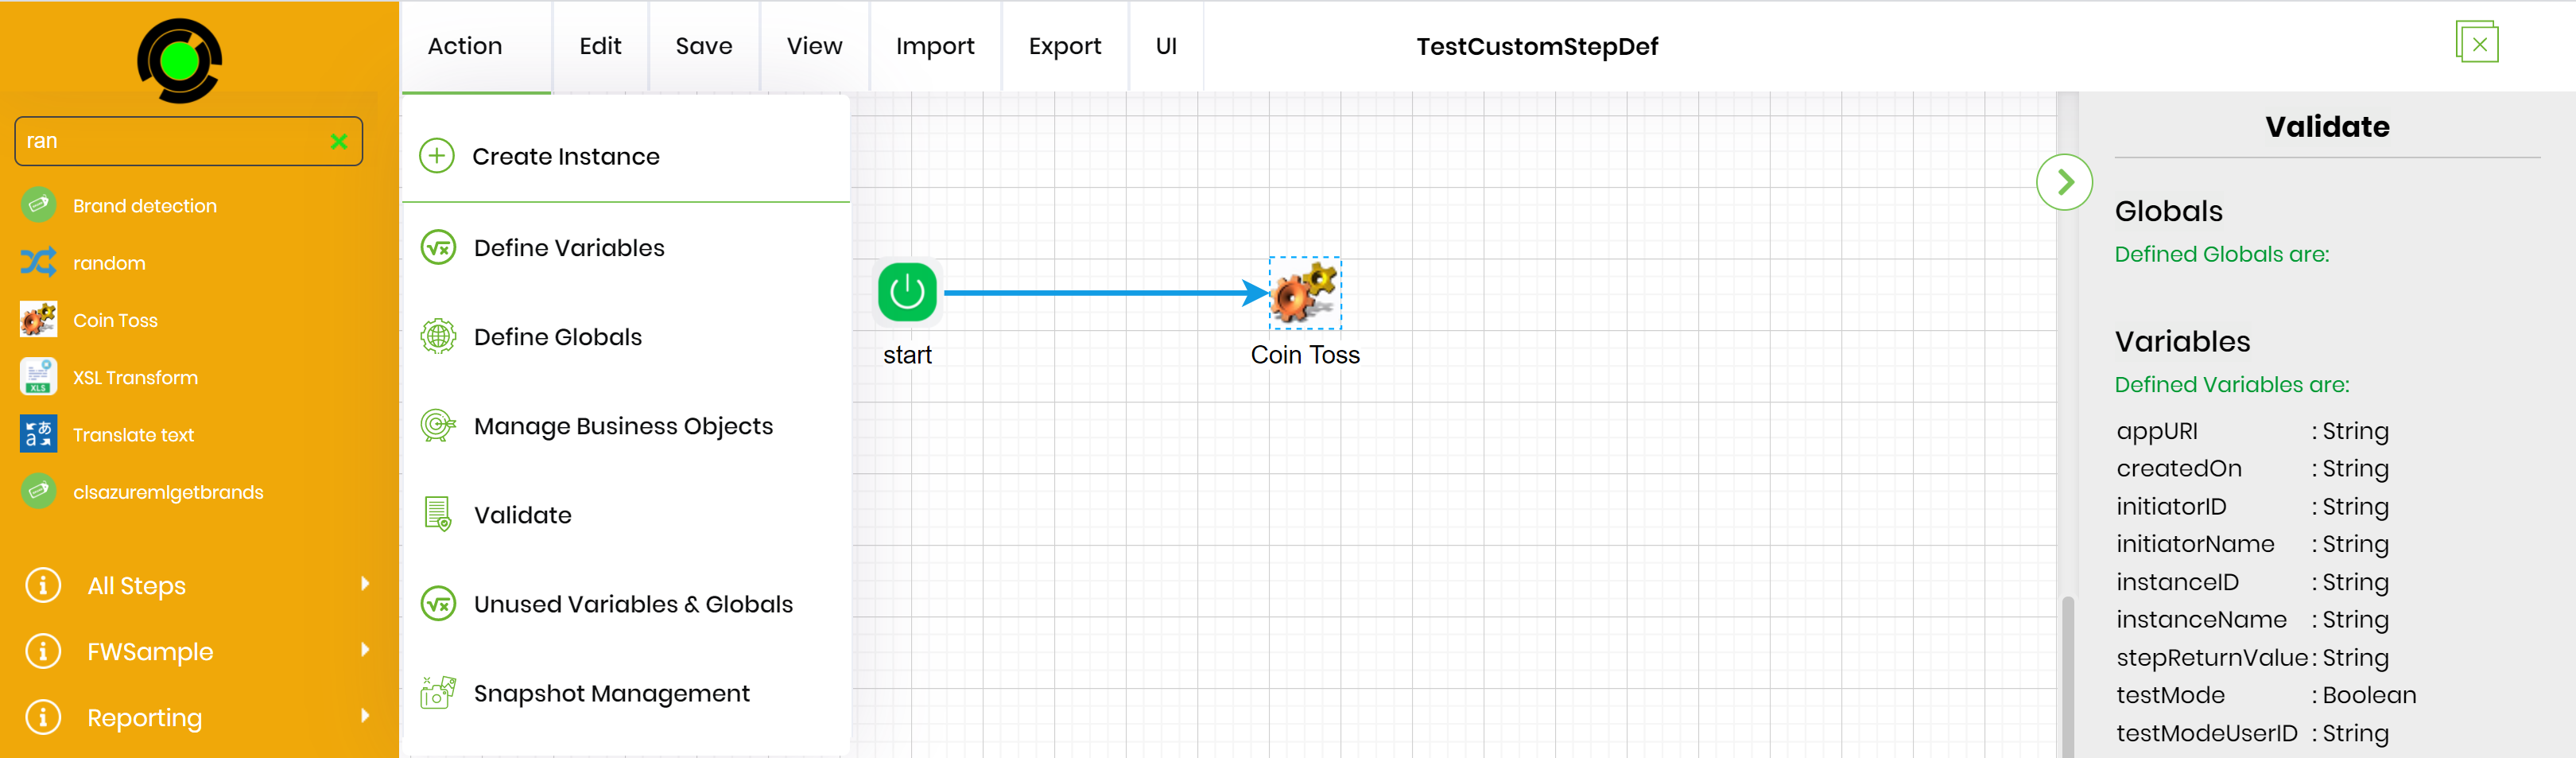
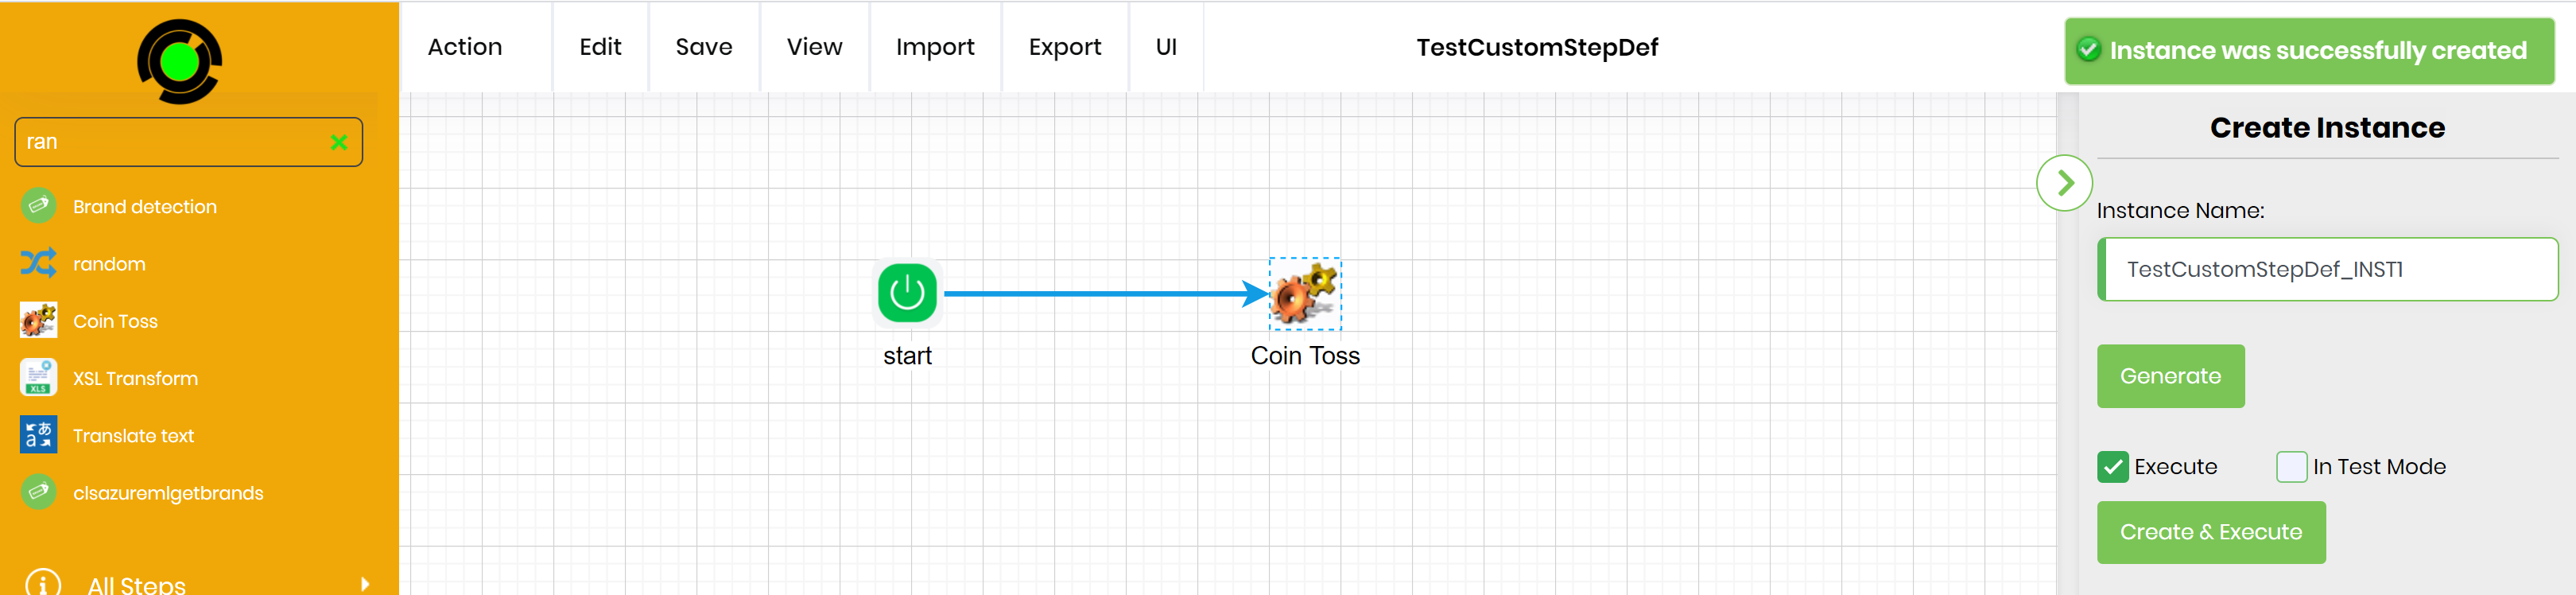
Now let’s create a Workflow Instance based on the newly created Workflow definition. Click the menu “Action->Create Instance” to render the instance creation tab on the properties window. Click the “Generate” button to generate a name of the new instance. Click the “Create & Execute” button to create and execute the new workflow instance.

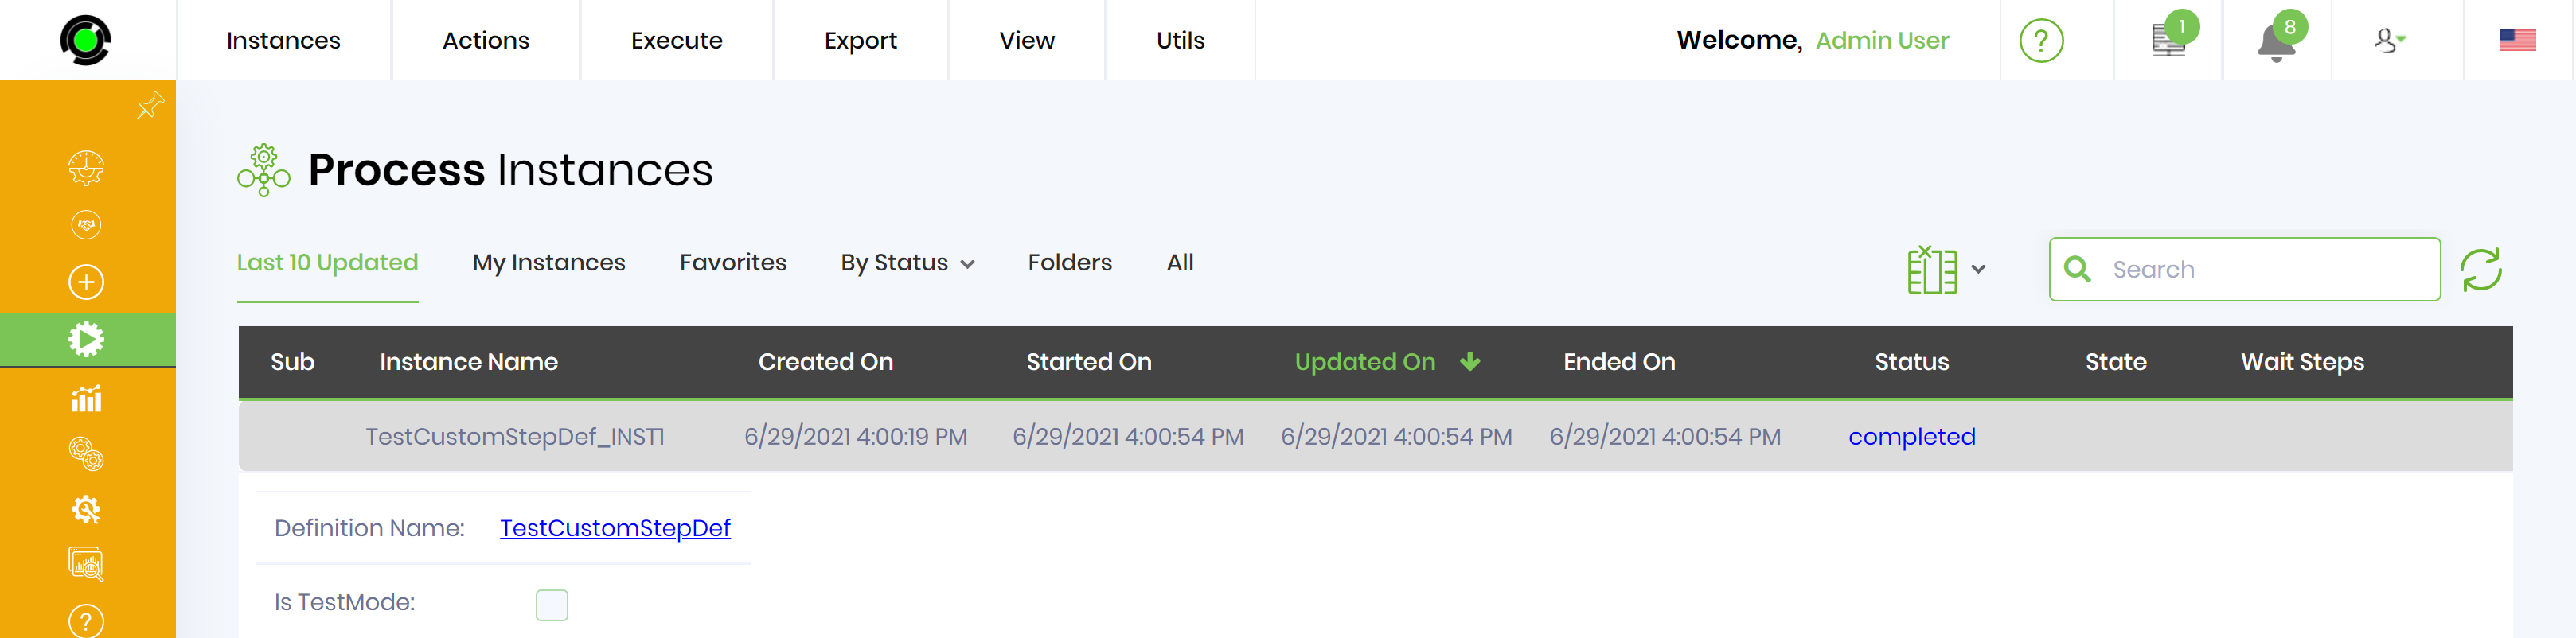
Select the Workflow instance from the list of Process instances.
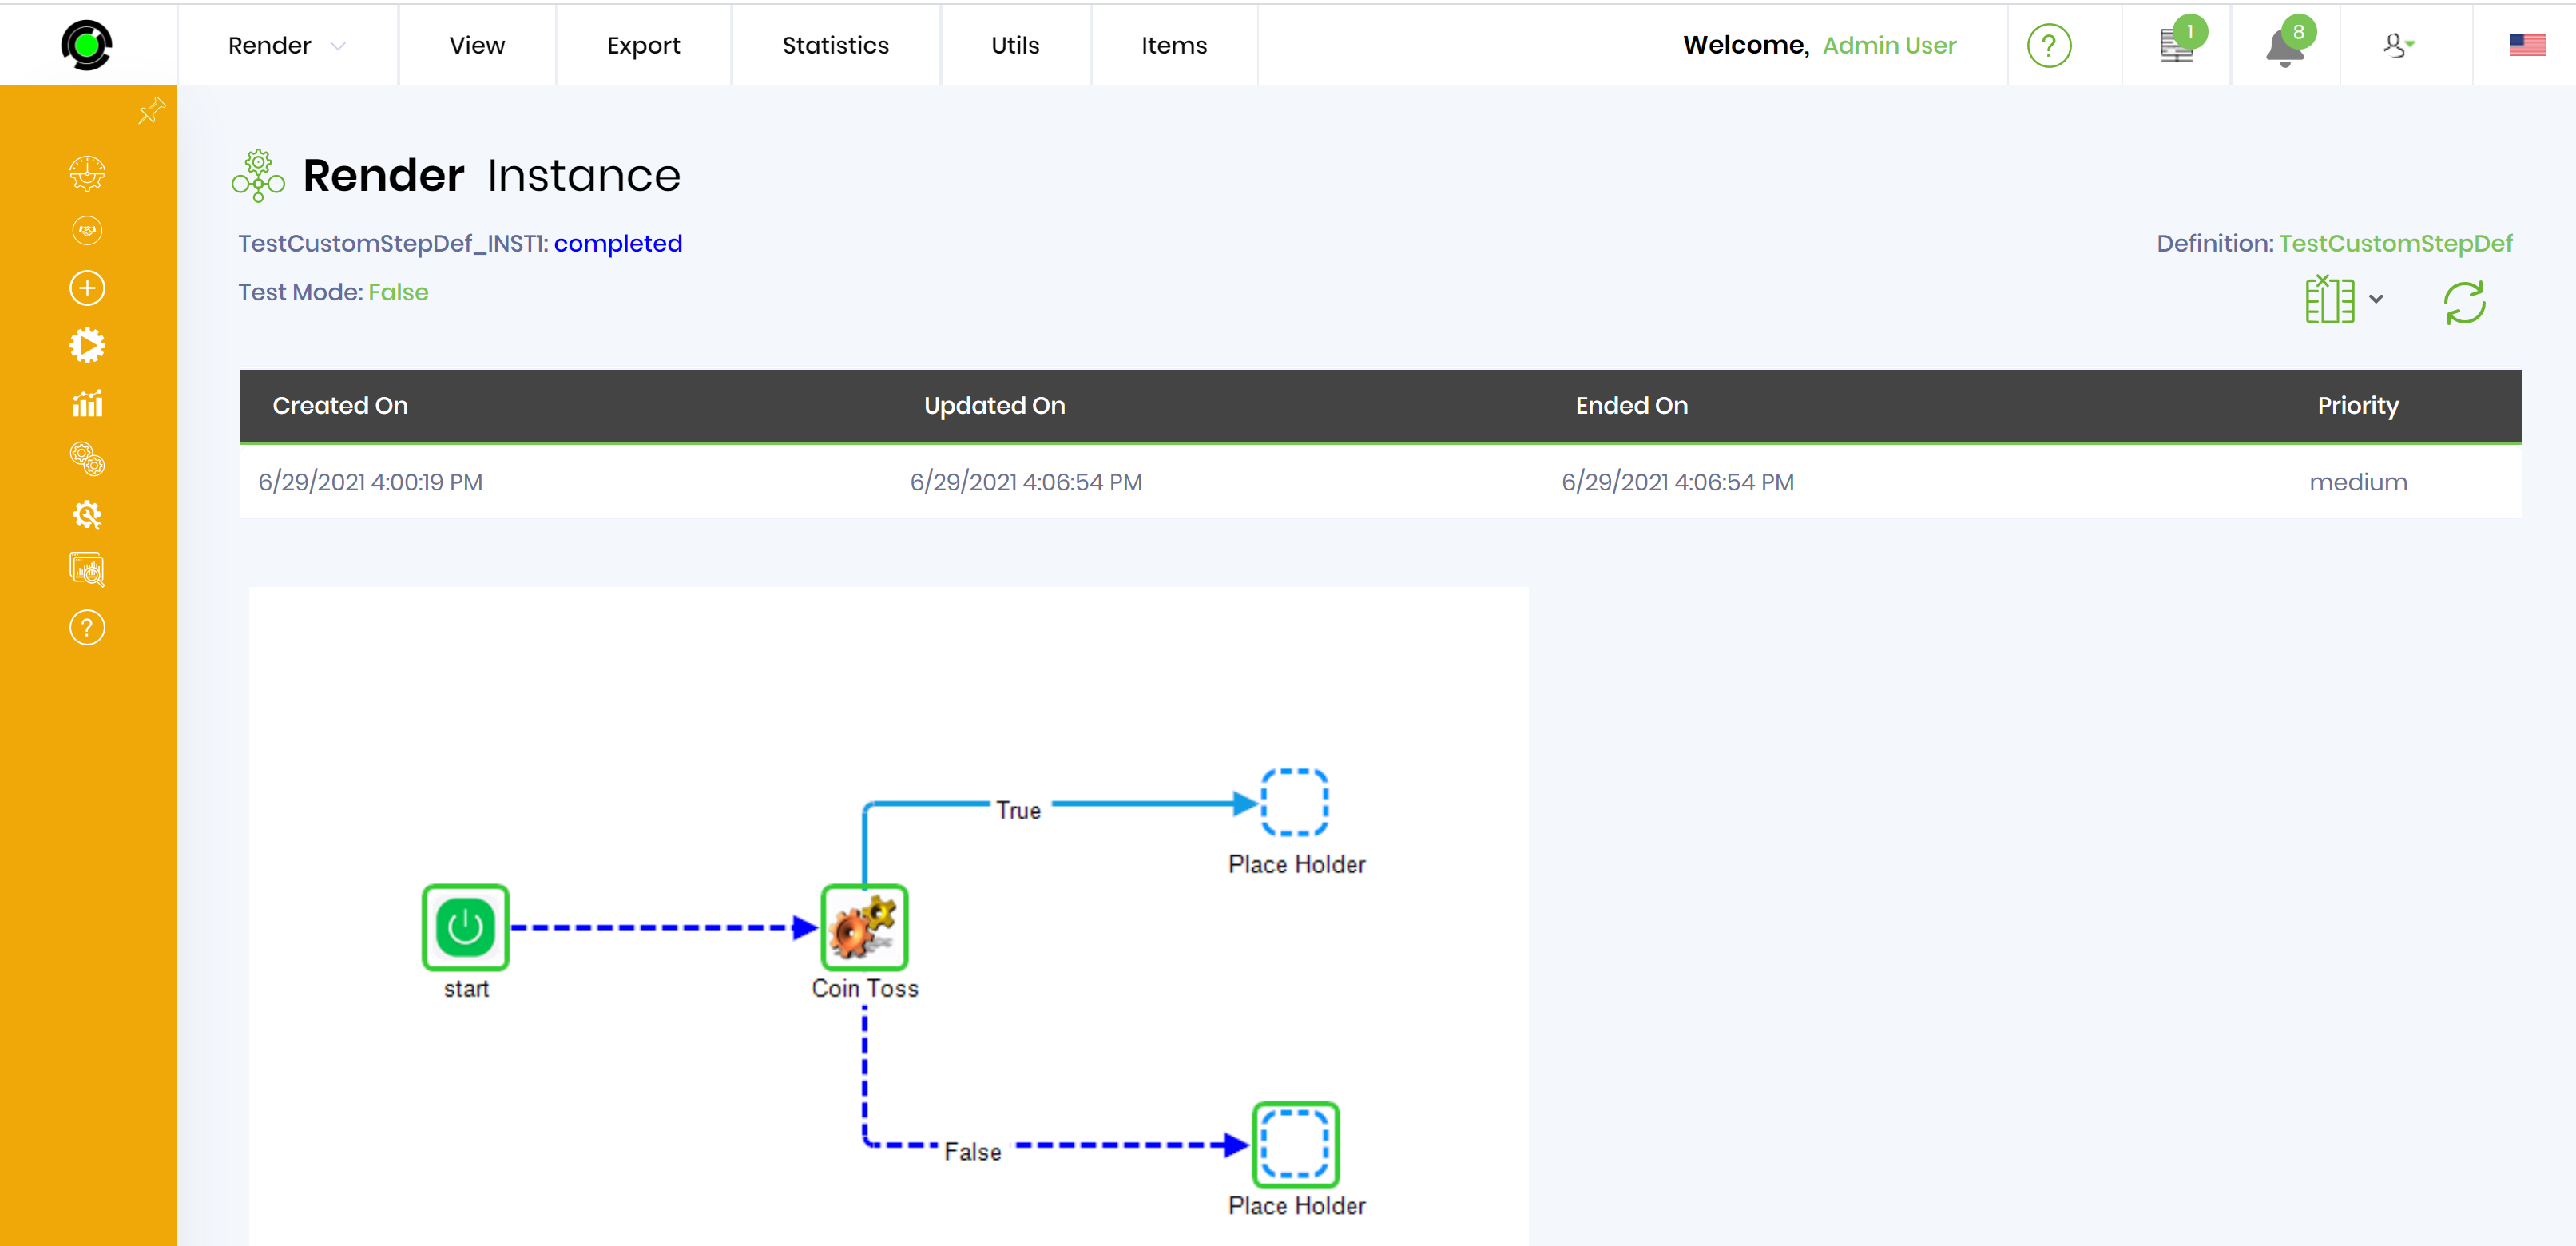
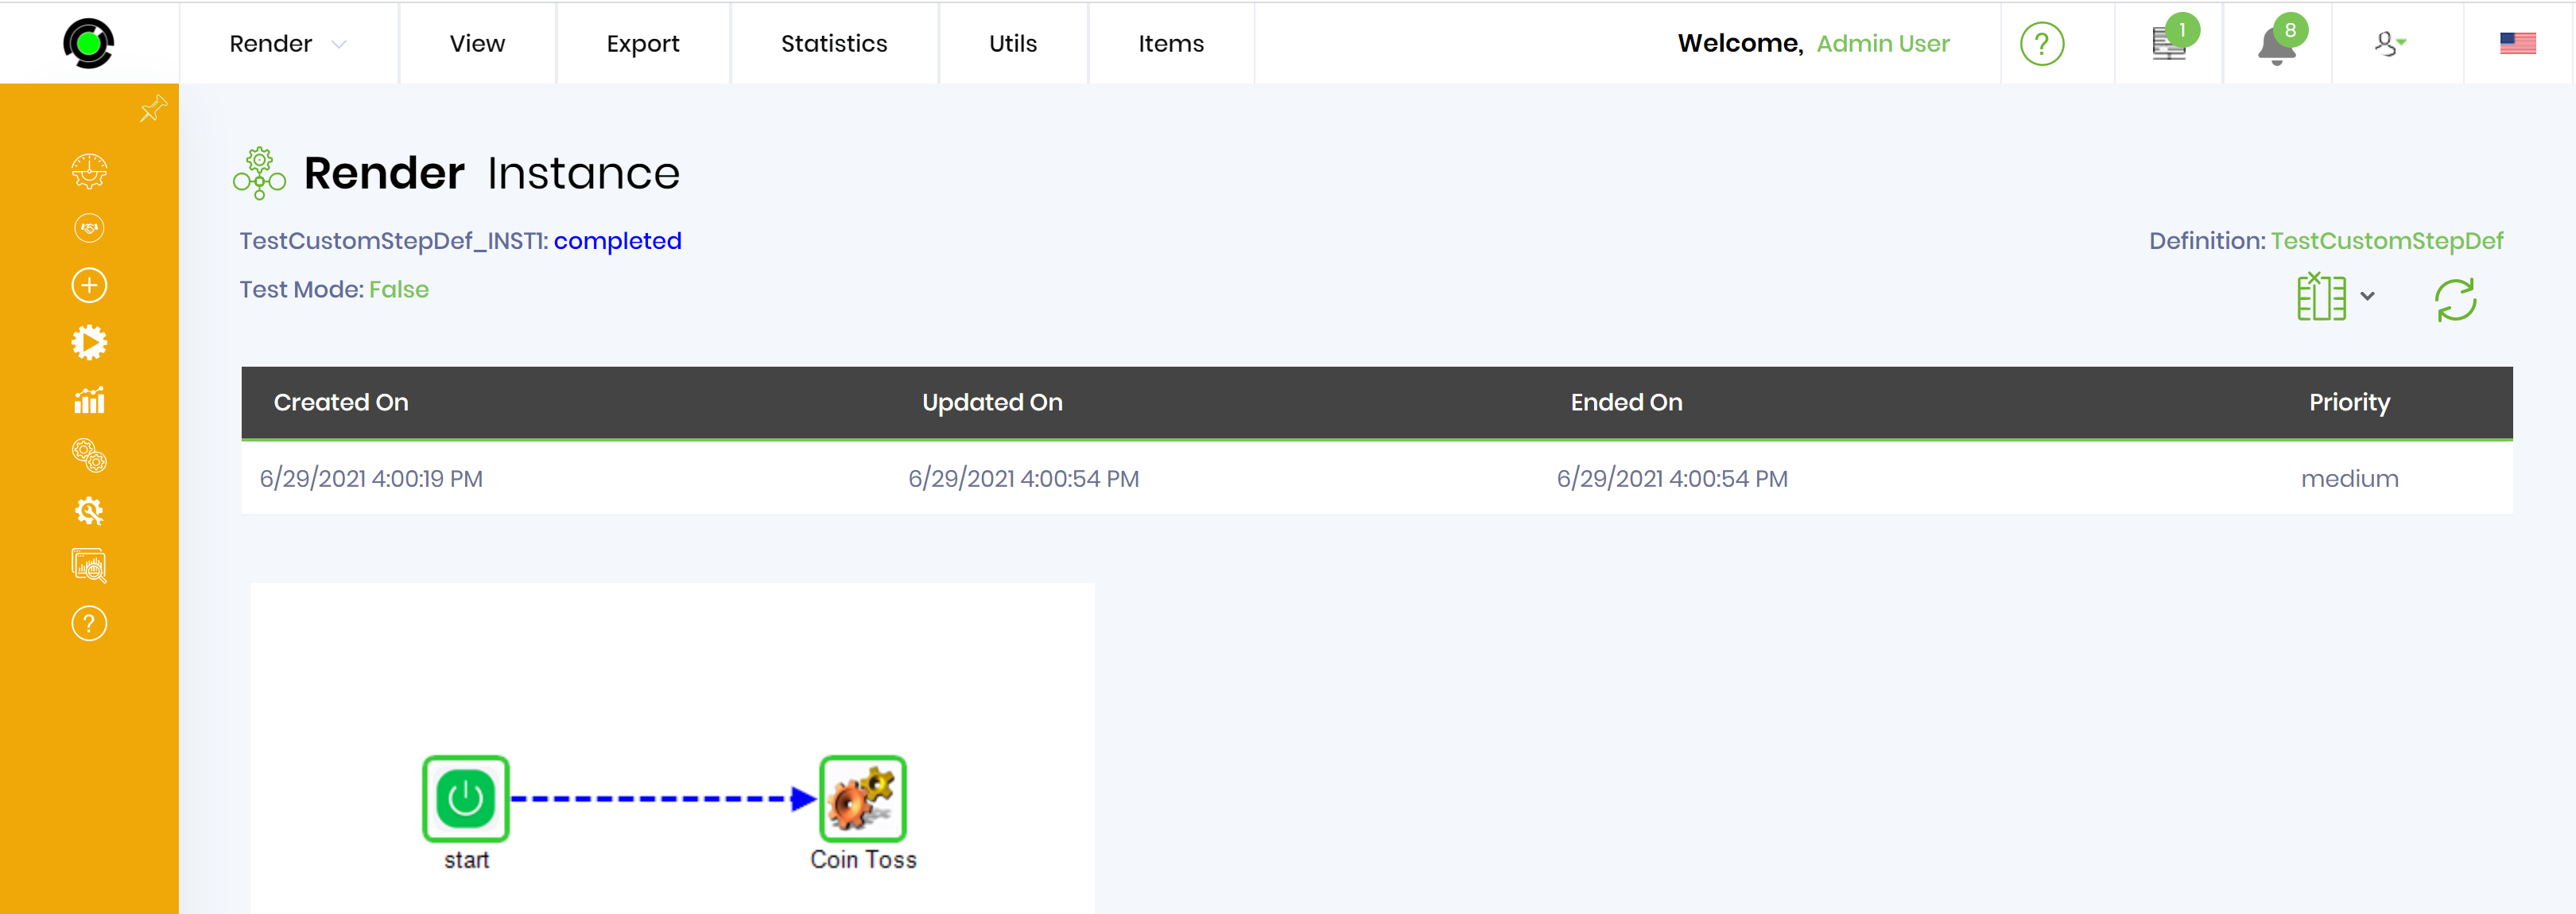
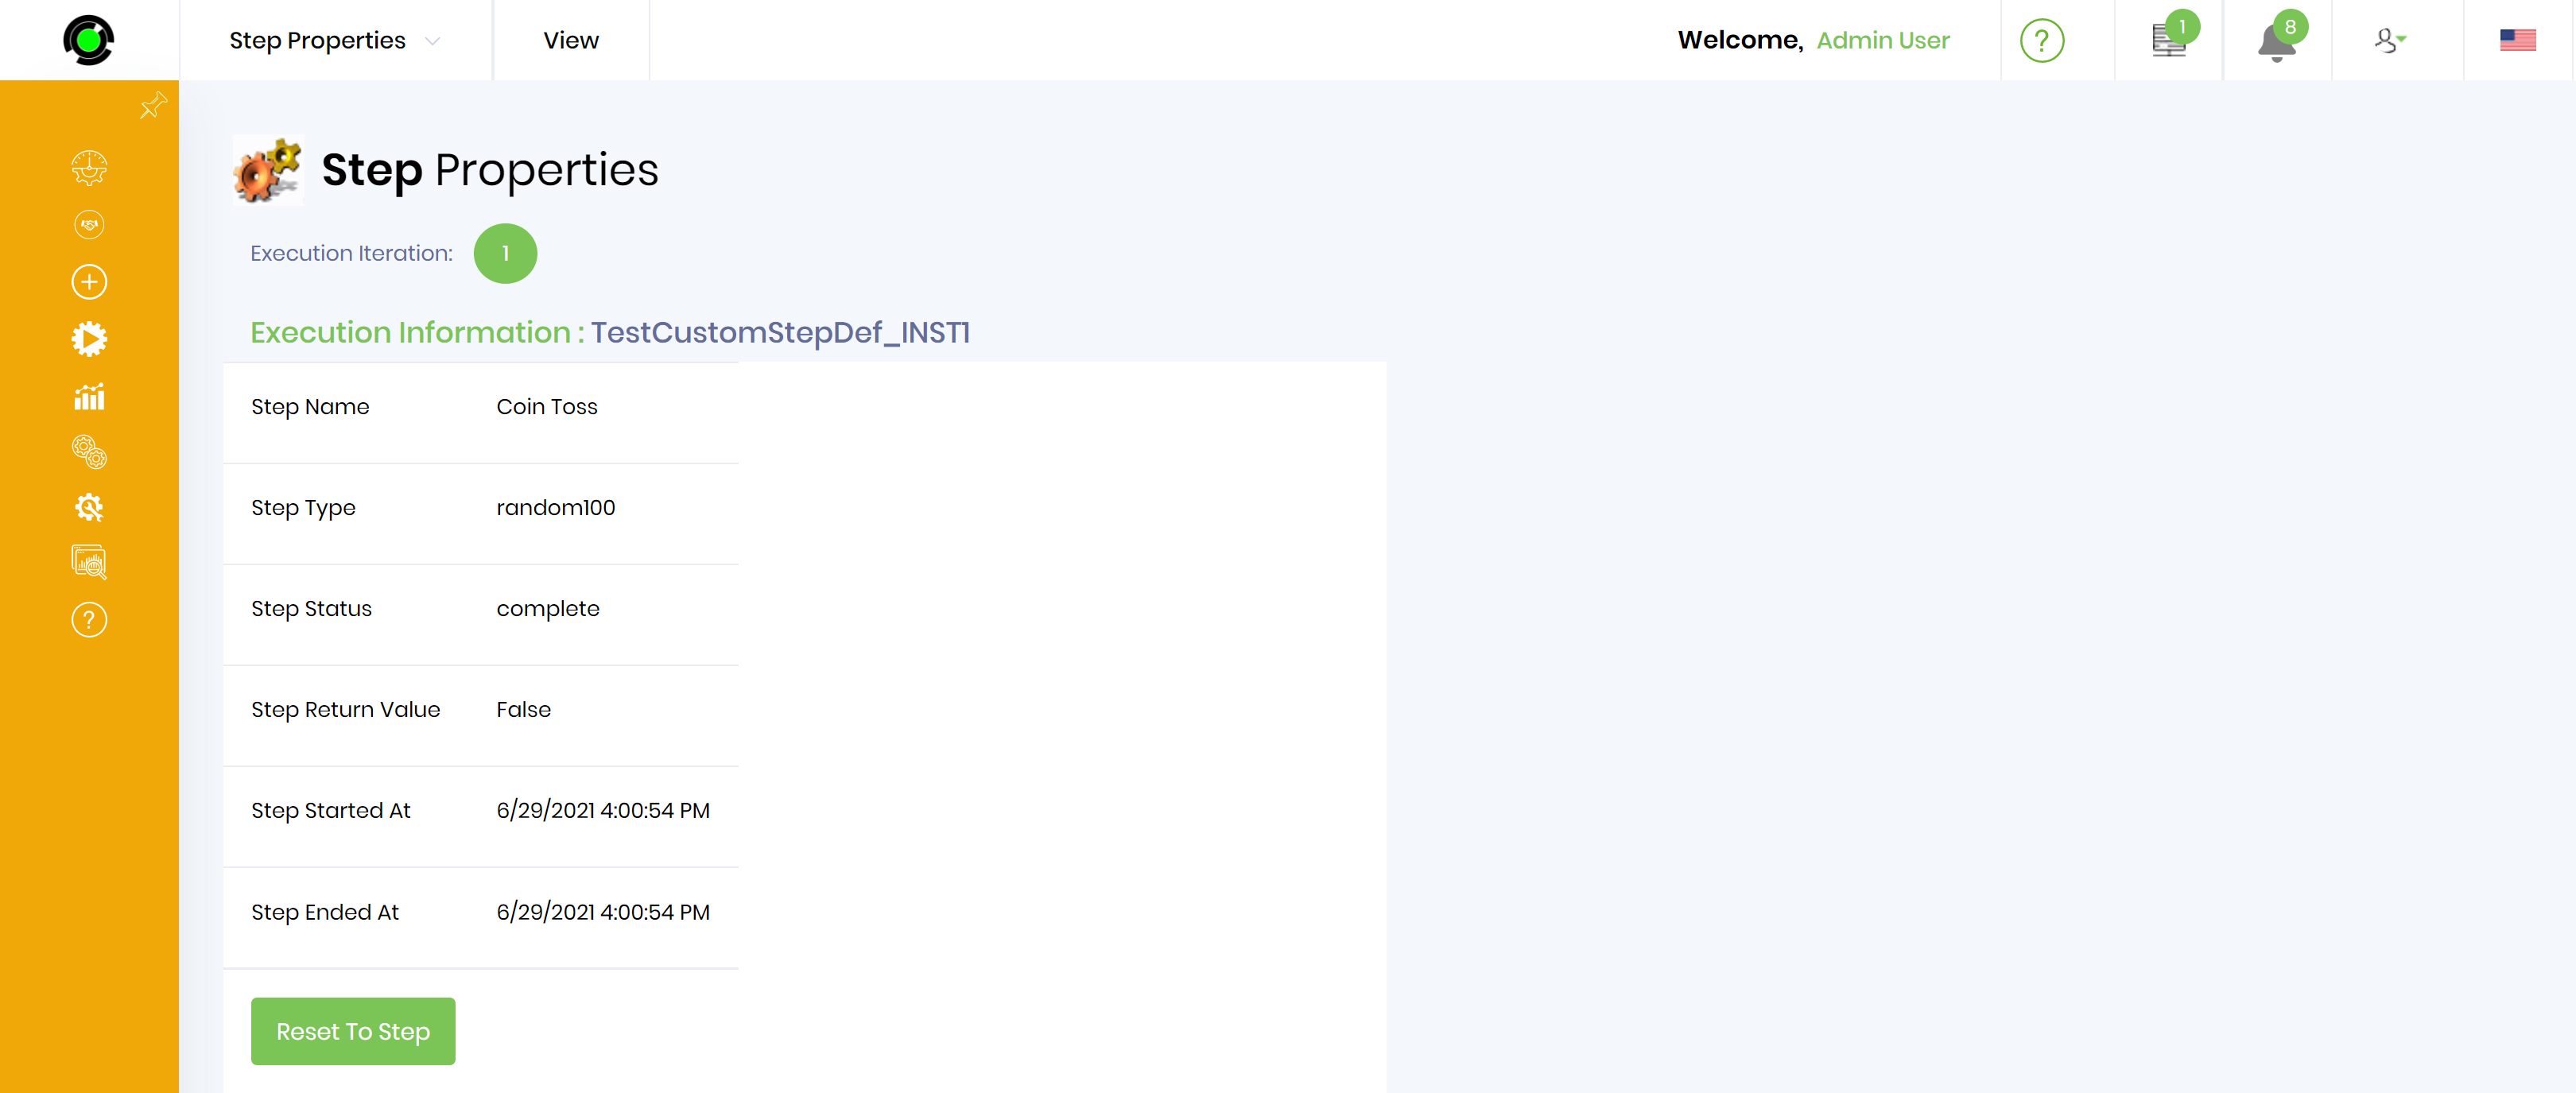
Once the instance is executed, select the “ViewRender” menu item to render the instance. Rendered instance shows that the “Start” step and the “random100” step is executed.
Click the “random100” step to view the execution details of the step. In this execution, since the random number that was generated was less than 56, the step returns a “False” value.
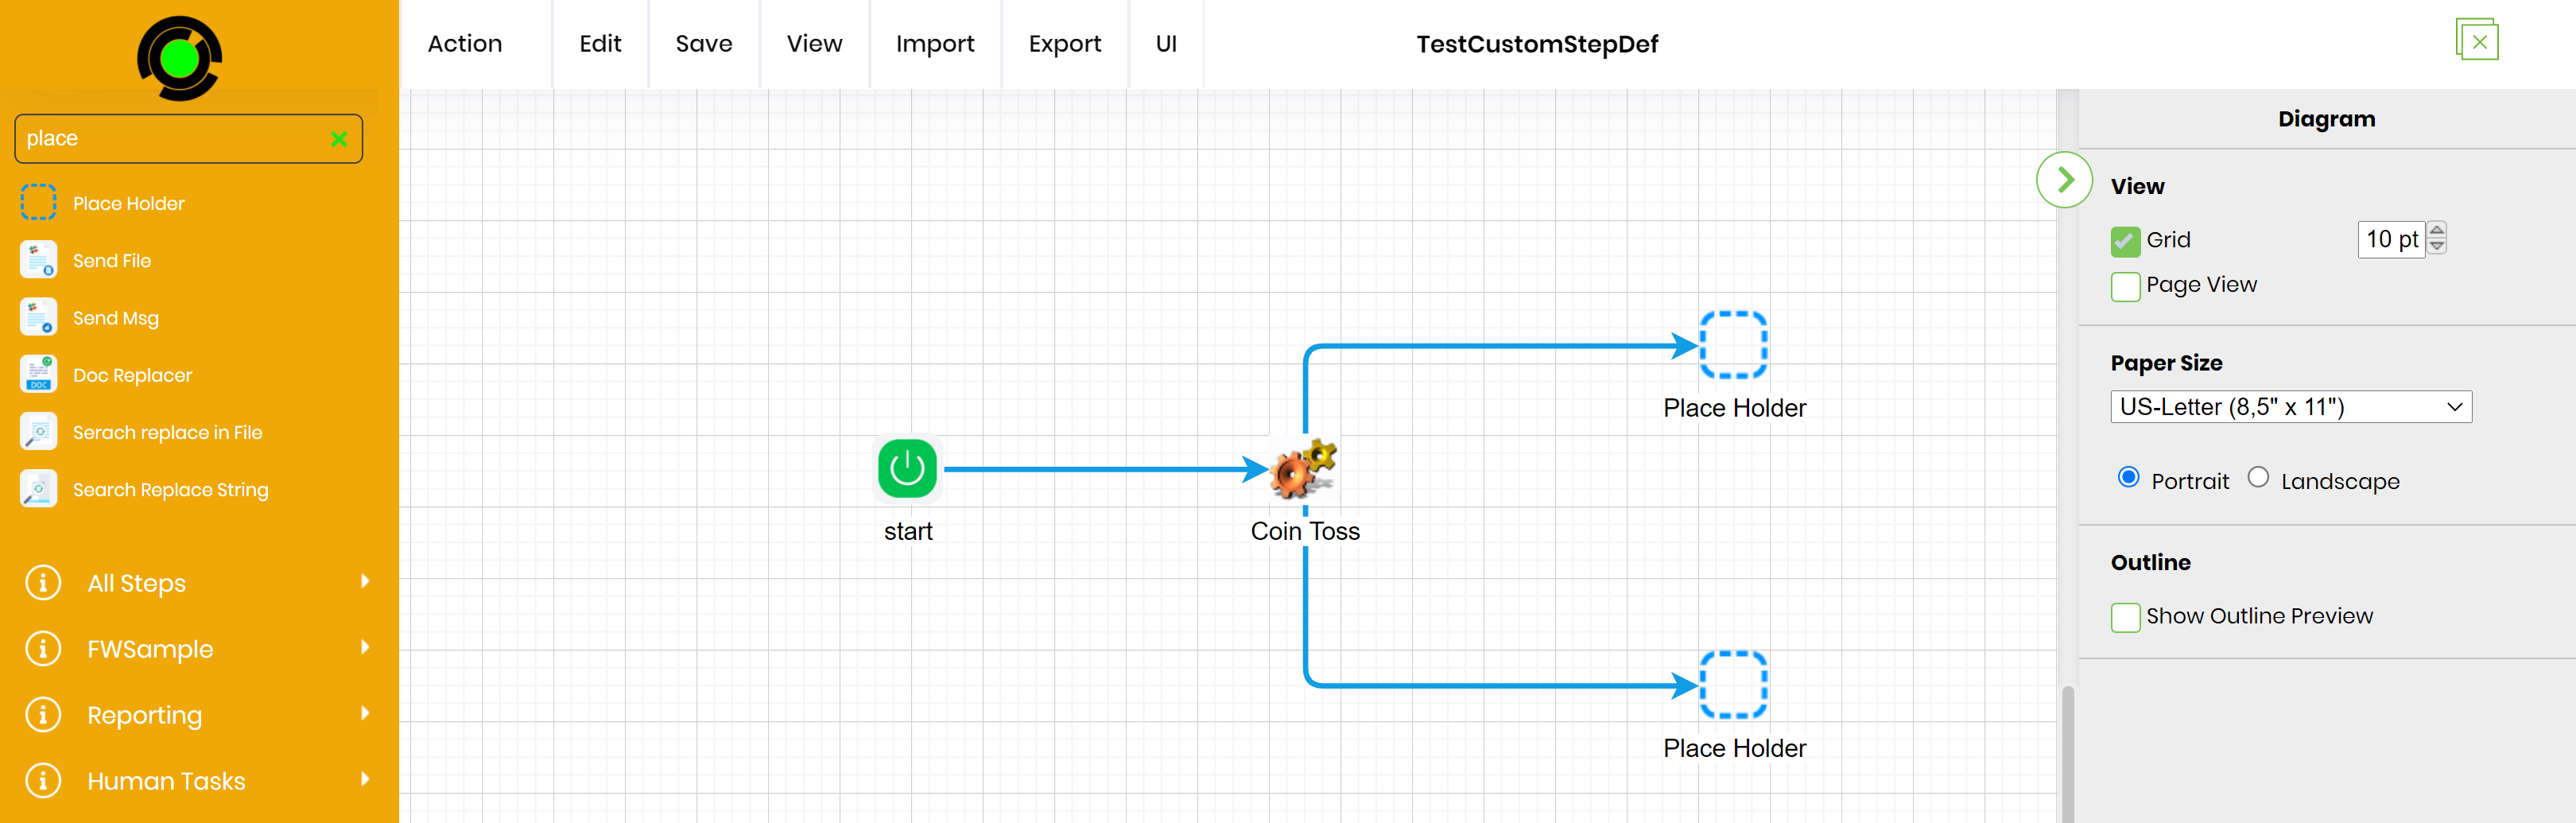
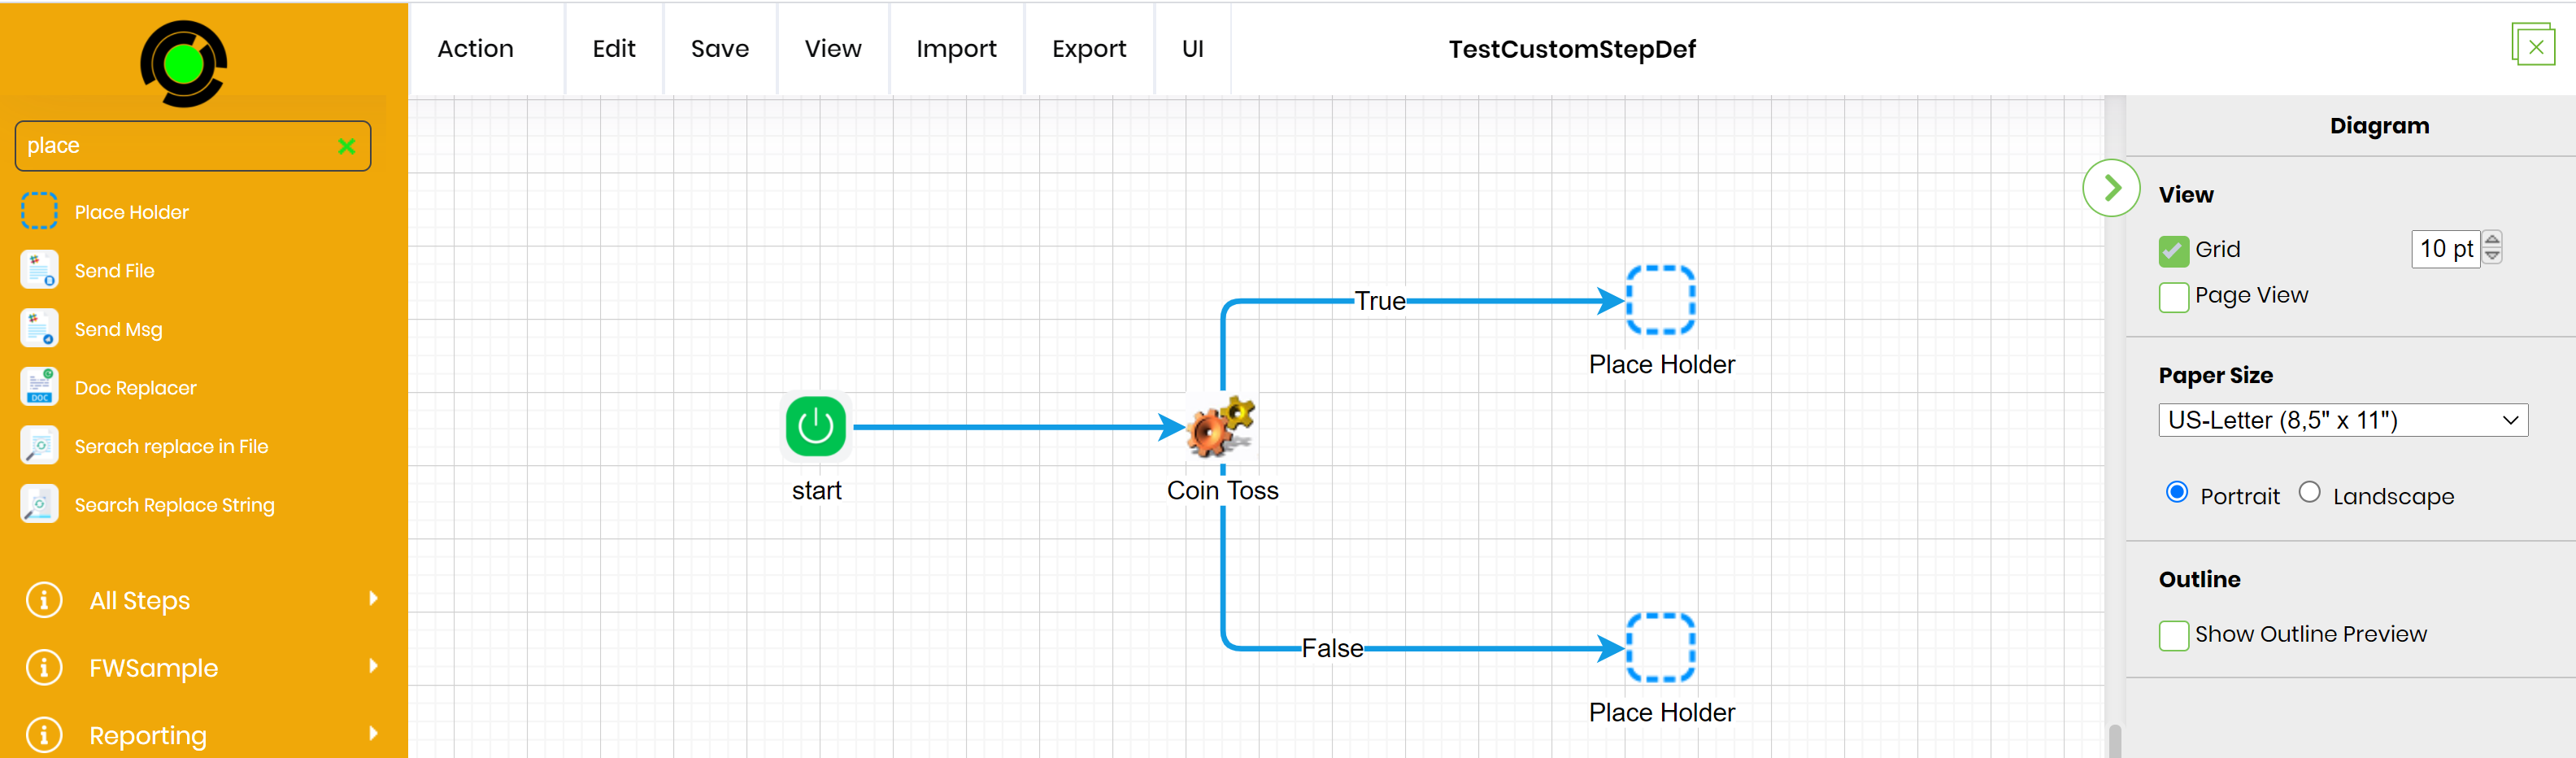
Let’s take the step to the next level and perform functions based on the return value of the step. Open the Workflow definition “TestCustomStepDef” within the workflow designer.
Let’s add 2 "place holder" steps to the design area. Then connect the 2 steps to the “random100” step ash shown above.
Click on the connection between the “random100” step and the top decision step to configure the properties of the connection:
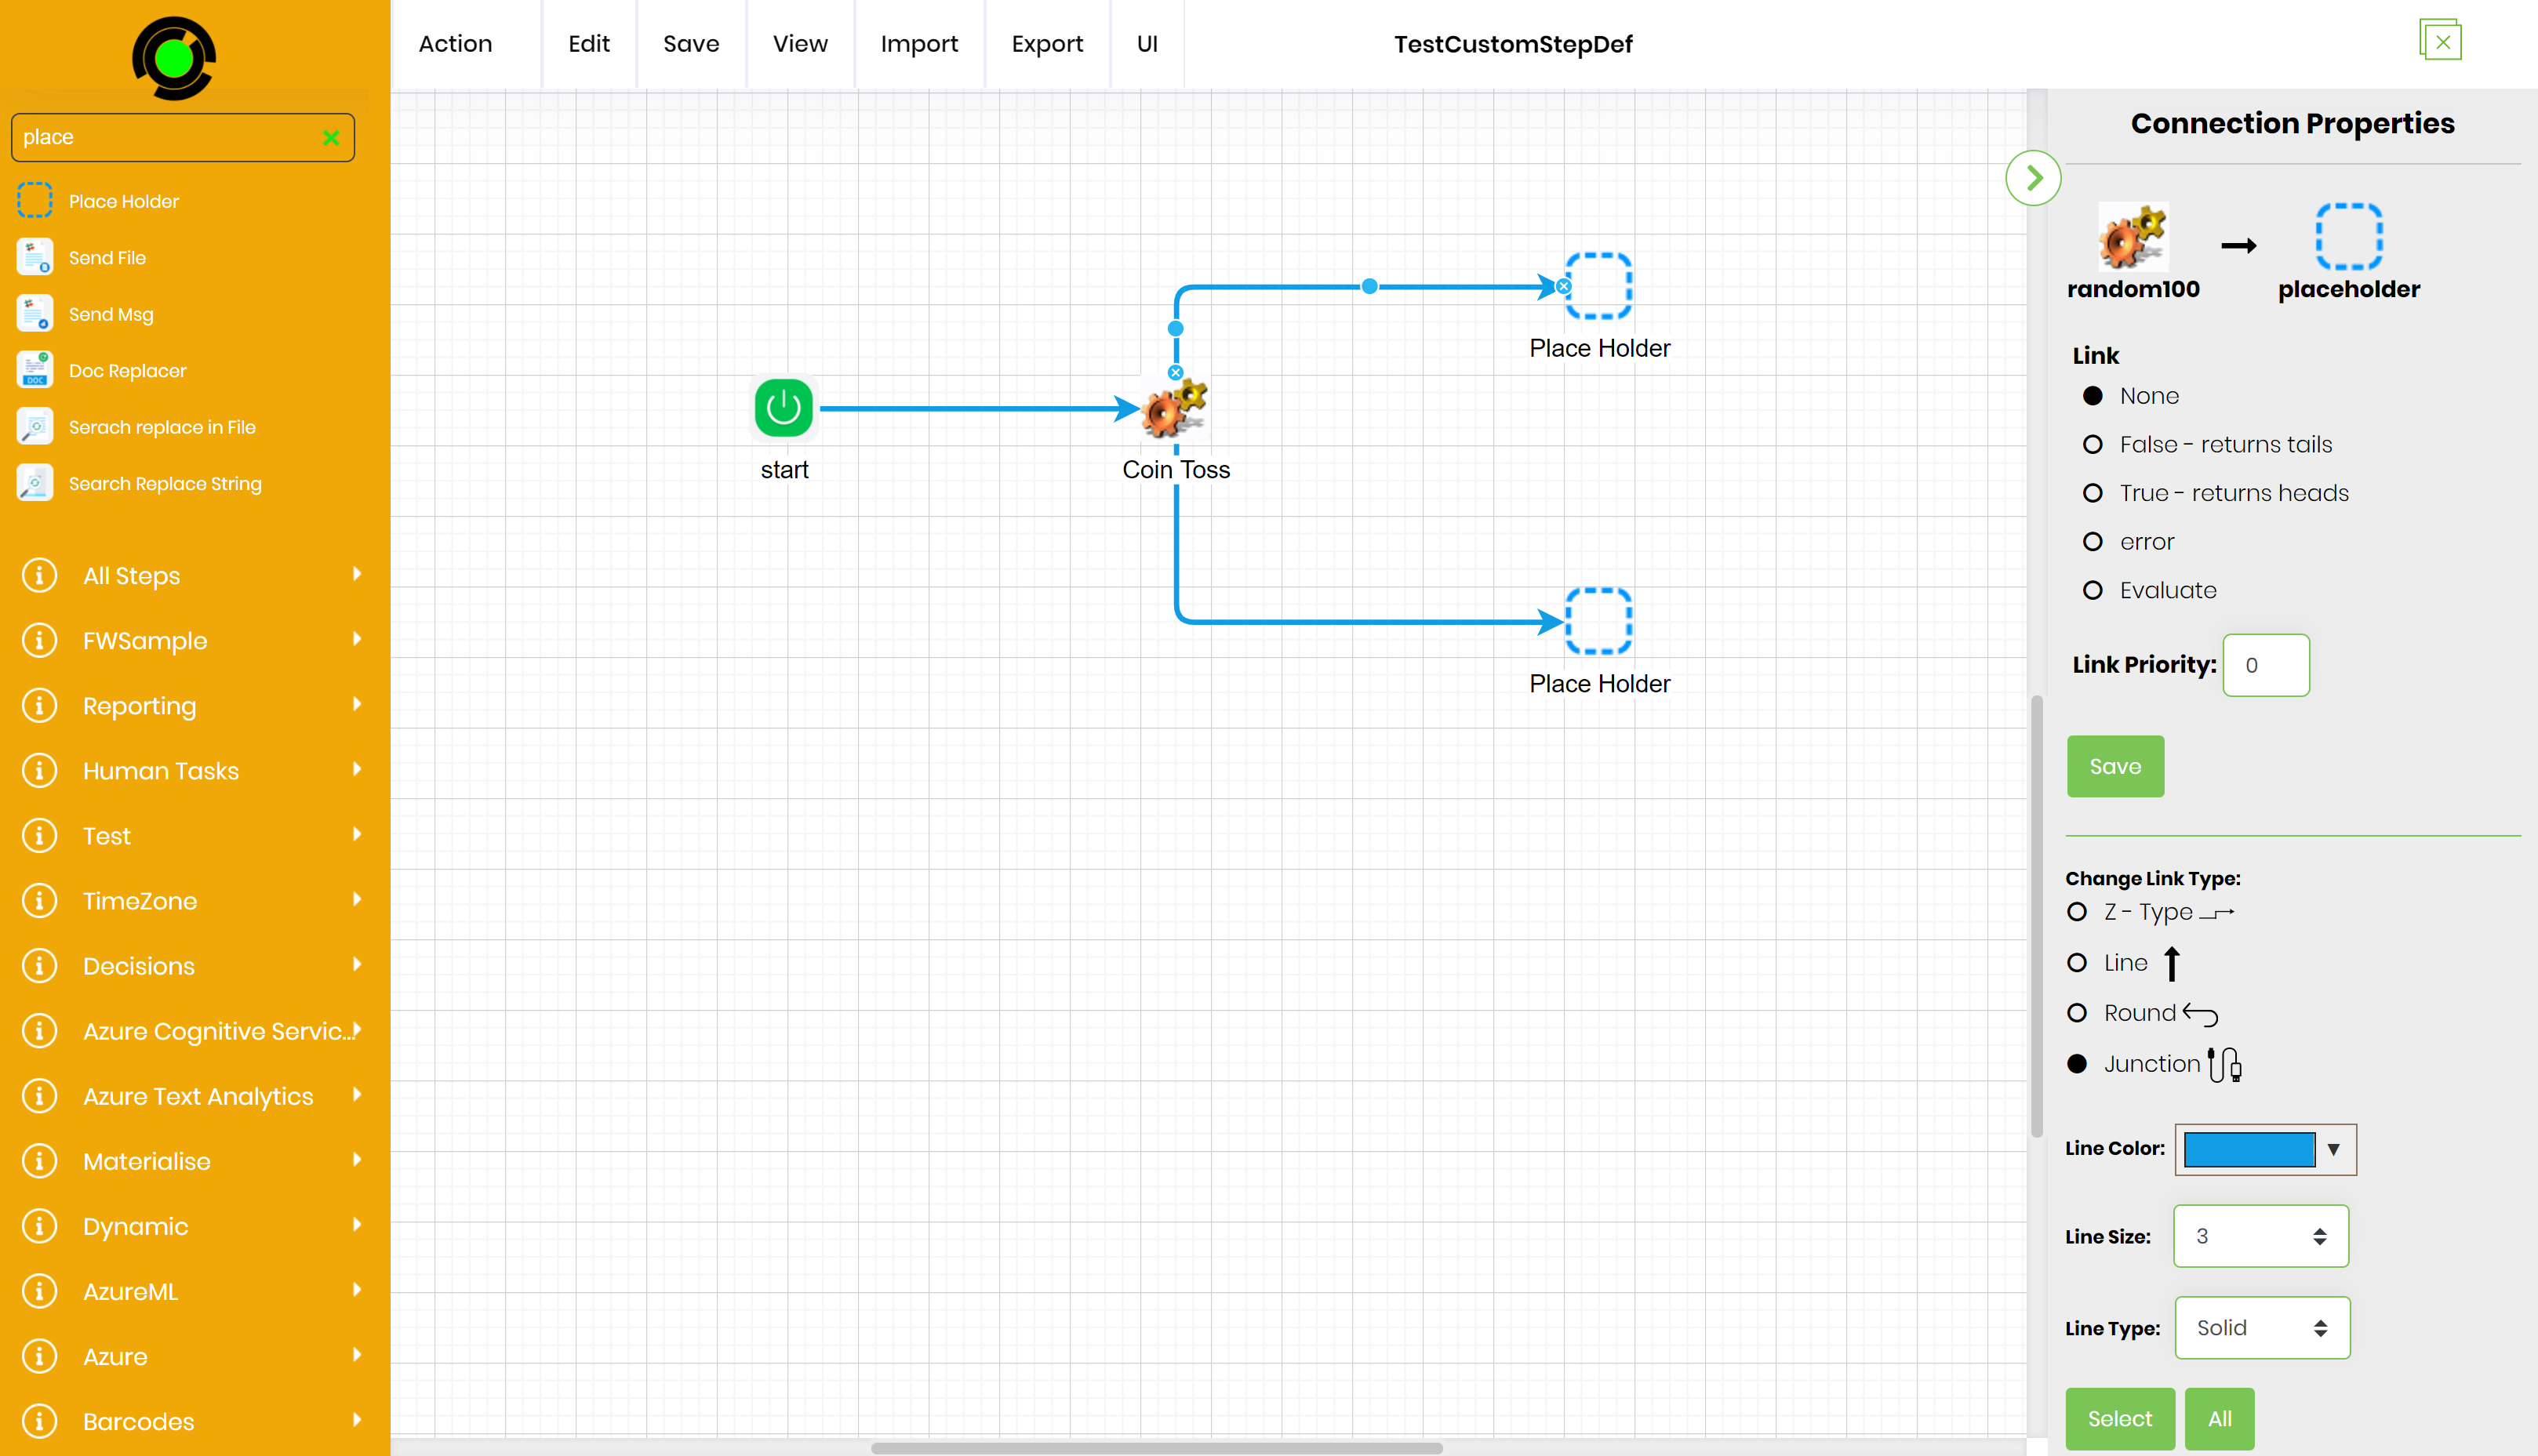
Select the link value “True” and click the “Save” button to save the changes. Click the connection between the “random100” step and the bottom decision step and set the link value to “False”.
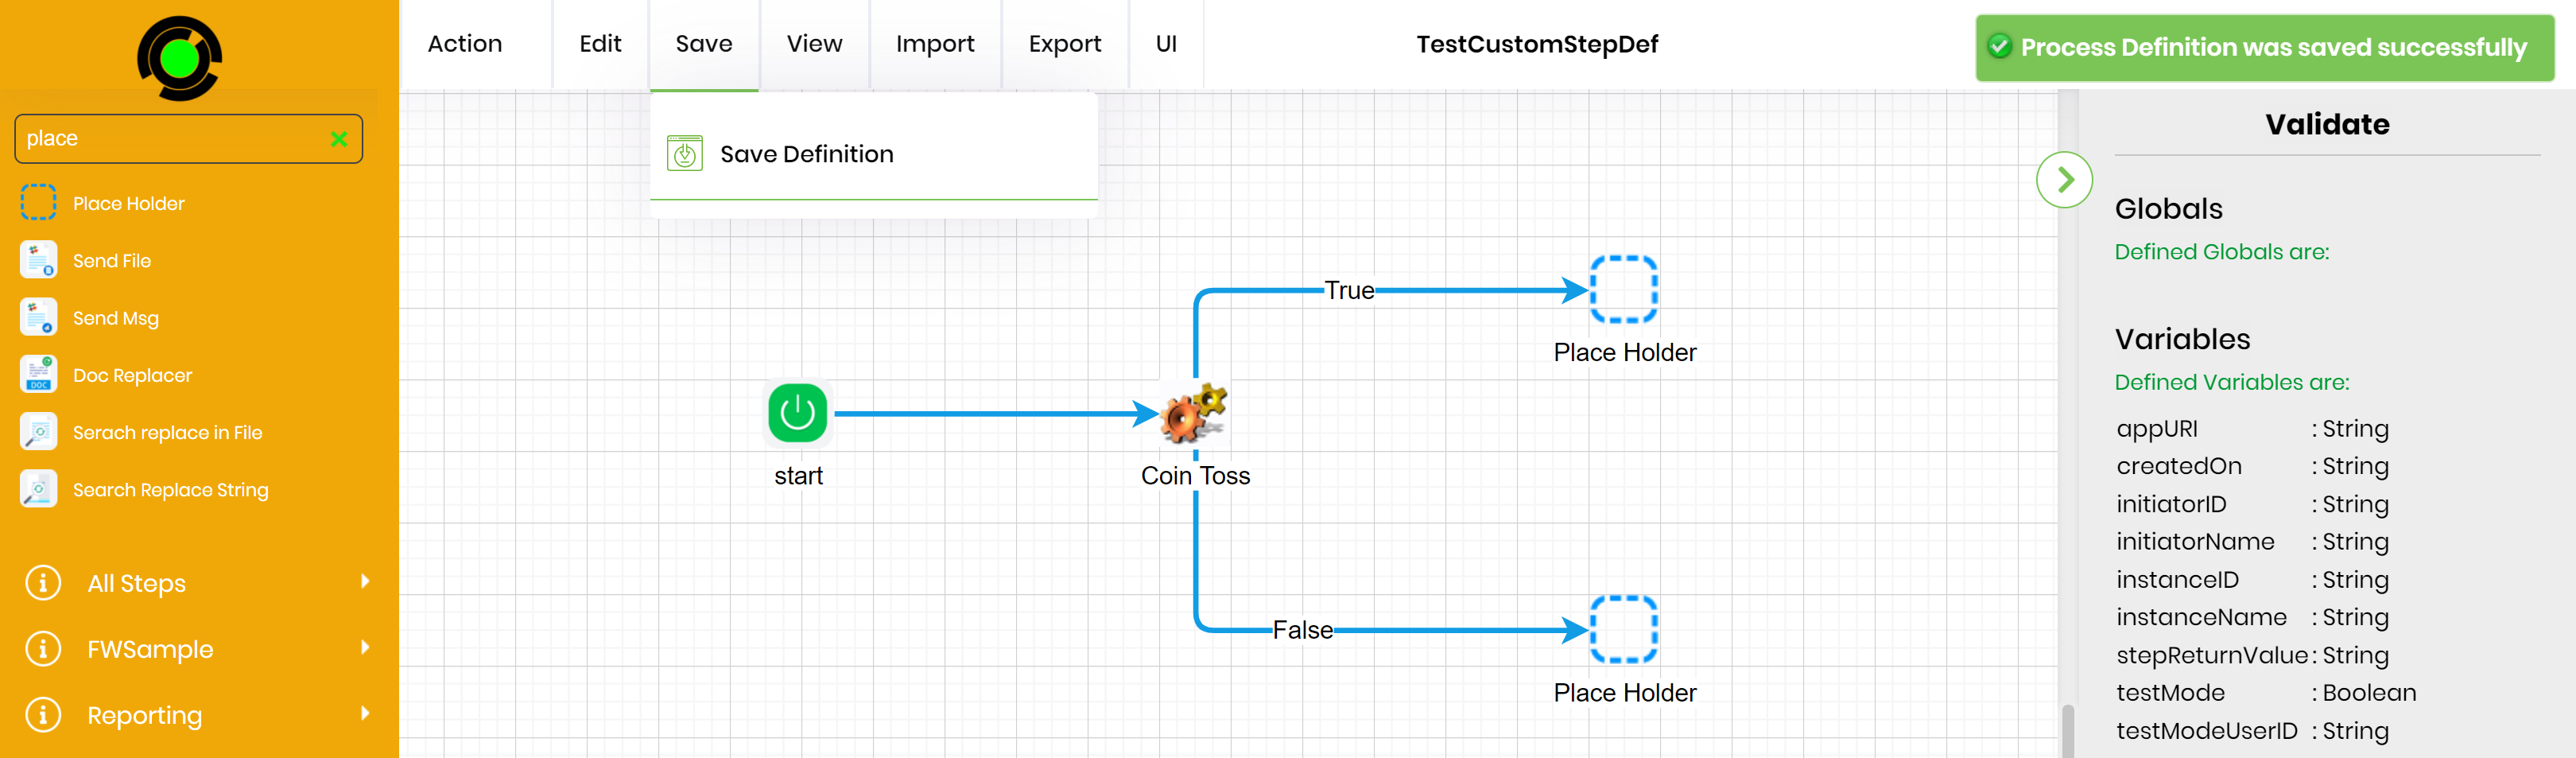
Select the “SaveSave Definition” menu item to save the changes to the definition.
Let’s re-execute the instance by selecting the instance from the instance page
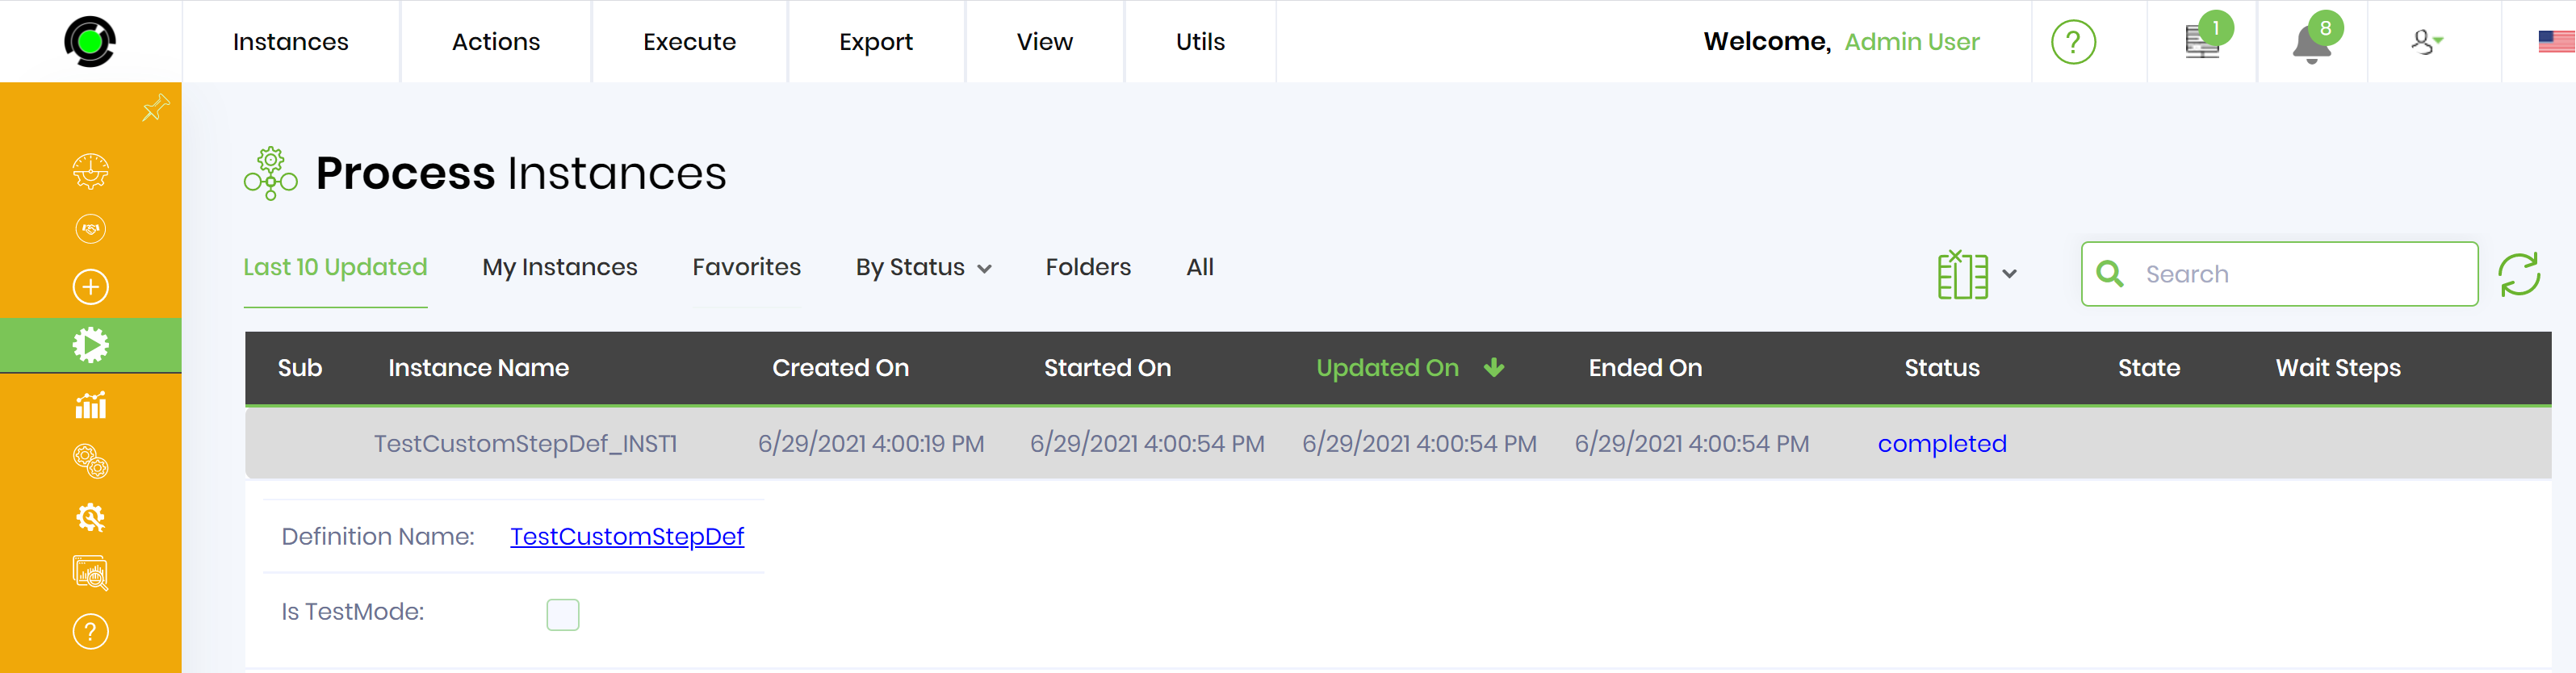
Let’s render the instance to view the execution