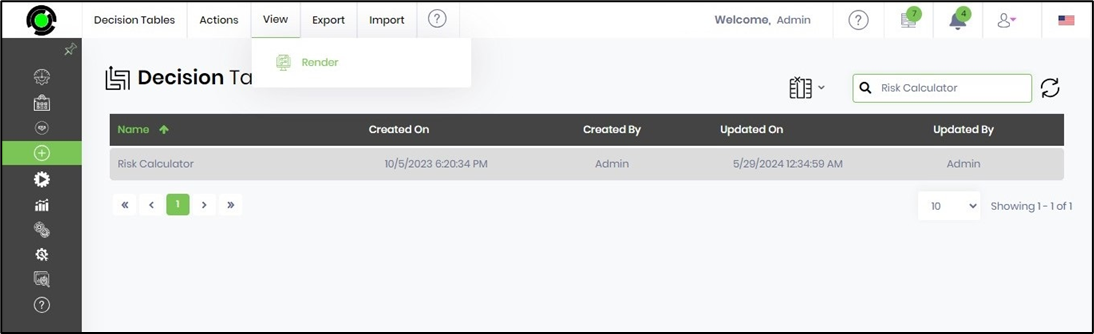
Render decision table
This function lets you render the decision table to work.
On the Decision Tables page, select a table and click on the View—Render menu option.
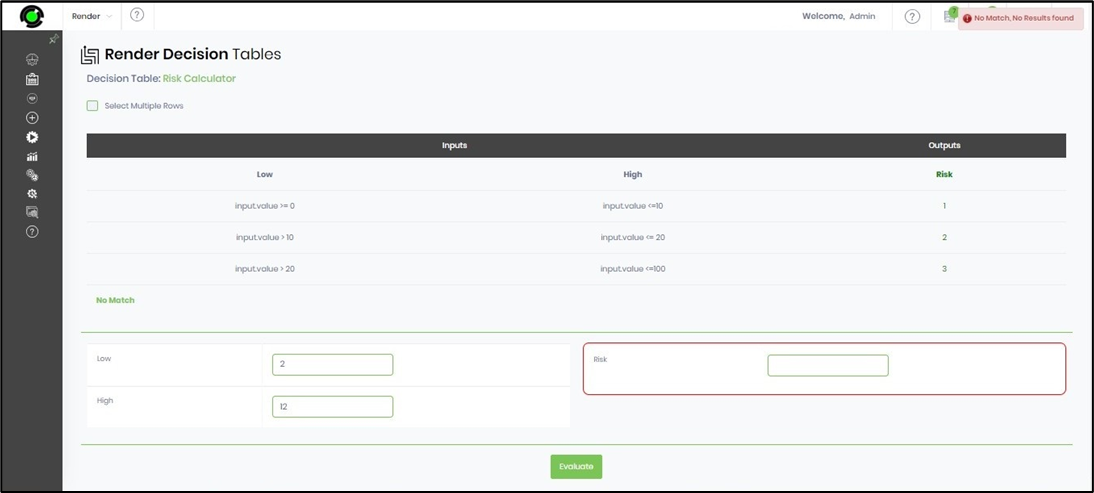
The decision table is rendered on a new page as below. The input and output columns are arranged side-by-side. The input parameters and the output result columns are displayed for user interaction. In this example, the user provides an input value matching one of the conditions, and an alert message is displayed in the top right-end corner as “no match.”
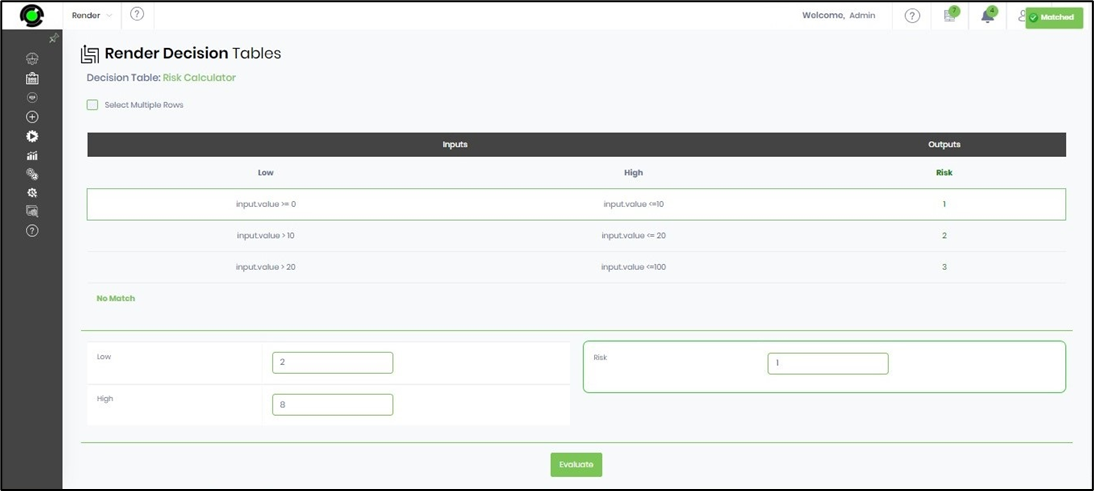
Here, the user provides an input value matching both conditions, and a success message is displayed in the top right-end corner as “matched.”
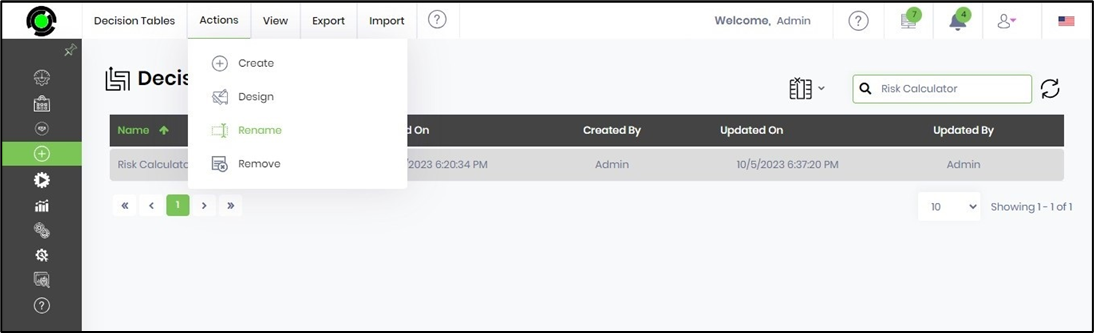
Rename Decision Table.
This function lets you rename the decision table.
Select a table from the list on the Decision Tables page and click on the Actions - Rename menu option.
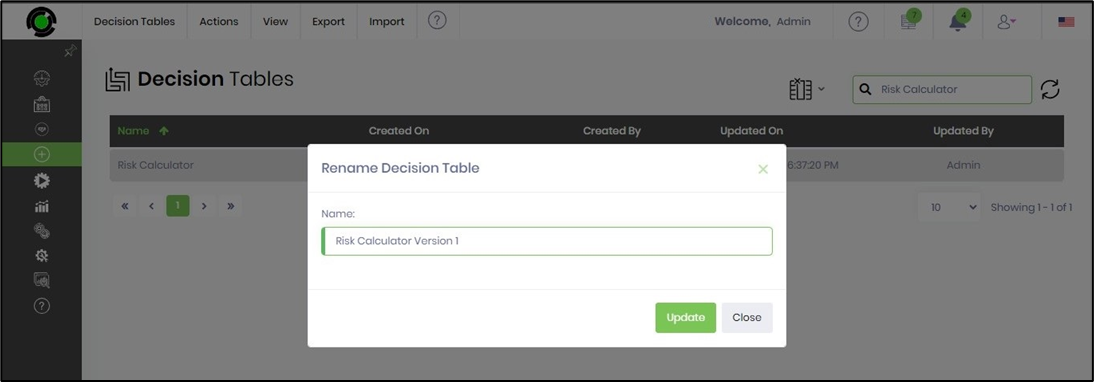
The Rename Decision Table popup window is displayed for configuration. You must provide a new name and click the Update button to confirm.
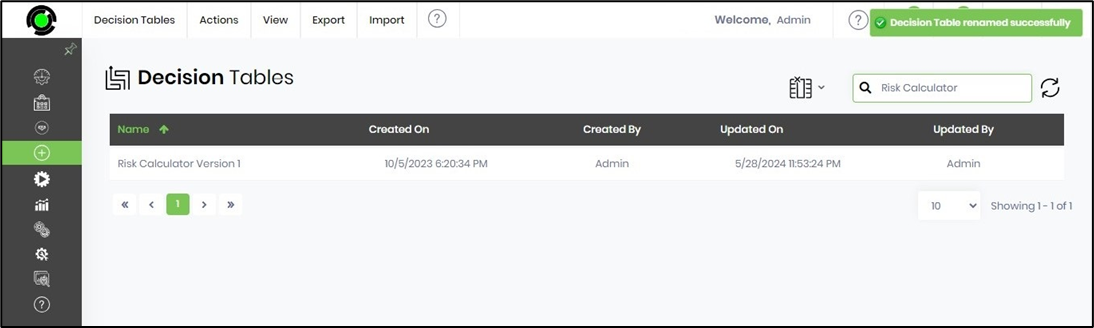
The decision table is renamed, and a confirmation message is displayed at the top right-end corner.
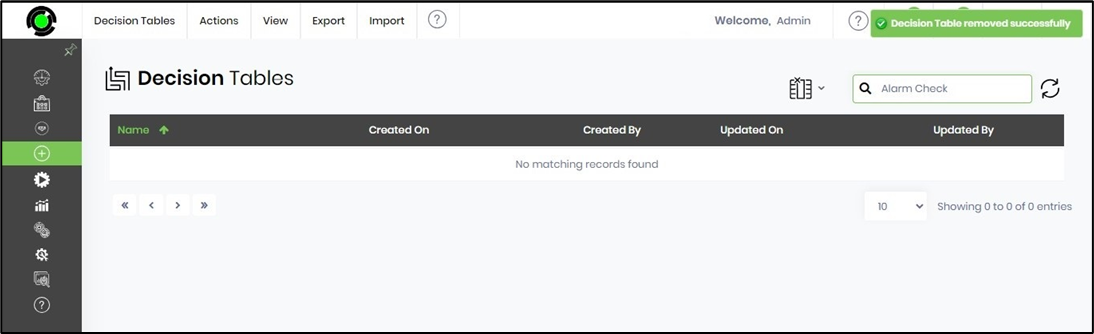
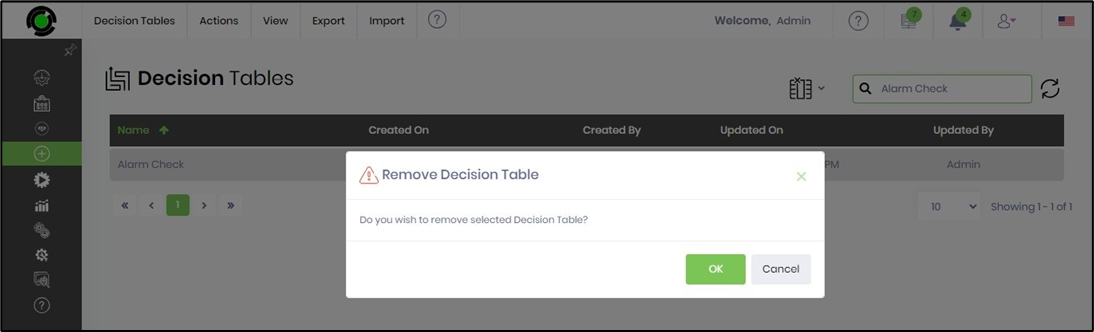
Remove the Decision Table.
This function lets you permanently remove the decision table.
Select a table from the list on the Decision Tables page and click on the Actions—Remove menu option. The Remove Decision Table popup window will appear for confirmation. Click OK to continue.
The decision table is removed, and a confirmation message is displayed in the top right-end corner.