This function allows you to create a decision table.
Go to Manage Config > Decision Tables to manage decision tables.

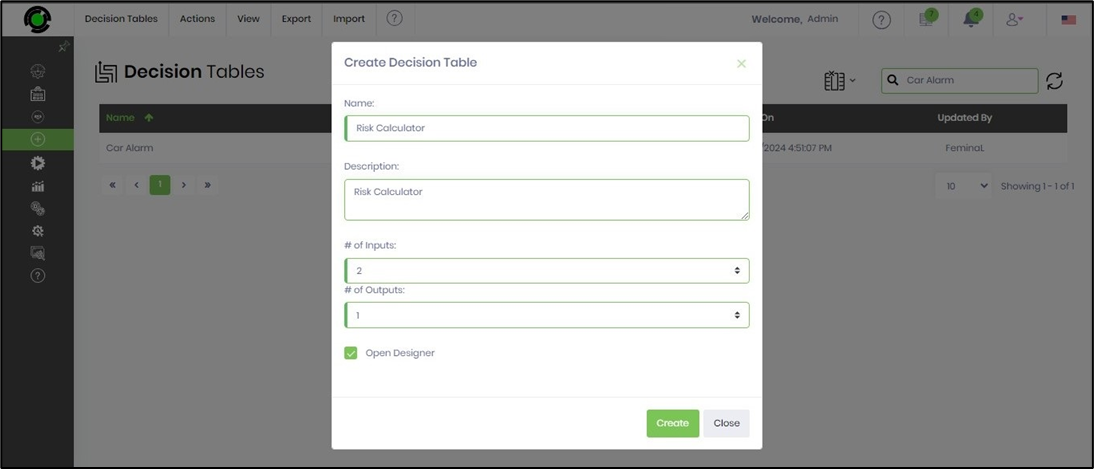
To start, go to the Create > Decision Table page and choose the Actions > Create menu option.

A configuration pop-up window is displayed. Provide a name and a description. Select the number of input parameters and output results from the drop-down list. Note: You can create more than five input and output columns. When creating the decision table, select the “Open Designer” box to open the designer canvas.
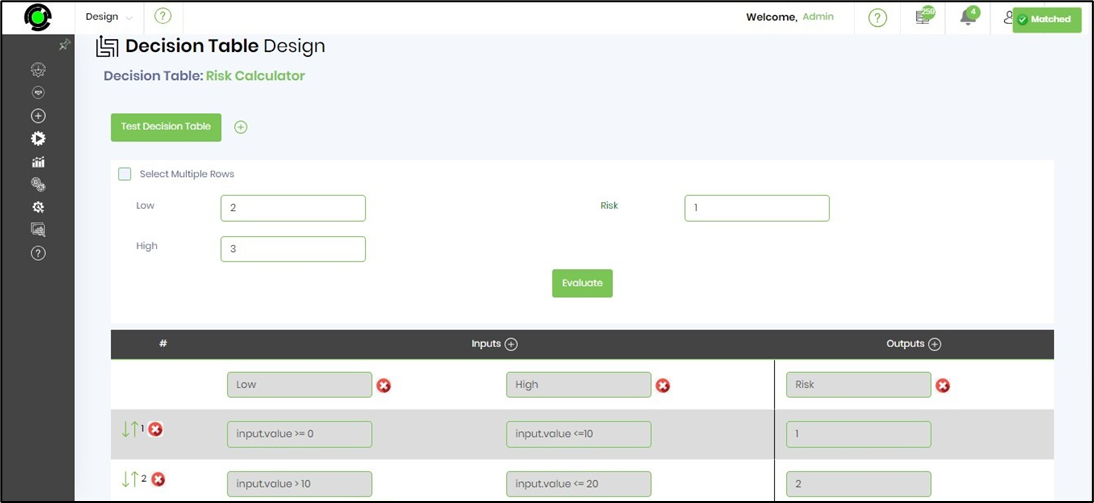
Example: Consider the numeric evaluation example below, which includes two input values, “low” and “high,” and one output value, “risk.”
Enter the input and output values as shown below, then save the table. Configure the input and output column names. Click the “+” icon in the top-left panel to add multiple input rows. Click the “Save” button to confirm the changes.

Click the “Test Decision Table” button to evaluate the setup. The UI appears as shown below. Enter values in the low and high fields. Click the “Evaluate” button to view the risk output value. An alert confirms a successful match, and the table row is highlighted accordingly.
An alert is triggered when values fall outside the specified range, indicating an unsuccessful match.

Select the “Multiple Rows” checkbox. Enter values in the low and high fields. Click the “Evaluate” button to view the risk output value. An alert notification indicates a successful match; multiple table rows are highlighted in this context.

You can view this video to learn more.