FlowWright provides various workflow widgets for handling Form-related tasks within a workflow process.
A list of Form widgets included with FlowWright is available on the Administrator > Form Widgets page. Note: This list also incorporates the custom widgets (DLLs) added to the FlowWright repository. The availability of each widget is managed by FlowWright Administrators.
These Form widgets are accessible on the Form Designer page. You can drag a widget onto the Form Designer canvas and click the help icon in the widget's properties to learn about its functions.

In the Form Designer, the Form widgets are shown in the left pane, as illustrated below. Drag a widget onto the Form Designer canvas and click the help icon in the widget's properties to learn about its functions.

Using the instantiate Form step within a workflow process.
To illustrate the concepts, this example shows a Form Definition and a Workflow Process.
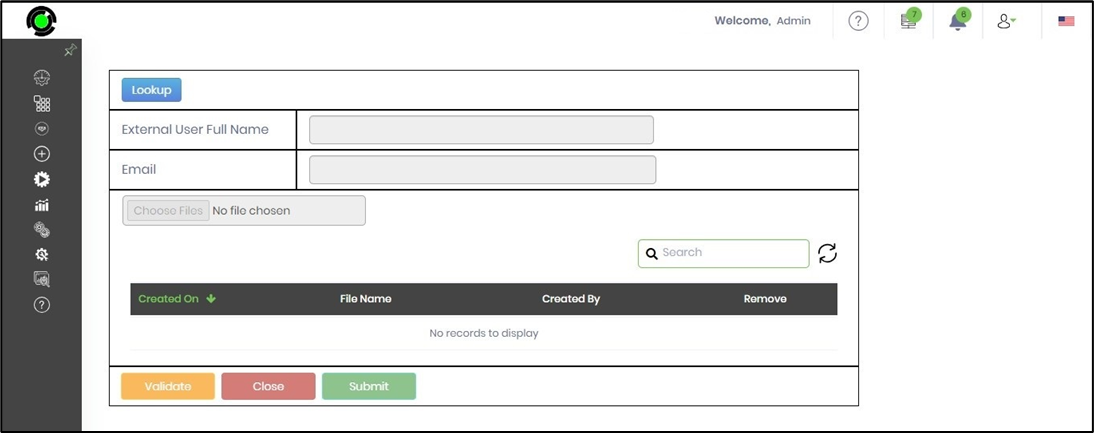
The example Form Definition "TestFormFile" is shown below. You need to drag and drop a label, a text box, a file attachment, an approval button, a validation button, and a lookup widget onto a Bootstrap grid control.

The example process definition "TestFormFileDef" is shown below. Drag and drop an “InstantiateForm” step onto the designer canvas, then connect it to the Start step.

Click the step to configure the “Required” input properties. Select the Form Definition “TestFormFile” from the drop-down list. Define a variable “FormID” of type string. Use this variable to store the “Form Instance ID”. Click the “Save” button.

Click the step to configure the “Optional” input properties; in this context, the default configuration is adequate. Click the “Save” button.

Based on the design above, let's generate and run a workflow or process instance.
On the Process Designer page, choose Actions > Create Instance.

The “Create Instance” section is on the right pane. Enter an instance name or click the Generate button to create one automatically. Select the “Execute” box, then click the “Create and Execute” button to start the process. A new instance is created, and a confirmation message appears in the top-right corner.

Navigate to the Process > Instances page. Use the Search textbox to refine the results. The new process instance is marked as “completed.” The process step has generated a new Form Instance, and the workflow has finished successfully.

Go to the Form > Instances page. Use the Search box to filter the results. Select the Form Instance, then click Actions > Edit. This step is necessary to modify the Form, enter user input, and submit.

The Form appears on a new page. Note: The key-value attribute “mode=Submit” in the URL sets the Form to “EDIT” mode. The attribute “mode=Render" sets it to “READ-ONLY” mode. Enter user input and click the “Submit” button to close the Form.

Navigate to the Process > Instances page. Use the Search textbox to refine the results. The new process instance is marked as "completed." The process step has created a new Form Instance, and the workflow has finished successfully.
As the process runs, a new Form instance will be created. Click the Items > Forms menu option to see the list of Forms generated by the process.

The list of Forms and their instance IDs is shown in the table below.

Click the Instance ID to open and display the Form instance in read-only mode, as shown below.
To edit and submit this Form instance, navigate to the Run > Form Instances page and select this Form instance ID from the list. Then, click Actions > Edit.

The Form instance appears on a new page for editing, as shown below. After entering values in the Form fields, click the Submit button. The Form instance saves these values in XML format, which can be downloaded as an XML file.
