This function handles the tasks assigned to queues by the process.
Tasks are usually assigned to users, but in FlowWright, they can also be directed to queues. This is a crucial feature for specific situations. In most support systems, tasks go to support queues first and are then assigned to users from those queues.
In the example below, the workflows utilize “routeToQueue” process steps to accomplish this.

Create and run a new process instance to generate Tasks and send them to designated queues.

Click the “View Instance” link to display the process instance on a new page. Choose Items - Queues from the menu to see the tasks assigned to the queues.

The Queues table shows the tasks assigned to different queues, as demonstrated below.

To manage the tasks assigned to the queues, navigate to Engage > Tasks > Queue Assignment.

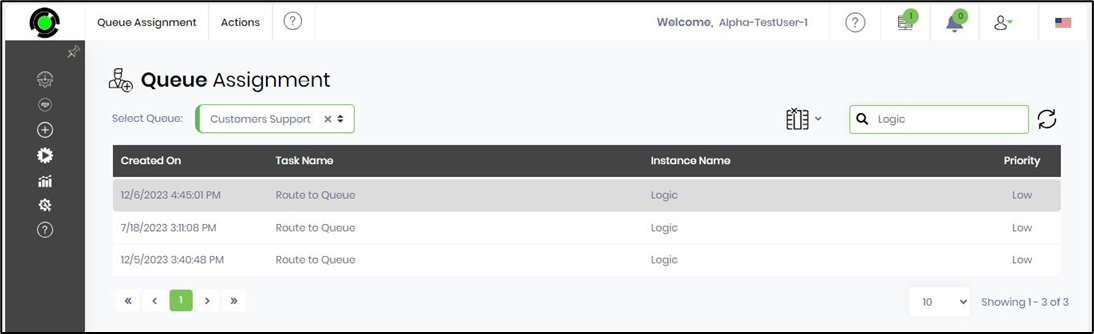
The Queue Assignment page opens in a new tab. You need to select a queue from the drop-down list. You can filter the user using the drop-down menu as well. Additionally, you can use the Search box to further narrow down the list.

Select the queue from the drop-down list. The task list from the queue is displayed in the table. Select the User to assign to from the drop-down list. You can use the Search box to narrow down the list.

Select the queue task from the table, then click Actions > Assign Items > Selected User.

The Assign Queue pop-up appears for confirmation. Click OK to proceed.

The queue task is assigned to the User's My Queue, and a confirmation message appears in the top-right corner. Once the queued tasks are assigned to the selected user, they are removed from the queue.

UI Control - Tasks.
As a FlowWright Admin user, you should enable access to the “My Queue” feature for non-admin (regular) users. You need to navigate to the Status > Status > Settings > UI Control.

Enable the “My Queue” feature by selecting “ON” and clicking the “Settings” icon to allow access for All Users or for specific users based on their application role. Click the Save button to confirm the changes. A confirmation message is displayed in the top-right corner.

My Queue.
To access the My Queue tasks list, navigate to the Engage > Tasks > My Queue menu option.

The “My Queue” page is rendered, displaying the list of tasks assigned to the user.

Select a queue from the drop-down menu to navigate to other queues. Note: The queues are only visible when there's an Open Task assigned to the user. The user cannot perform the task from this UI.

To perform the task, the User needs to navigate to the Engage - Task page and select the task.

To unassign this task, the user selects the task from the list and clicks on the Actions - Unassign menu option.

A pop-up window is displayed for confirmation. Click the OK button to proceed.

The task is unassigned from “My Queue” and returns to the origin queue, with a confirmation message displayed in the top-right corner.

Queue Management.
The workflow process assigns tasks to the Queues, and Users (with access permissions) can navigate to the queue and “Assign or Unassign” tasks themselves.
You need to navigate to the Manage - Queue Management page.

The Queue Management page is rendered on the new page, displaying the list.

To grant access permissions to the queue, go to the Create—Queue Management page. You can use the Search textbox to narrow down the list.

Select the Queue from the list, then click the Security - Permissions menu option.

The Manage Queue Permissions page opens in a new tab. Search for the username by typing the first three characters, then select the user from the list. Click the Add button. Finally, click the Save Permissions button to grant the user Queue access. Access is given to the User, and a confirmation message is displayed in the top-right corner.

Here, search for the application role by typing the first three characters, then select Application Role from the list. Click the Add button. Next, click the Save Permissions button to grant Queue access to all users in this application role. Access is given to the User, and a confirmation message is displayed in the top-right corner.

Assign to Me.
To view the My Queue tasks list, go to Engage > Tasks > My Queue.
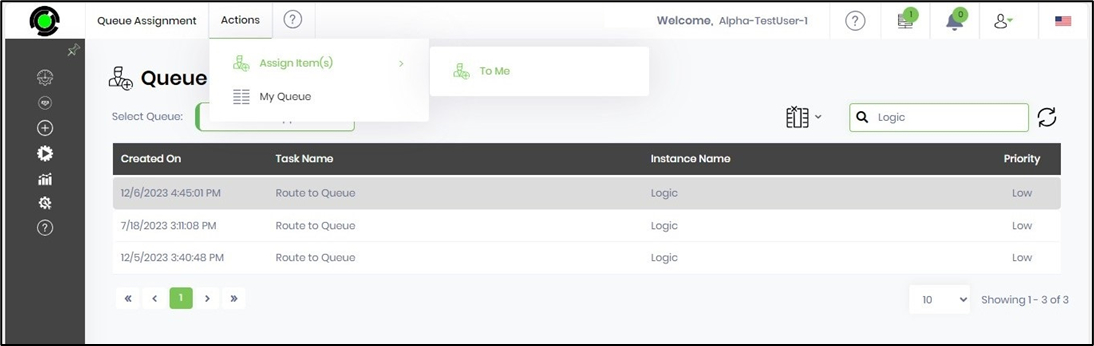
The user navigates to the Engage—Tasks—Queue Assignment page and selects the Queue from the drop-down list. Then, using the Search textbox, they narrow down the list. The list of tasks in the Queue is displayed in the table for selection.
The user selects a queue task from the list and clicks on the Actions—Assign Items—To Me menu option. The task is successfully assigned to the user's My Queue. This way, the user can choose functions from the queue and unassign tasks back to the queue.