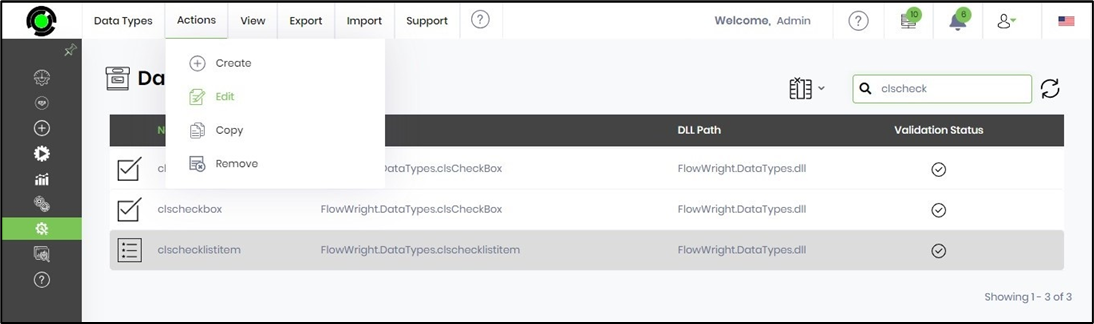
Edit data type
Select the data type from the list table on the Data Types page and click on the Action - Edit menu option.
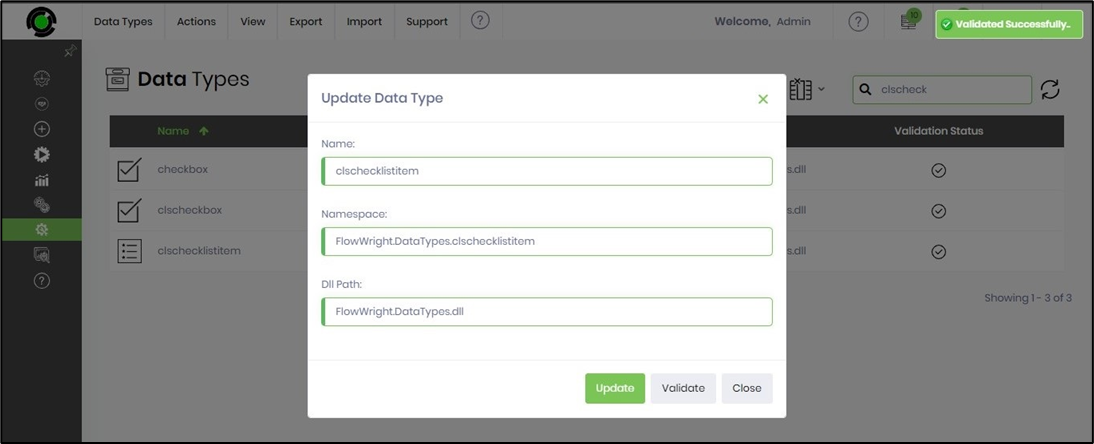
A popup window is displayed for configuration, as shown below.

You can provide the configuration changes and click on the Validate button to verify them. A confirmation message will be displayed in the top right-hand corner to let you know if the changes are successful. Click on the Update button to confirm the changes.
Copy data type
On the Data Types page, select the data type from the list table and click on the Action—Copy menu option.

A popup window appears for configuration. You must provide a new data type name and click the Copy button to confirm.

The selected data type is copied, and a confirmation message is displayed in the top right-end corner.
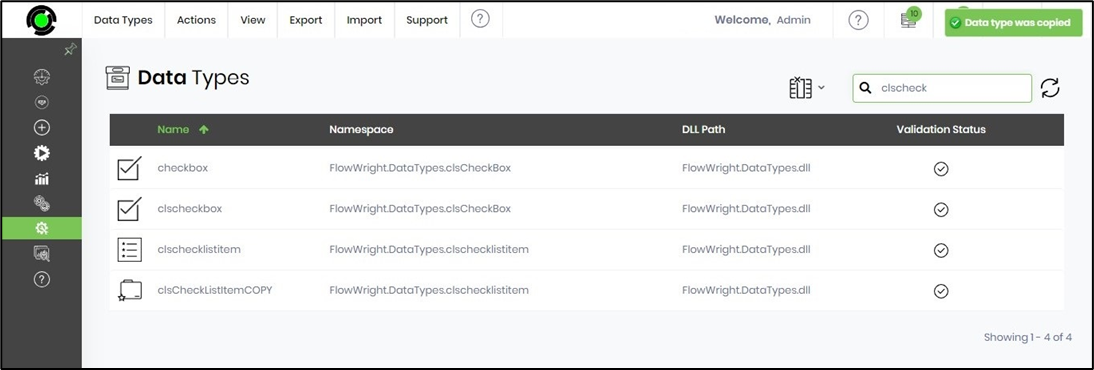
Next, select the copied data type from the list and click on the Actions—Edit menu option. In the popup window, click the Validate button to verify the configuration. A confirmation message is displayed in the top right-end corner for correct configuration.

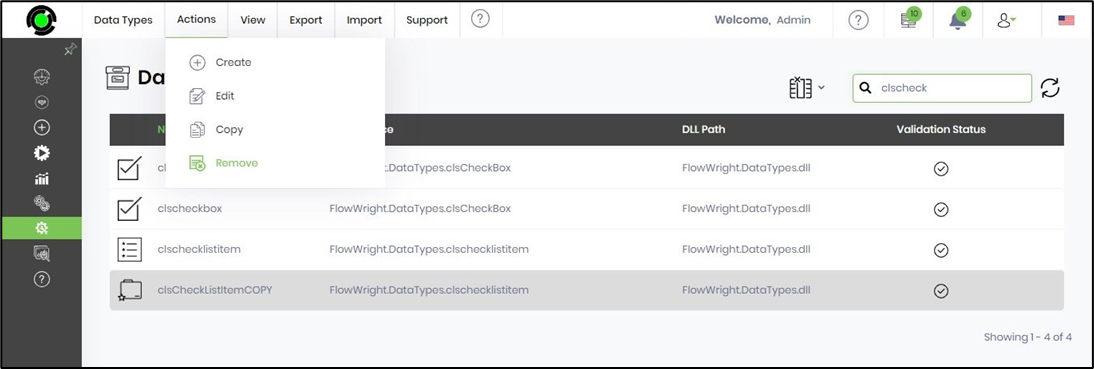
Remove data type
Select the data type from the list table on the Data Types page and click on the Action - Remove menu option.
A popup window is displayed for confirmation. Click the OK button to confirm.

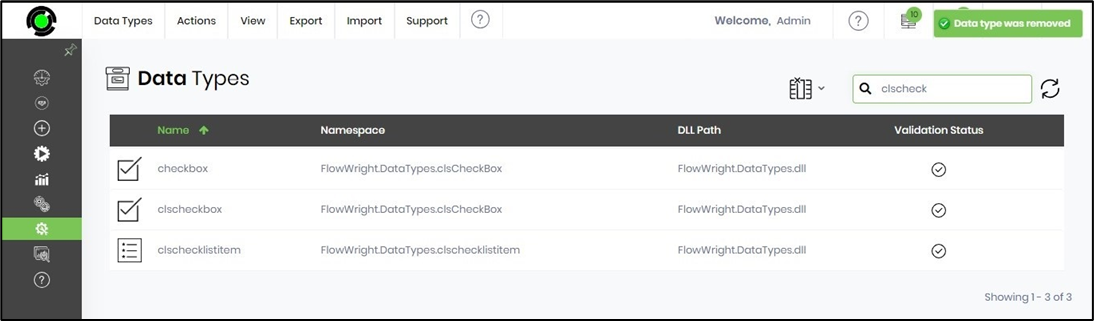
The data type is deleted, and a confirmation message indicating successful deletion is displayed at the top right-end corner. Note that a data type cannot be removed if the process steps use it.
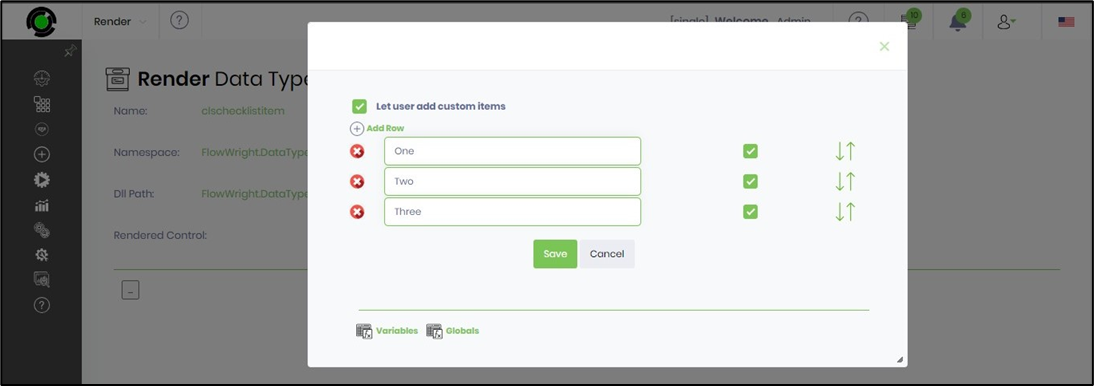
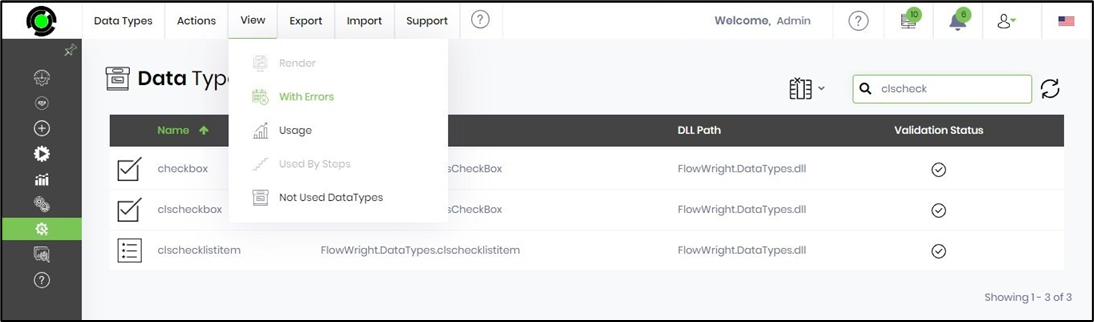
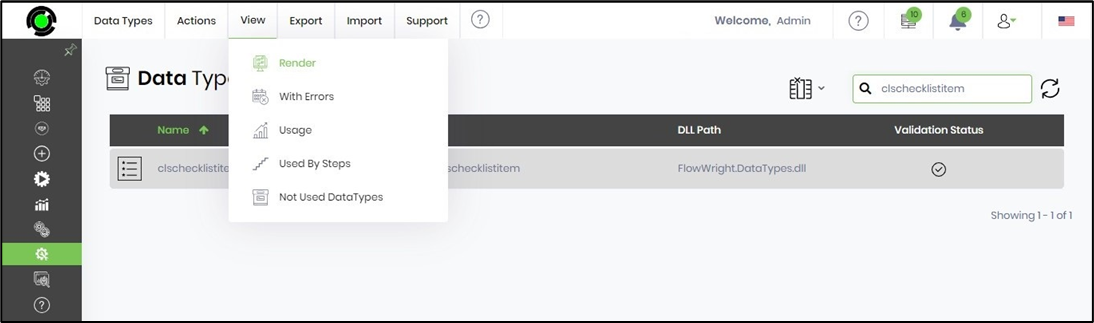
Render a data type
Select the data type from the list table on the Data Types page and click on the View - Render menu option.

The data type configuration is rendered on a new page, as shown below. Click the red UI button to verify the namespace and DLL path information.

The user interface is displayed in the popup window below. You can verify the UI controls to understand their functions. In this example, the checkboxes are validated for mandatory responses, the add row button is validated for new rows, and the shuffle arrows are validated for the textbox position in the user interface.

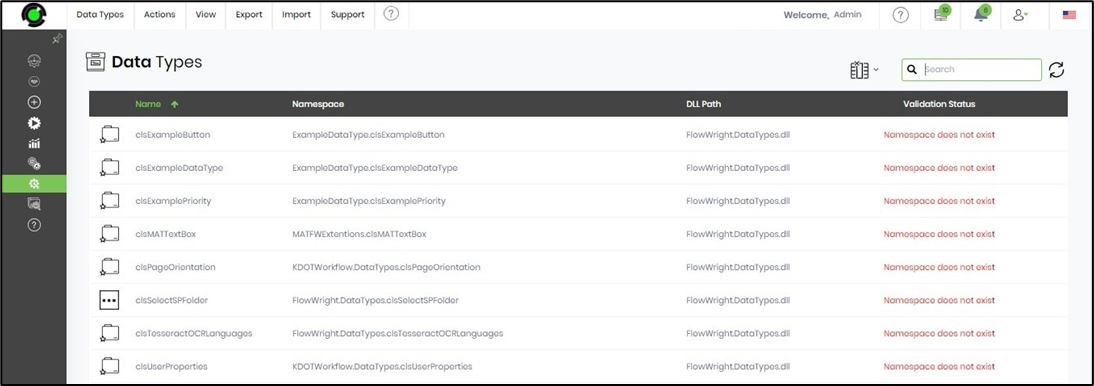
View data type with errors.
On the Data Types page, click on the View - With Errors menu option.
The table below displays a list of data types that have failed the configuration. The “namespace does not exist” error must be resolved manually by modifying the data type configuration.
View data type usage.
Click on the View - Usage menu option on the Data Types page.

The usage of data types across the process steps is represented by a graph. In this example, the “string” data type has been used 569 times across 272 process steps available in the FlowWright application at this time. You need to hover the mouse on the graph to view the data set.
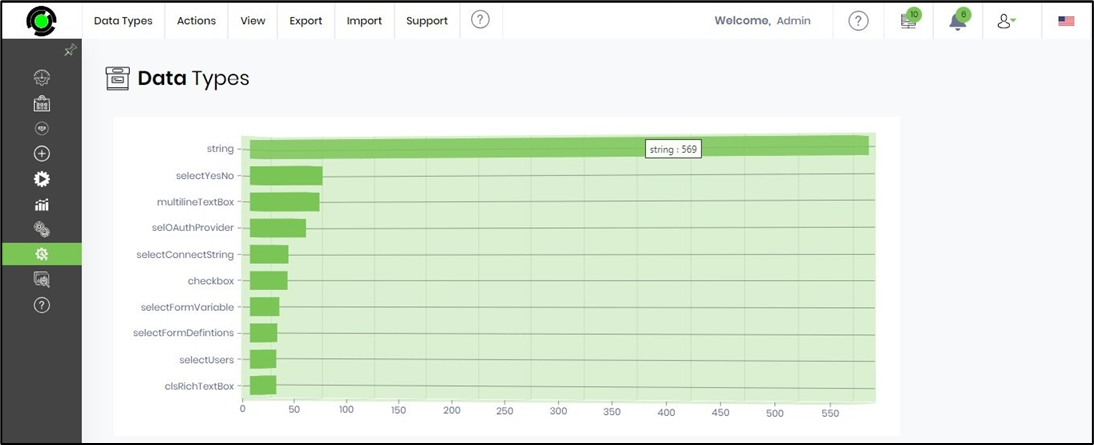
The total count of process steps in FlowWright at this time.

View data types used by the process steps.
Select the data type from the list table on the Data Types page and click on the View—Used By Steps menu option. You can also use the Search textbox to narrow the list.

The data types the process steps use are listed in the popup window, as shown below.

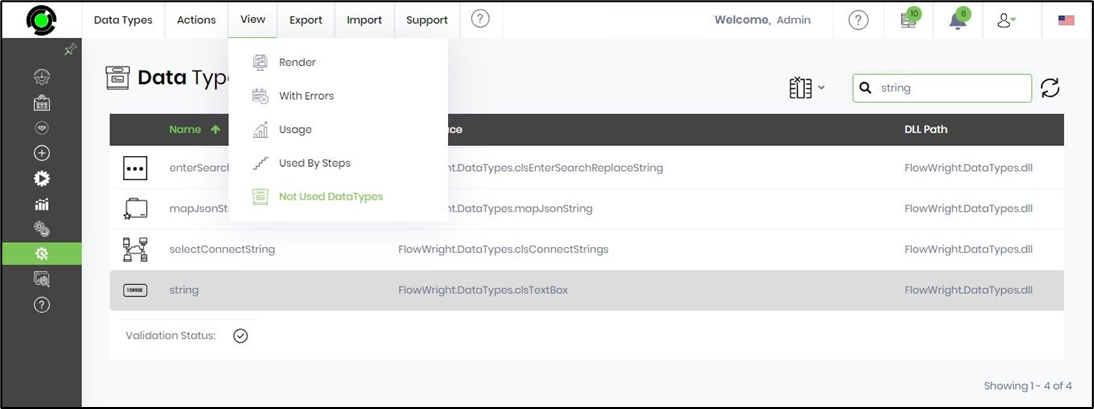
View data types NOT used by the process steps.
Select the data type from the list table on the Data Types page and click on the View—Not Used By Steps menu option. You can also use the Search textbox to narrow the list.
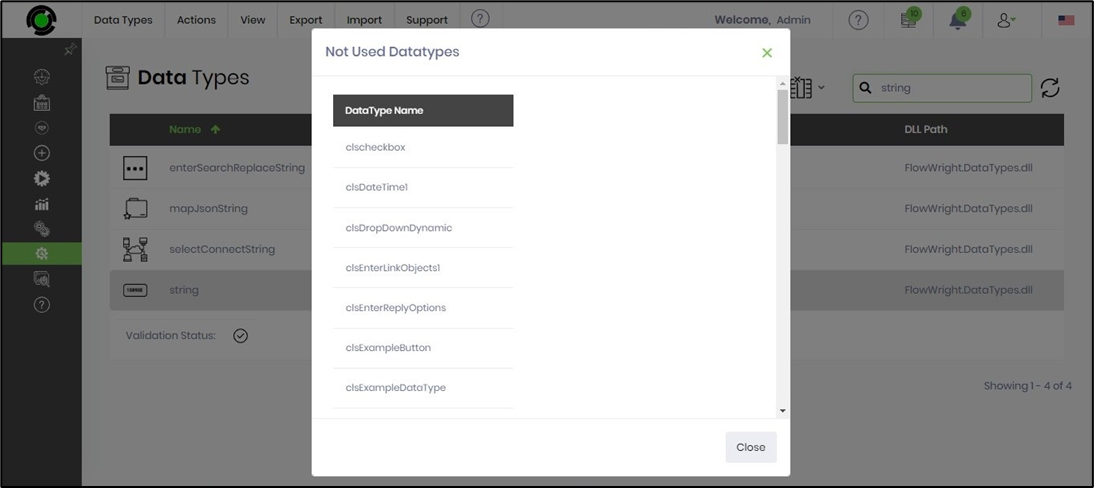
The data types not used by the process steps are listed in the popup window, as shown below.
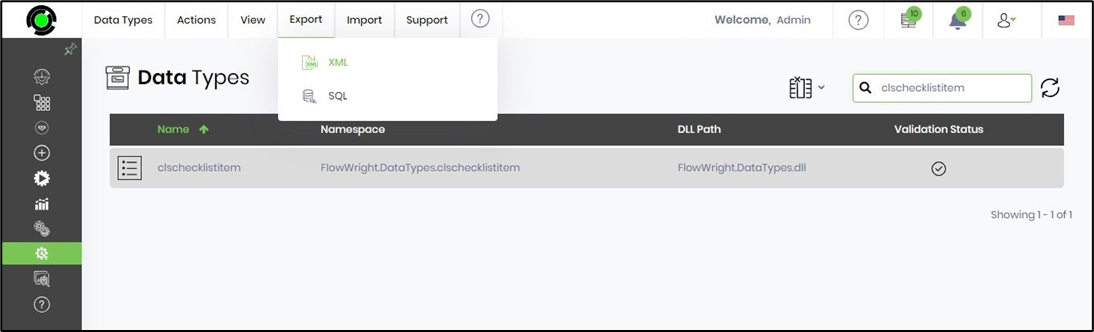
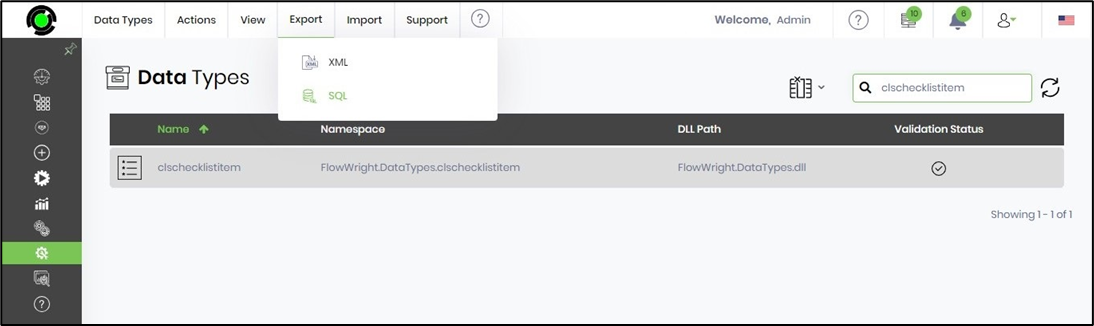
Export a data type
This function exports a data type as an XML/SQL file. You may move data types between FlowWright environments using the Export and Import function.
Navigate to the Administration—Data Types page and select the data type from the list. Then, click on the Export—XML menu option. The XML file is generated and downloaded to the local folder.
Navigate to the Administration—Data Types page and select the data type from the list. Then, click on the Export—SQL menu option. The SQL file is generated and downloaded to the local folder.
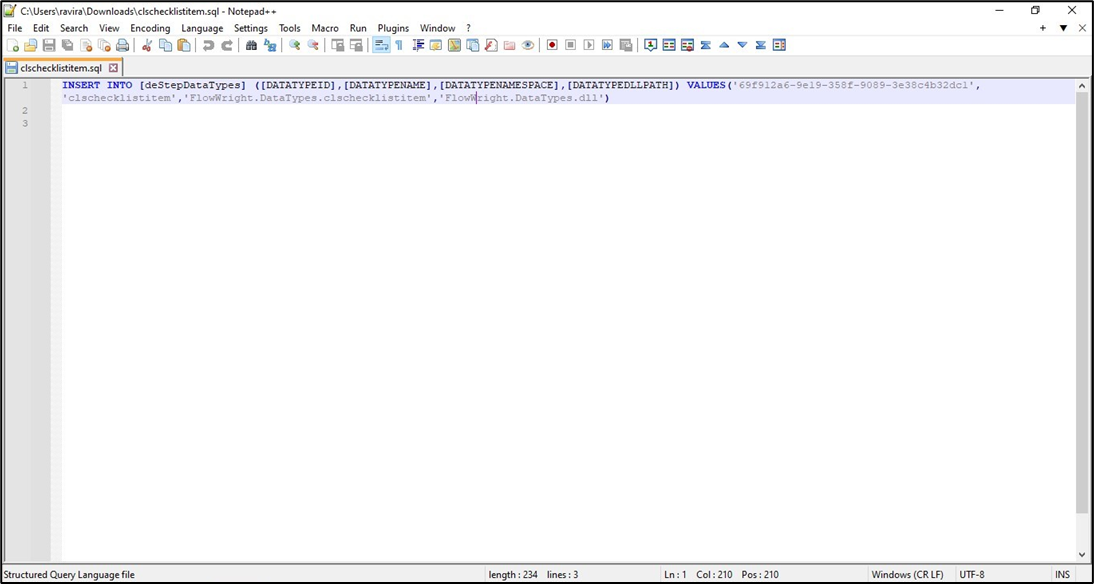
To understand the file contents, edit the downloaded SQL file using Notepad. The text contains an SQL insert statement to create the data type as designed.
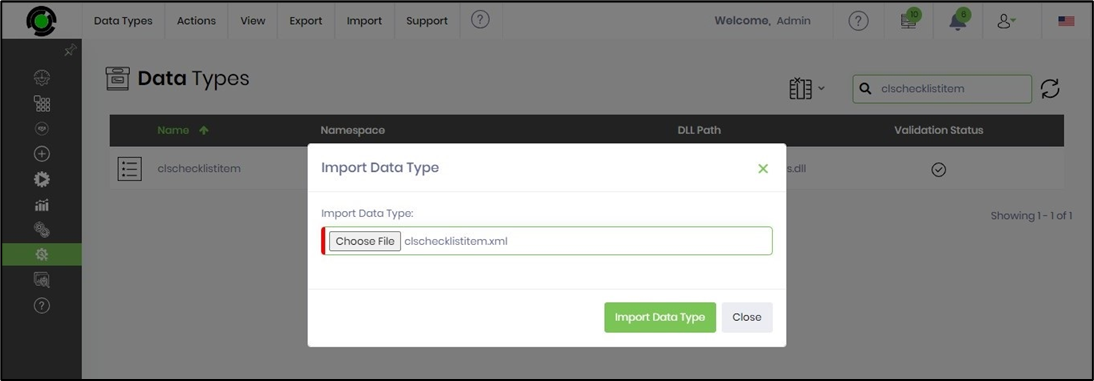
Import a data type
This function imports a data type and configures it automatically for use. You may move the data types between FlowWright environments using the Export and Import function.
Navigate to the Administration - Data Types page and select Import - XML menu option.

The popup window is displayed for configuration. You may choose the XML data type file from the local folder and click the Import Data Type button to confirm.
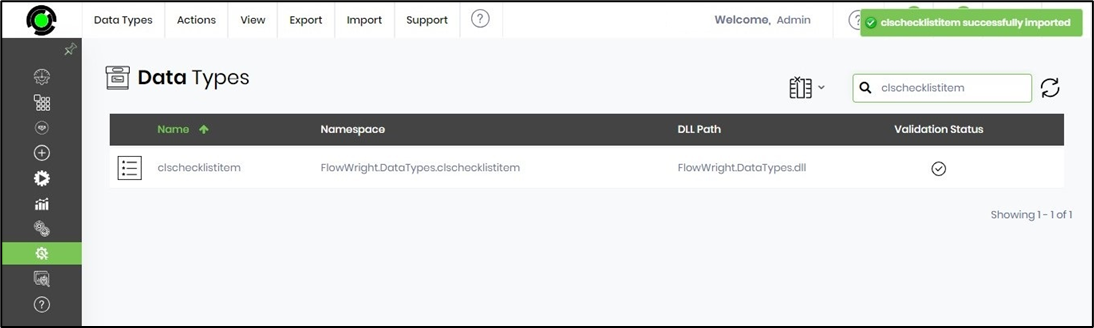
The data type is imported successfully into your FlowWright environment.
To verify the data type functionality, select the data type from the list and click on the View - Render menu option.
The data type “clsCheckListItem" provides a UI to test the feature in a popup window. The row items are added, checked for modifications during run time, and rearranged in the list order.