Users can take a snapshot(s) of the process definition by clicking on the “Snapshot Management” menu item. Snapshots are backup copies of the workflow and the definition of the process at that time. It’s a good practice to always take a snapshot of the process definition before changing. If the autosave feature is “ON,” an “Auto-Backup” snapshot is created automatically when a definition is open for design. The process definition snapshot names can be generated automatically by clicking the Generate button.
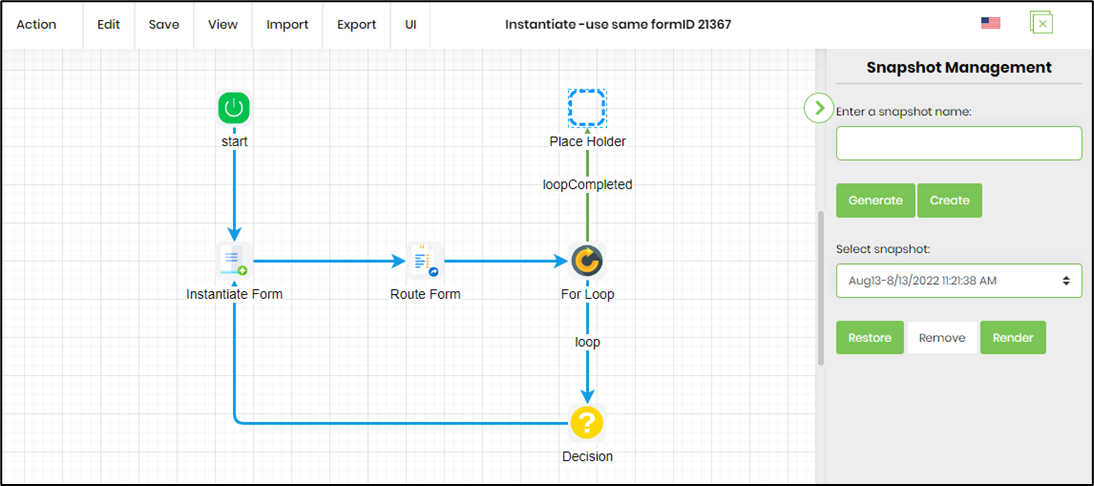
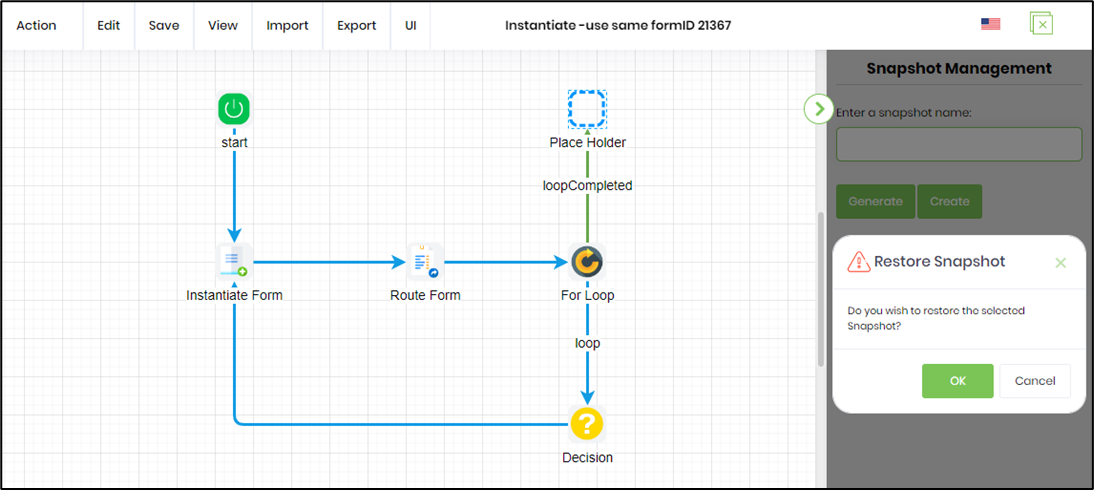
A process definition snapshot can be restored anytime by selecting the “Restore” menu item. Users can also render/view and remove the snapshot by clicking the “Render” or “Remove” menu item.
Manage process definition snapshots.
A selected process definition can have any # of snapshots over time. The process definition snapshot names can be generated automatically. The snapshot functionality helps you manage those snapshots by selecting an existing definition from the list and clicking on the “Manage Snapshots” menu item.

The user can render, get the XML, restore, remove, compare, and create a process definition based on an existing snapshot. Snapshot functionality lets you capture the workflow when creating the snapshot and later restore the workflow definition using the selected snapshot.

The compare function creates a graphical comparison of the source and target snapshots of the workflow definition.

The comparison identifies added and removed steps and steps that have different property values.

Create a process definition from a snapshot.
Users can create a new process definition by selecting the snapshot and clicking on the “Create Definition” menu item. The newly created definition will be displayed under the process definitions table as shown below:

When you click on the “Create Definition” menu item, a pop-up window will appear. In the window, provide the name for the workflow definition and click the “Create” button.

A new definition of the process will be created from the selected snapshot. All dates and times are stored in UTC and displayed in the user's local timezone.

Import Steps from snapshot
Users can import process steps by selecting the "Import" menu and clicking the "Import Steps from Snapshot" menu item.

Users then select the snapshot from the drop-down list.

Select the desired step from the list by clicking on the check box.

Click on Import Steps to start.

The Step is imported and placed in the process definition designer view and selecting the step shall display the step properties as shown below:

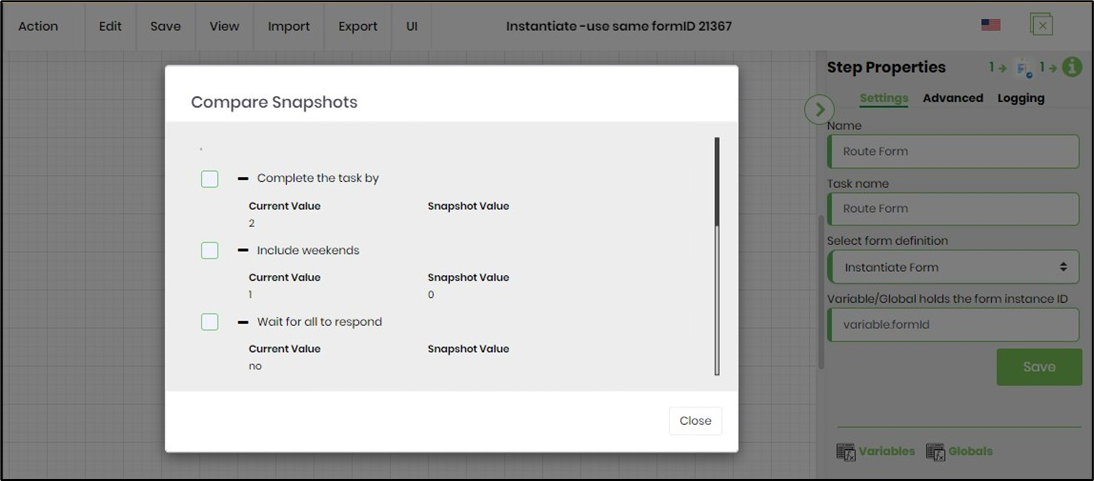
Select a workflow step and compare snapshots.
You can select a workflow step and compare snapshots to understand the step changes provided. The snapshots were created at two different timelines (before and after the step changes were made). Select the workflow step, and right-click to choose the Compare Snapshots option.

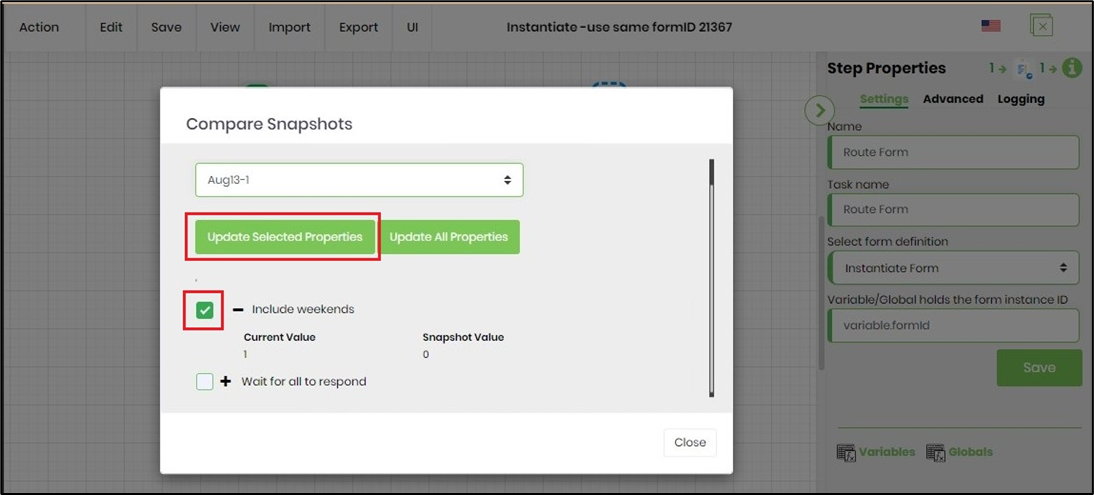
The Compare Snapshots popup window appears. Select the snapshot by name from the dropdown list, and the difference in the step input properties (or configuration) is displayed.
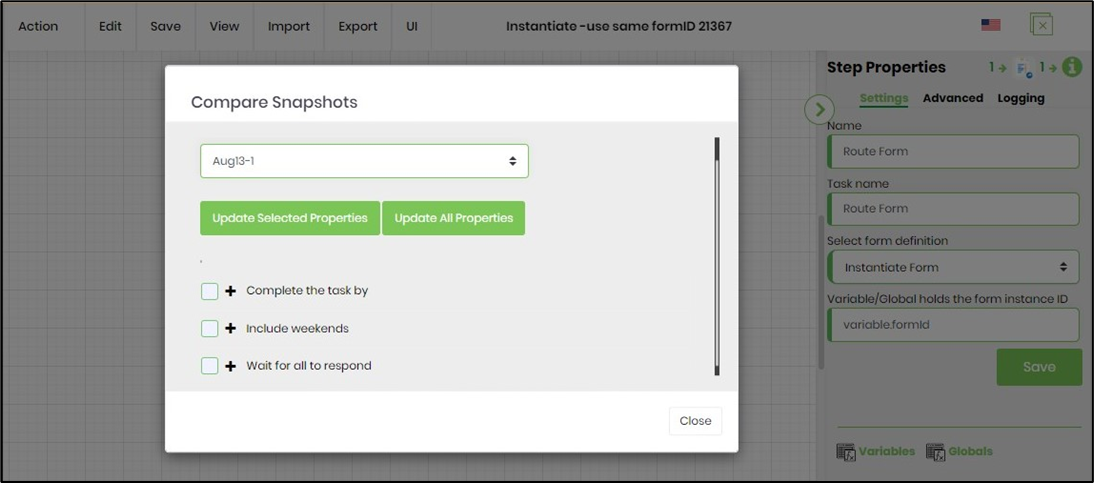
Click on the (+) sign to view the details.
Select the checkbox and click the "Update Selected Properties" button to update the changes from the previous snapshot to the current snapshot - step configuration value.
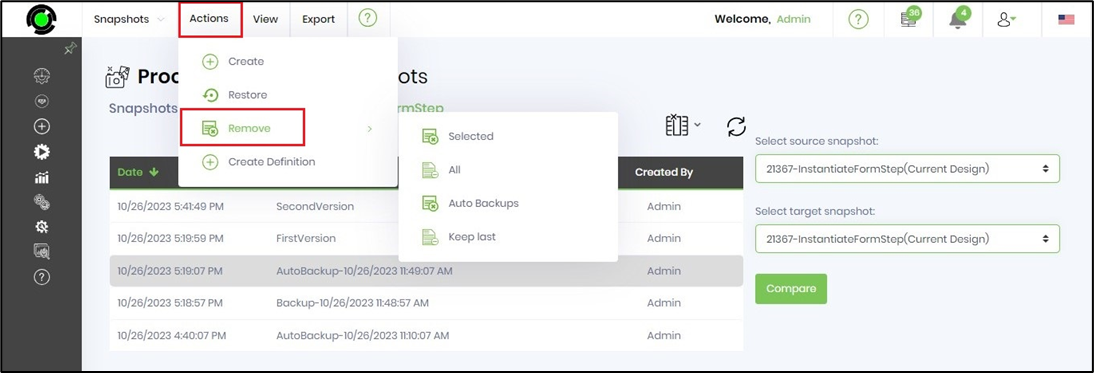
Remove a snapshot
Select a snapshot from the table and click on the Actions—Remove menu item. Choose the “Selected” option to remove the one selected. Choose “All” to remove all the snapshots for this process definition. Choose “Auto Backups” to remove all snapshots created by the system. Choose “Keep last” to remove all snapshots except the recent one. NOTE: All snapshots are permanently removed from the database.