OAuth is an open standard that lets end users authorize third-party access to their server resources without sharing their credentials, using user-agent redirects. Credential tokens are long-lived, typically for a year. In this approach, the user logs into a system. That system then requests authentication, typically in the form of a token. The user forwards this request to an authentication server, which either rejects or allows the authentication. From there, the token is provided to the user and then to the requester. The requester can then verify the token at any time, independently of the user, for validation. It can be used over time with a strictly limited scope and a defined validity period.
As an Admin User, you need to create the OAuth Authentication Provider definition in FlowWright to get started. Go to the Administration menu, then select Authentication. The Authentication Providers page opens in the same tab.

The page lists the authentication providers, as shown in the example below. Authentication Providers are sorted by Name and include columns for type, namespace, DLL path, and verification status. Use the “Search” text box to filter the results.

On the Authentication Provider page, select the "Actions > Create" menu option.

Provide an Auth Provider name, description, type, namespace, and DLL path as shown below. Click the “Validate” button to verify the configuration values.

As an Admin User, create the API Authentication Connection definition within FlowWright.
On the Authentication Connections page, select the “Actions > Create” menu option. 
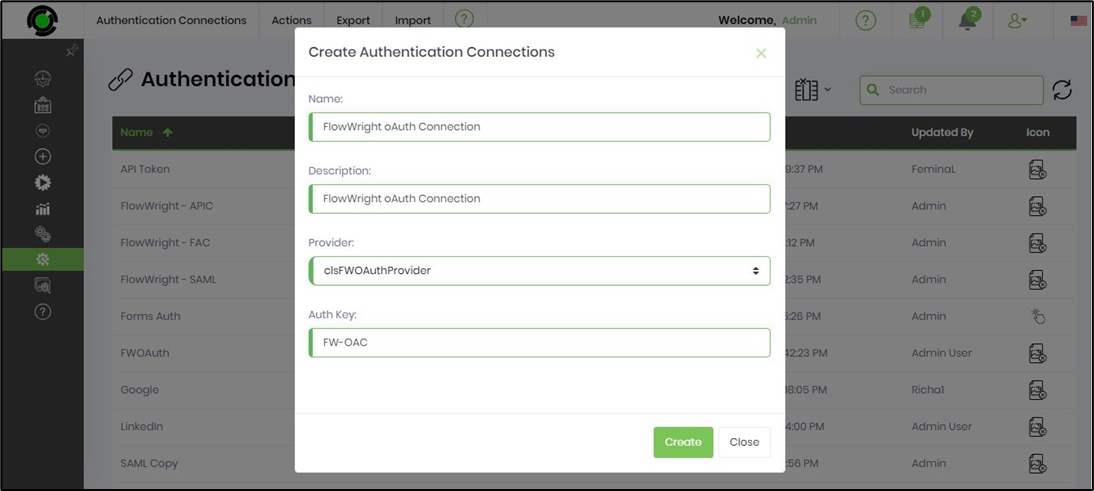
Provide an Auth Connection name and description, select the auth provider from the drop-down list, enter the Auth Key, then click the “Create” button.
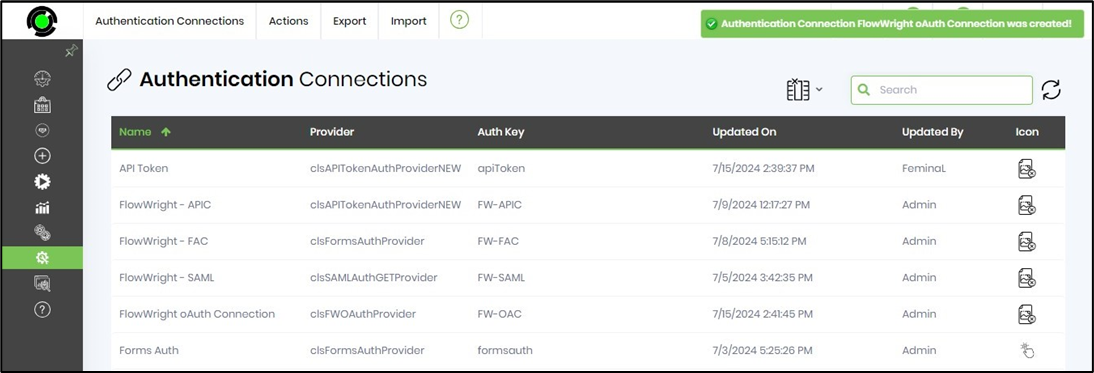
The new Auth Connection is created, and a confirmation message appears in the top-right corner.
As an Admin User, create the Login UI Auth Connection to provide a login interface for the FlowWright application.
On the Authentication Connections page, select the “Actions > Login UI Auth Connections” menu option.

The Configure Login UI Authentication Connections page is shown below. In the drop-down list, you can select which authentication connections to include or exclude from the user interface. The table below lists active OAuth connections.

Use the drop-down list to select 'Login UI Auth Connections' by enabling their checkboxes. You may also remove the login options by deselecting their checkboxes. A confirmation message appears in the top-right corner.
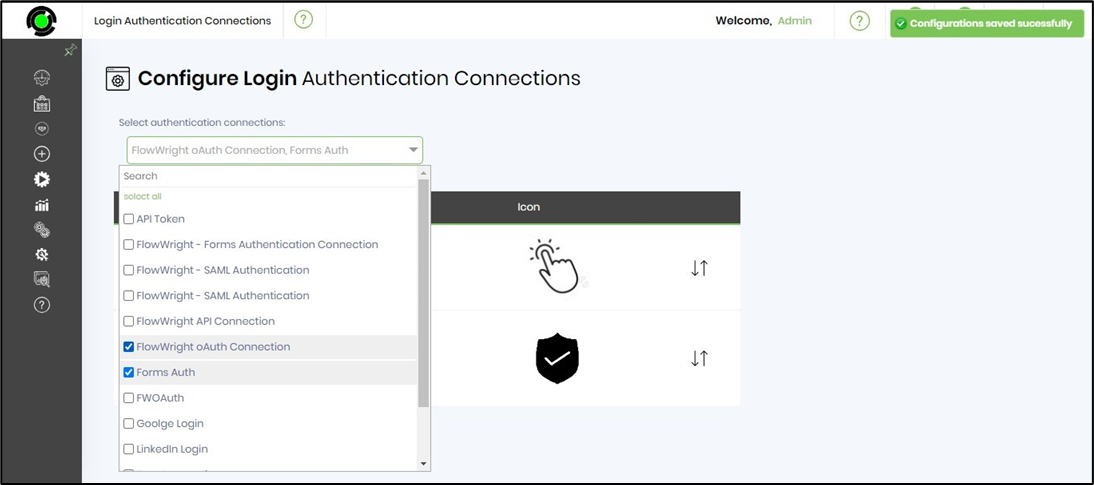
The Login UI Auth Connections, which facilitate form logins, are visible below. You may use the arrow keys to rearrange the order of the positions.