Description:
Use this step to route a form to users.
Usage:

Example:
Let’s build and execute the routeFormDef example.
- Create a new definition called “routeFormDef”
- Select the definition and click the “design” button
- Drag a routeForm step from the toolbox
- Connect the dots between the start and routeForm step

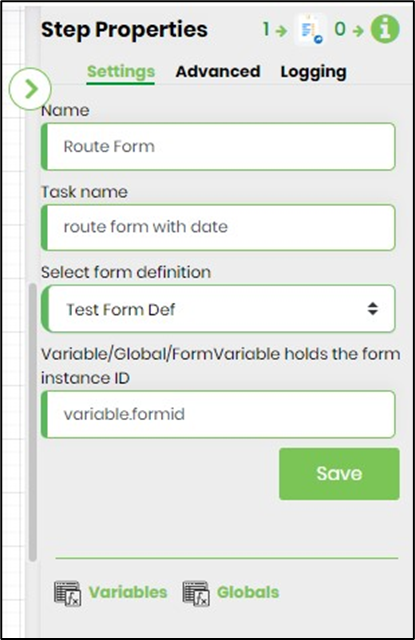
- Click on the “routeForm” step to configure its properties as shown on the below graphic. Provide a form control name. Provide a task name. Select the form definition from the dropdown list. Provide a variable or global reference to hold the form instance ID value on submission. The variable may be created prior to use or later when the process definition is saved.
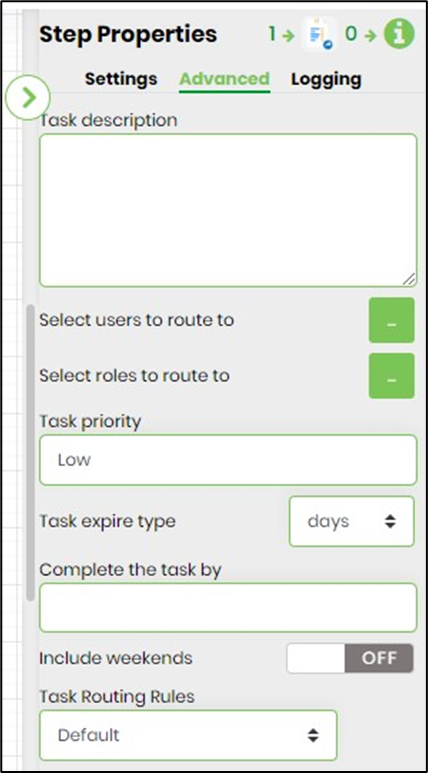
- Configure the following values for the properties as shown on the below graphic. Provide a task description. Select the users (single or multiple) to route to. Select application roles (single or multiple) to route to. Select task priority from the list (low, medium, high, normal, urgent). Select task expire type (days, hours, months, minutes). Provide the task completion duration value. Select include weekends if desired. Select task routing rules (default, task lock, least # of tasks in total, least # of tasks in duration). Task lock means the task is locked by one of the users during runtime. Task is assigned to one of the users having least # of tasks by count during runtime. Task is assigned to one of the users having least # of tasks by time duration during run time.
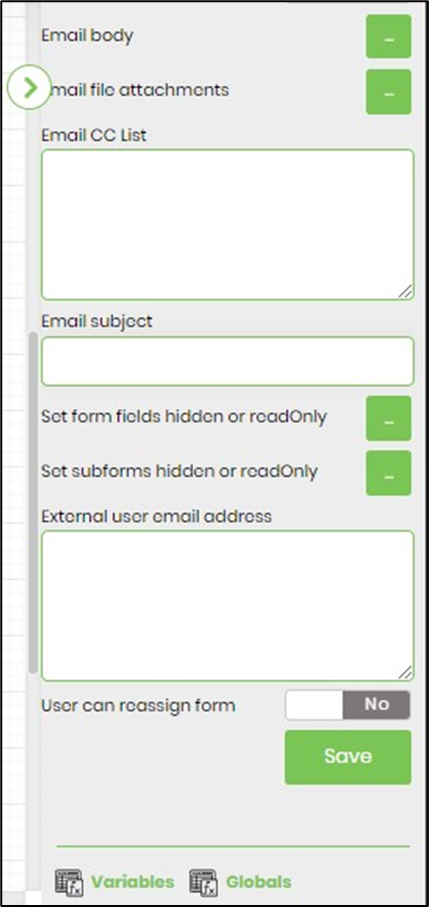
- Configure the following values for the properties as shown on the below graphic. Provide content to Email body. Select email file attachments from the application server file path. Configure the eMail CC address list (semi-colon separated), Provide email subject. Configure form fields to show/hide when rendered during run time. Configure subForm fields to show/hide when rendered during run time. Provide external email address list (semi-colon separated). Configure if user can re-assign the form during run time.
- Click on Task reminder to set task reminder intervals. Enable "Send Email Notification" to ON.Task reminders configured with a positive value is calculated from the task created date. Task reminders configured with a negative value is calculated by reducing that duration from the task due date. The task reminder message body supports line breaks.

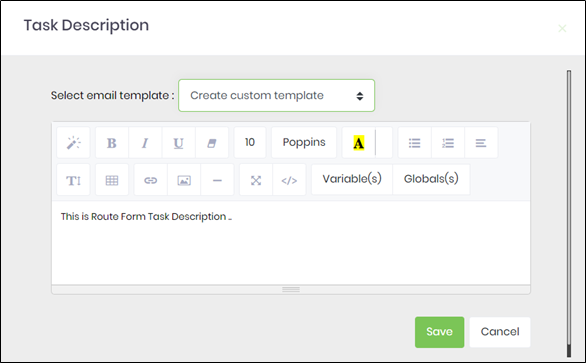
- Click on Task description and use the template or create new template content for task description then save.
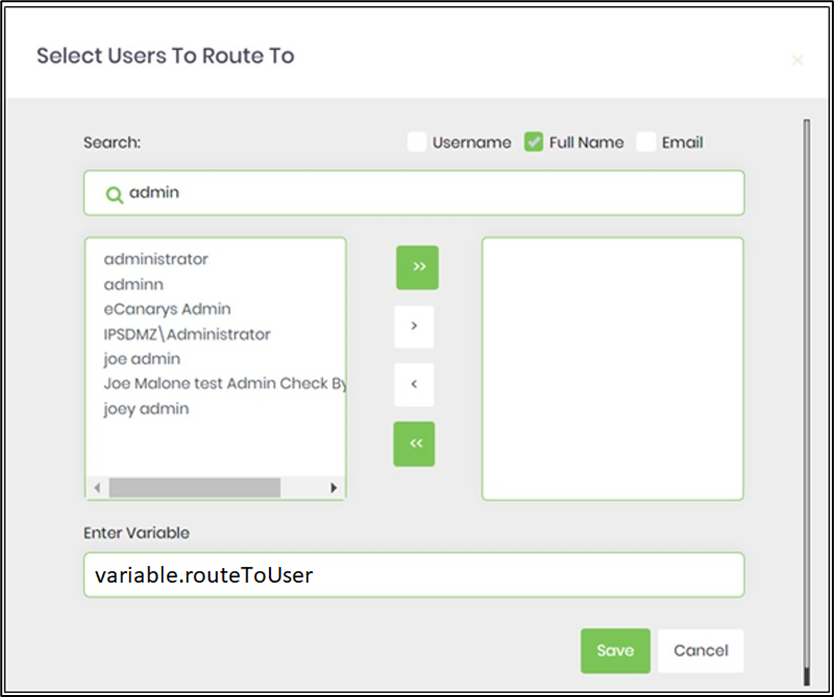
- Click on Select users to route to and select users.
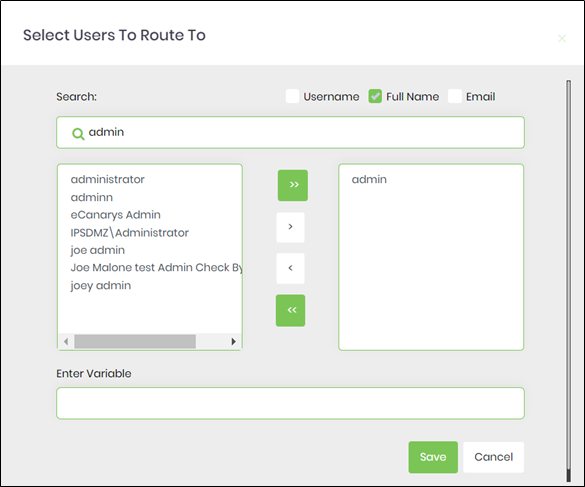
- Enter the variable containing the reference to User's GUID (not the user name)
- Click on Select roles to route to and select application if want to assign.

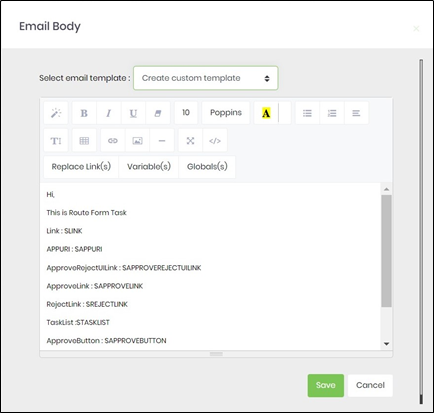
- Click on email body and use the template or create new template content for task description then save. Use Copy and edit button to edit existing content as optional.
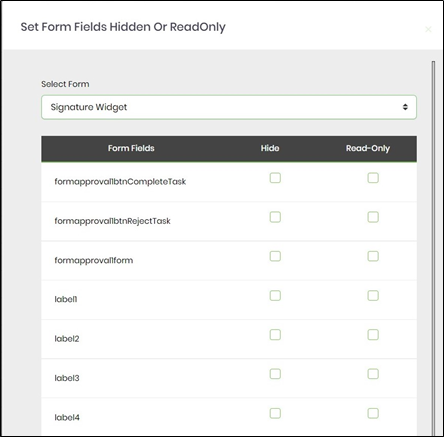
- Click on set form fields hidden or read-only to make form fields hidden or read-only while rendering.
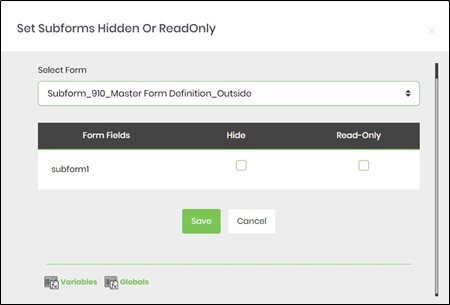
- Click on set sub forms hidden or read-only to make sub forms hidden or read-only while rendering. If selected form has sub-forms then we can use this feature.
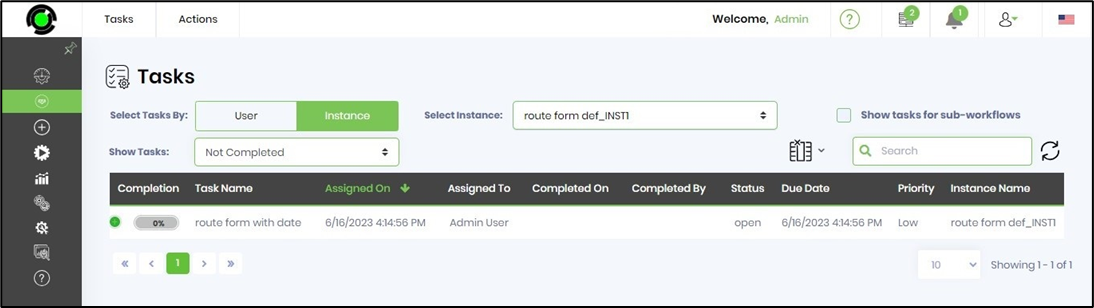
- Save the process definition, create a process instance and execute. The RouteForm step should submit the form and route to users.
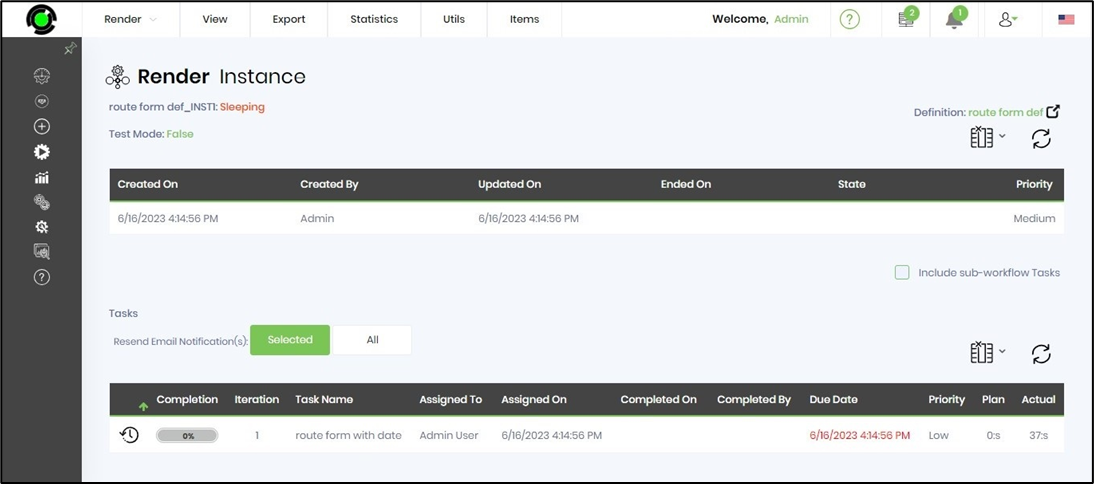
- Navigate to Run - Process Instance - select the process instance and click View → Render menu option.

- On Render Instance page select Items - Tasks menu option to view the tasks executed until that time.
- Also, Navigate to Engage - Tasks page to view the Tasks routed to the resource.