A task step can be assigned to multiple users and configured to stay locked for other users during use. Let's understand the configuration and flow through an example here.
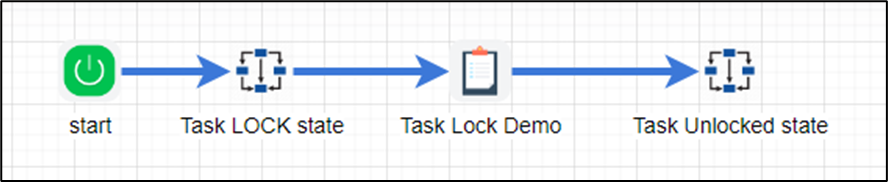
Create a new process definition and drag the task and process steps to the designer canvas.
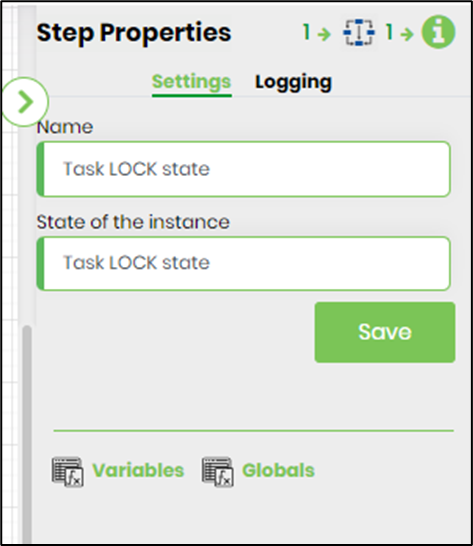
Select the first process step and click on the “Settings” tab. Provide the name and the process instance information.
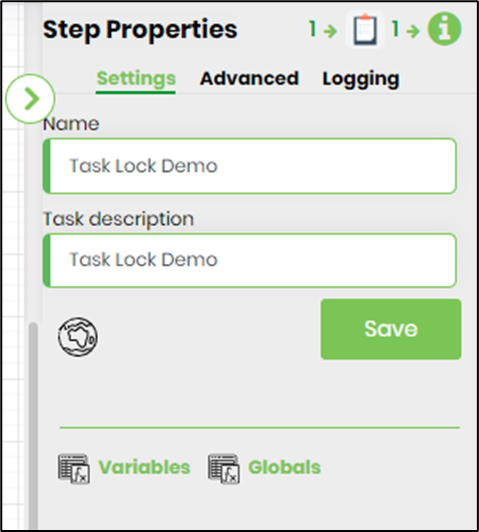
Select the task step and click on the “Settings” tab. Provide the name and the description information.
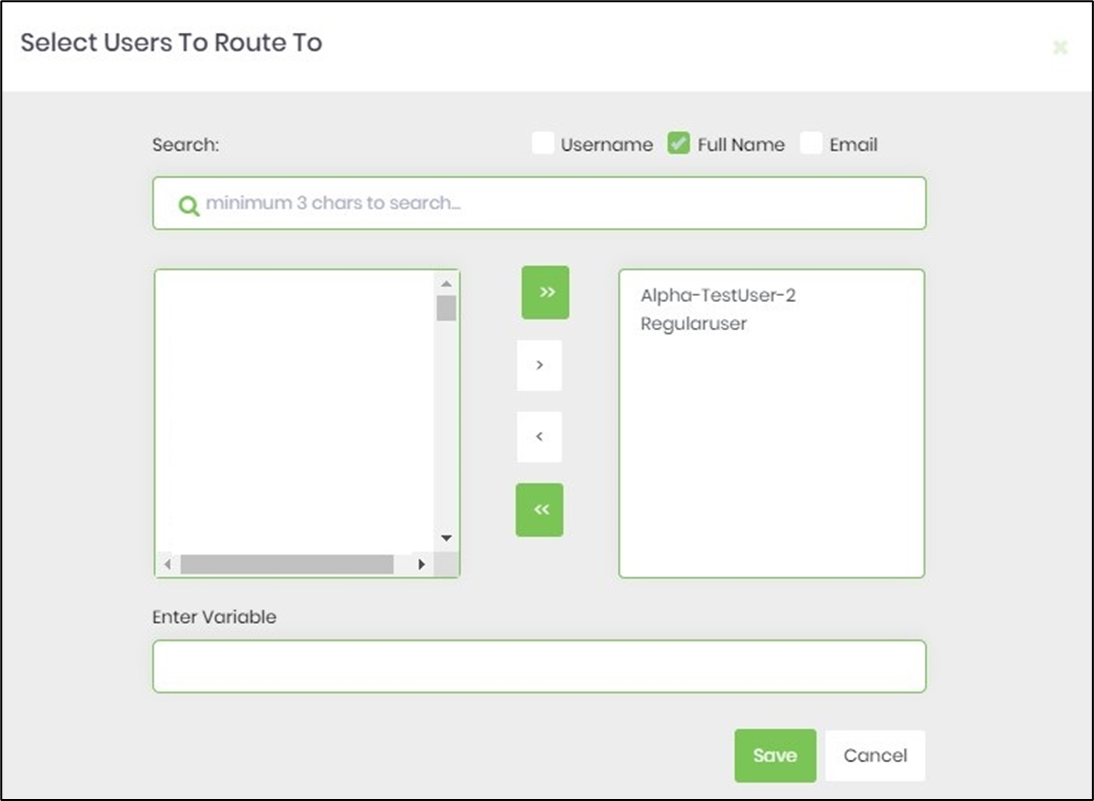
Select the task step and click on the “Advanced” tab. Click on the button to select users to route to. Provide task detail description. Provide text info on item tasks that are routed. Provide URL (if necessary).

Click on the button to select users to route to. Click SAVE to confirm the action.
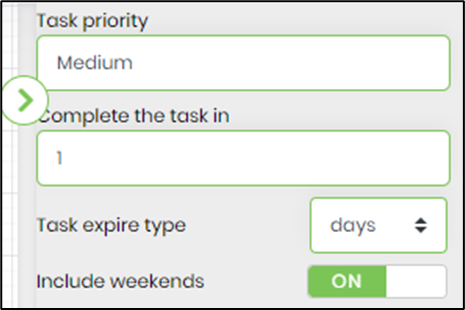
Select the task step and click on the “Advanced” tab. Select the task priority (low, medium, high, normal, urgent). Provide the task completion duration. Select weekends ON if the task duration includes a weekend.
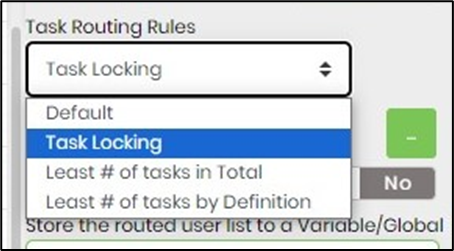
Select the task routing rules from the drop-down list (default, task lock, most miniature # of tasks in total, most minor # of tasks in duration). “Default” means the task has no lock status during run time. “Task lock” means the task is locked by one of the users during runtime. A task is assigned to one of the users having the least # of tasks by count during runtime. The task is assigned to one of the users having the least # of tasks by time duration during run time.
Click on the button to configure the task reminders. Select “No” to wait for all to respond. Provide a variable/global to store the routed user list during run time. Select “Yes” to send an email notification. Select “Yes” to send separate emails. Provide the email address mailbox information (if blank, FlowWright uses the mailbox configured by default). Provide email subject. Click on the button to configure the email body. Click on the button to configure email file attachments.
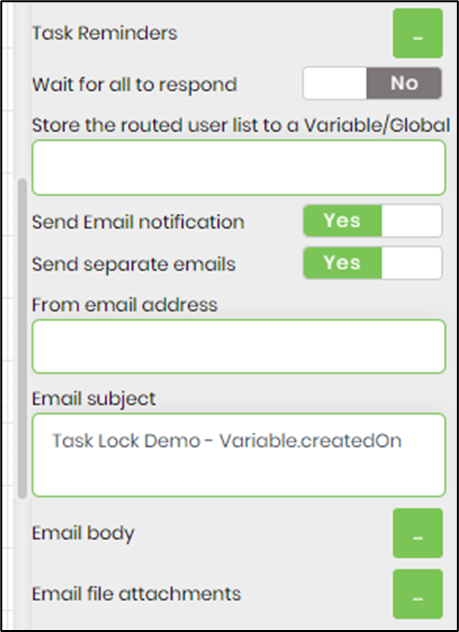
Provide the email CC list. Select “Yes” to send an expired email notification. Select “No” to send an acknowledgment link. Provide a value to change the default label text for the approval and reject buttons. Select “No” to hide the reject button. Select “No” to reassign the task by the user during run time.

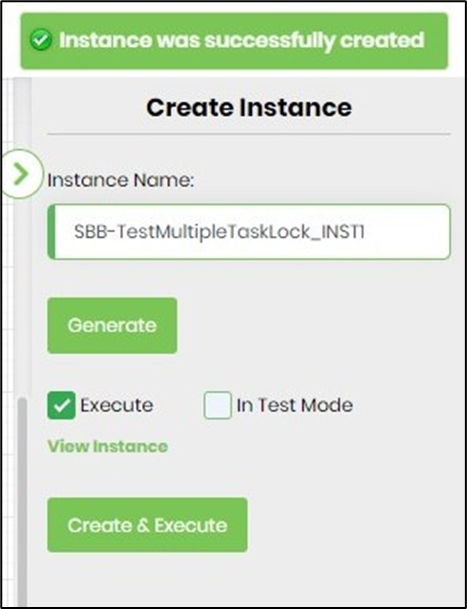
Save the definition. Create a new process instance and execute.
The task is assigned to the users as seen on the task page by the ADMIN user.
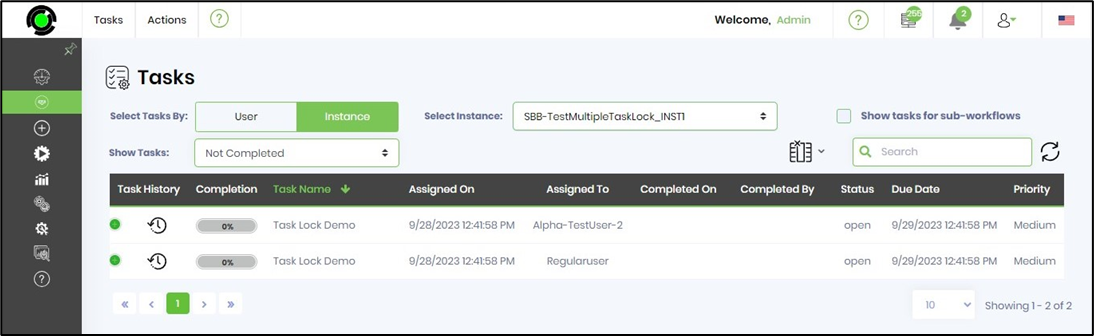
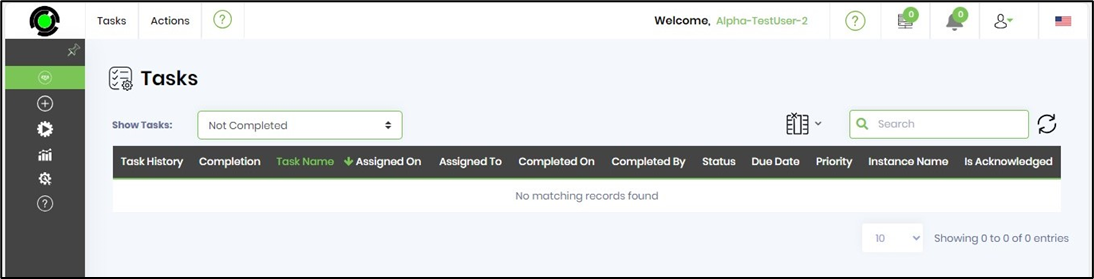
The task assigned is seen on the task page by the Alpha-TestUser-2 user.

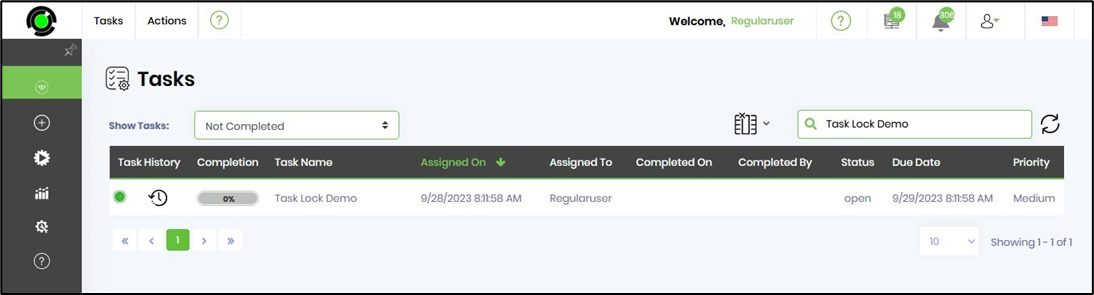
The task assigned is seen on the task page by RegularUser.
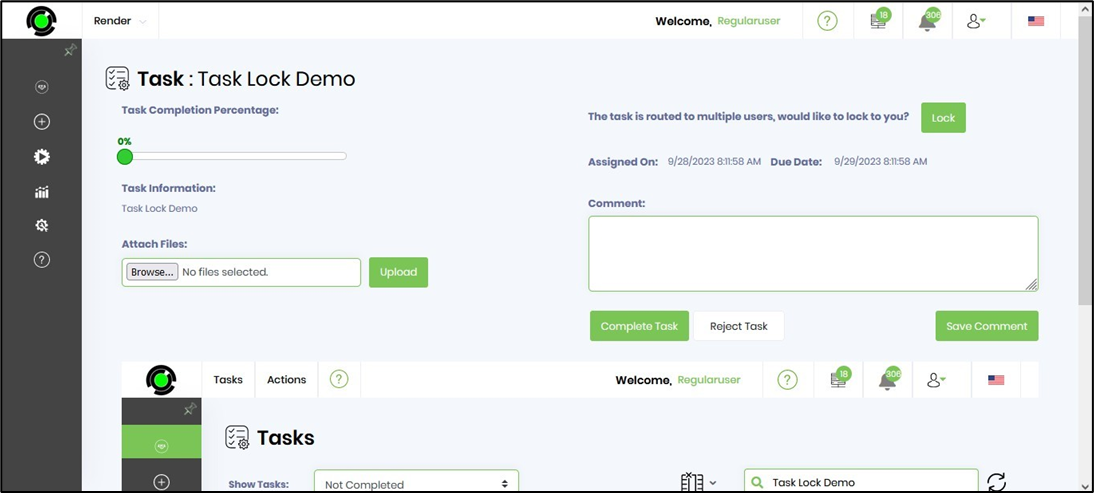
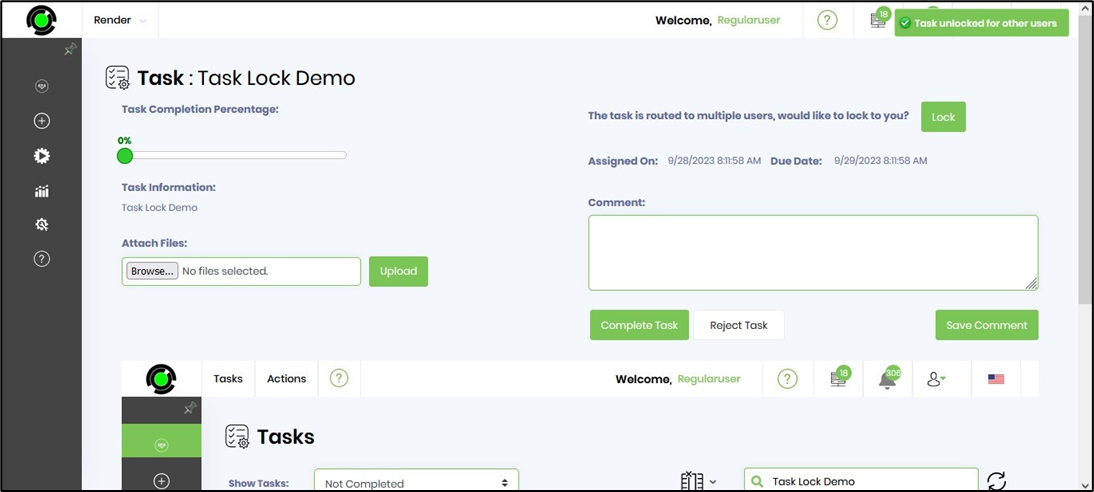
The first user to open the task notices an alert to lock the task for self (as shown in the following UI).
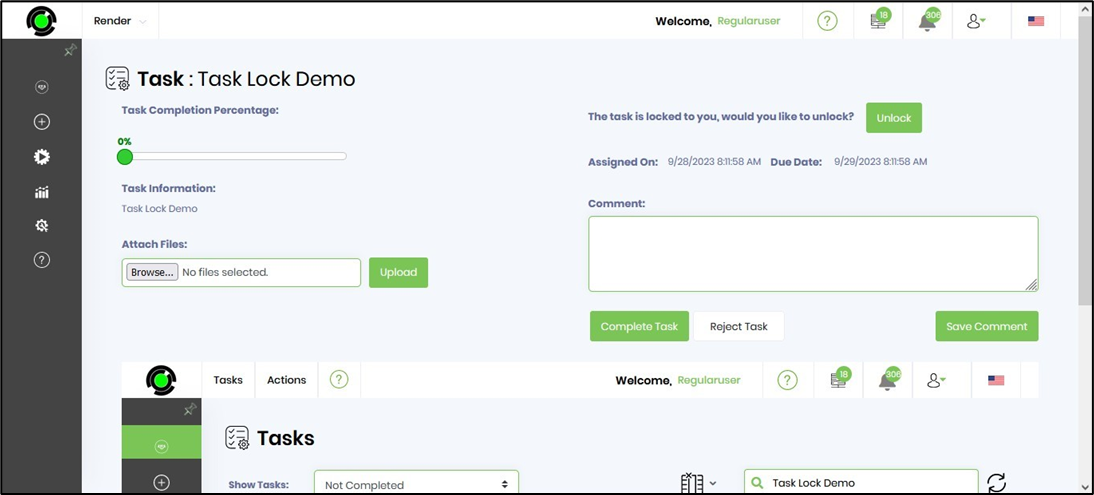
On confirmation, the task is locked to the first user until completion, or the user can unlock the task (and make it available for other users assigned to this task).
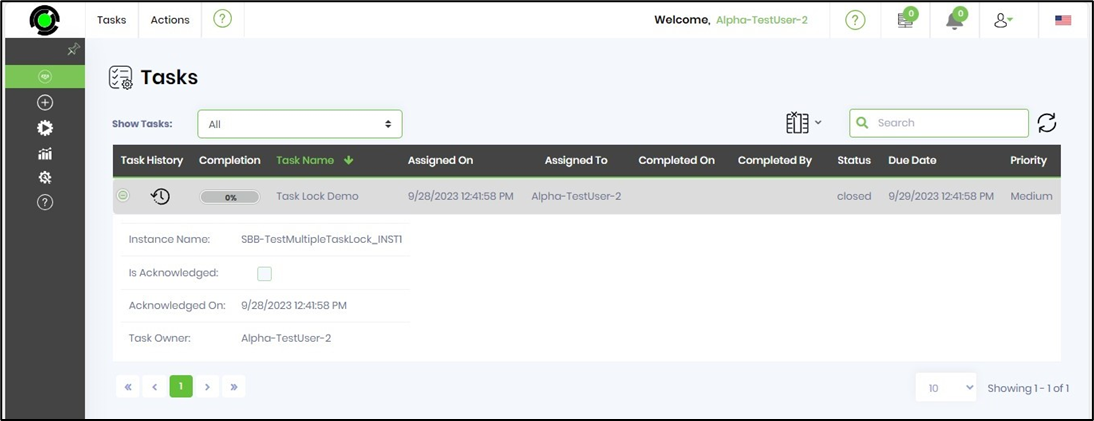
The locked task is not visible to the second user, as shown in the following UI (per the task filter).
The locked task is completed by the second user, as shown in the following UI (as per the task filter).
The first user unlocks the task, as shown in the following UI.
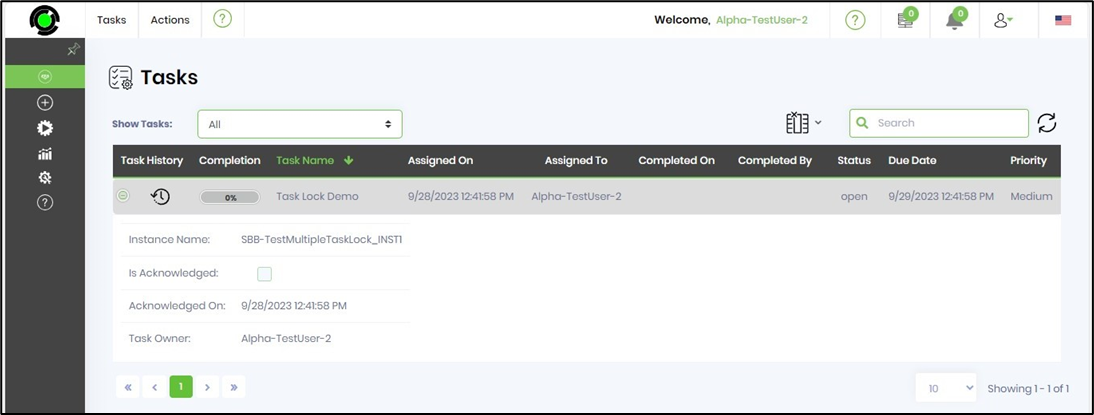
The unlocked task is now available to the second user, as shown in the following UI (as per the task filter). This way, users can lock the tasks until completion.
The other task lock mechanism works similarly to the “Task lock” illustrated above.
Task lock “Default” means the task does not have a lock status during runtime. “Task lock” means the task is locked by one of the users during runtime. The task is assigned to one of the users having the fewest tasks by count during runtime. The task is assigned to one of the users having the fewest tasks by time duration during runtime.