EditGridData form UI control provides in-place data editing with a certain level of functionality.
Use a SELECT SQL statement to fetch records from a single table or form data table and edit them in a grid. Configure the form control and route the form through a workflow where a FlowWright administrator can approve the edit grid modifications.The SELECT statement can also fetch records from multiple tables, and the grid behaves in read-only mode.
With In-place editing of data;
- Define what fields (columns, rows) can be modified or not
- Ability to define editable controls with complex configuration
- Use (text box, drop-down, checkbox, date picker) controls for editing
- Trigger individual processes from the EditGridData form
Example (construct):
This setup requires two sets of process and form definitions to construct and execute.
A FormFill (form definition) accepts sample user input and stores it in a data table by a process instance.
A FormFillEditGrid (form definition) displays the above data table in an EditGridData control, with provisions to approve and submit.
An ApproveForm (process definition) instantiates a workflow and routes the FormFillEditGrid to a user for approval and submission.
A WorkflowFillForm (process definition) instantiates a workflow and routes the FormFill to a user to accept user input into a data table.
Let’s build the FormFill example.
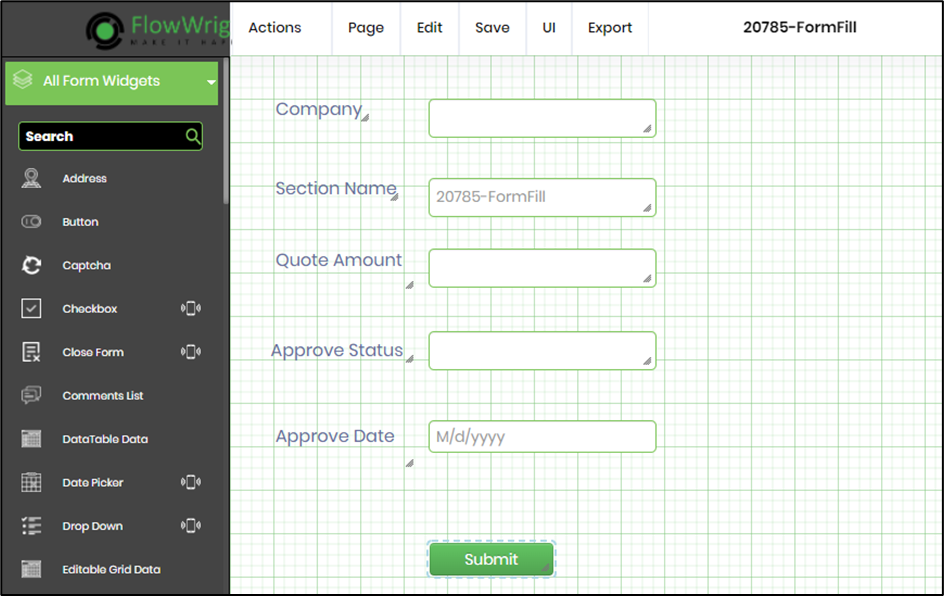
- Create a new form definition called “FormFill.”
- Select the Open Designer checkbox and click the “Create” button
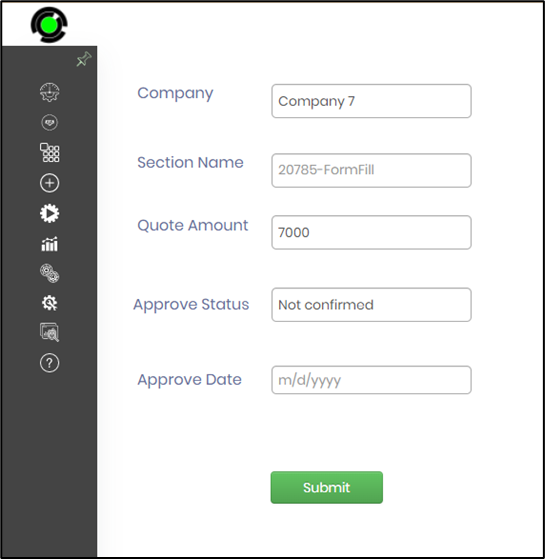
- Drag the label and text box controls. Arrange them on the canvas as shown in the graphic below. Add the form submit button also. Save the definition to confirm the changes.
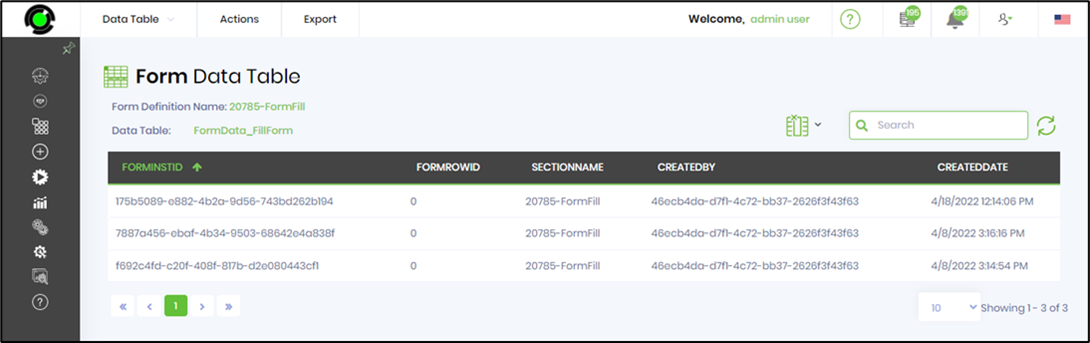
- Navigate to the Form Definitions page, select the above form definition, choose the Actions menu, and select the "Data Table" option to create a form data table (FormData_FillForm), as shown in the graphic below.
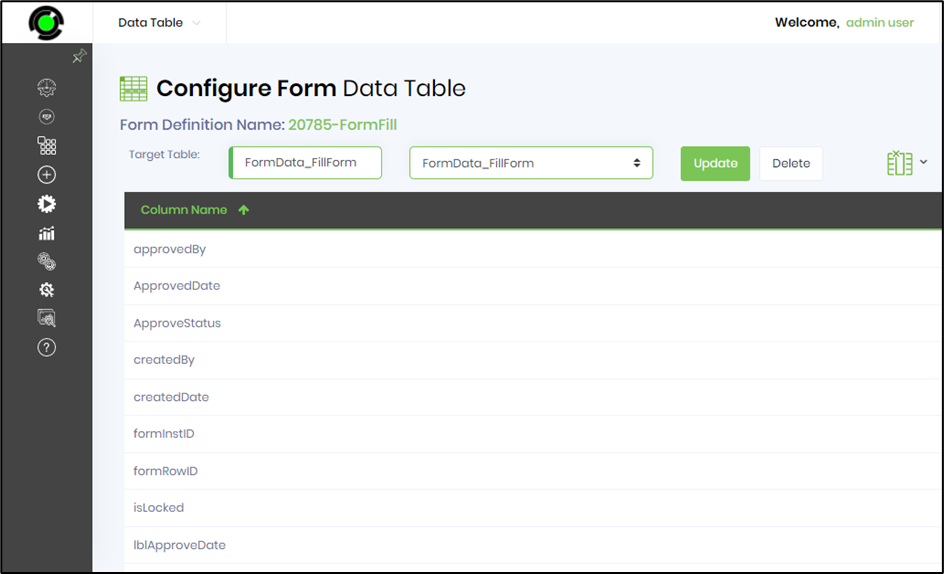
- Navigate to the Form Instances page. - select the above form definition - choose the Actions menu, and select the "Data Table" option to create a form data table, as shown in the graphic below. Save the definition to confirm the changes.
Let’s build the FormFillEditGrid example.
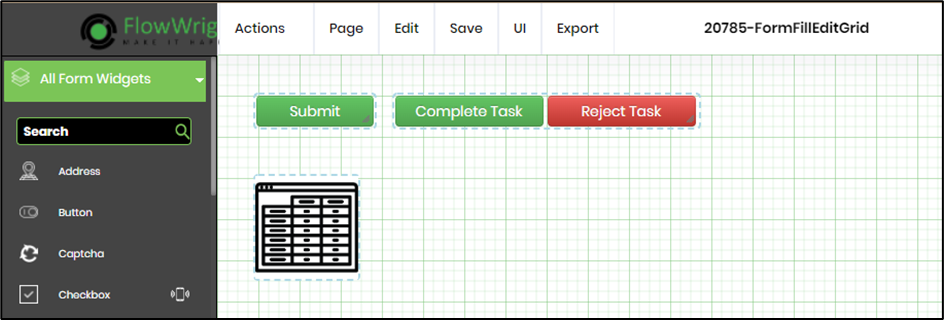
- Create a new form definition called “FormFillEditGrid”
- Select the Open Designer checkbox and click the “Create” button
- Drag the EditGridData widget to the canvas. Drag the submit, approve/reject buttons also.
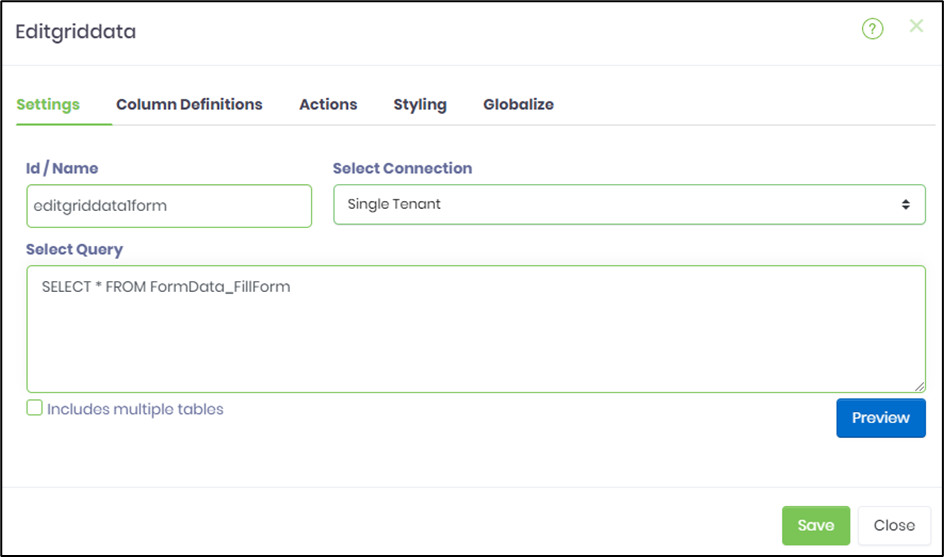
- Edit the control and configure the properties as shown in the graphic below. In the Settings tab, select the form data table as the query.
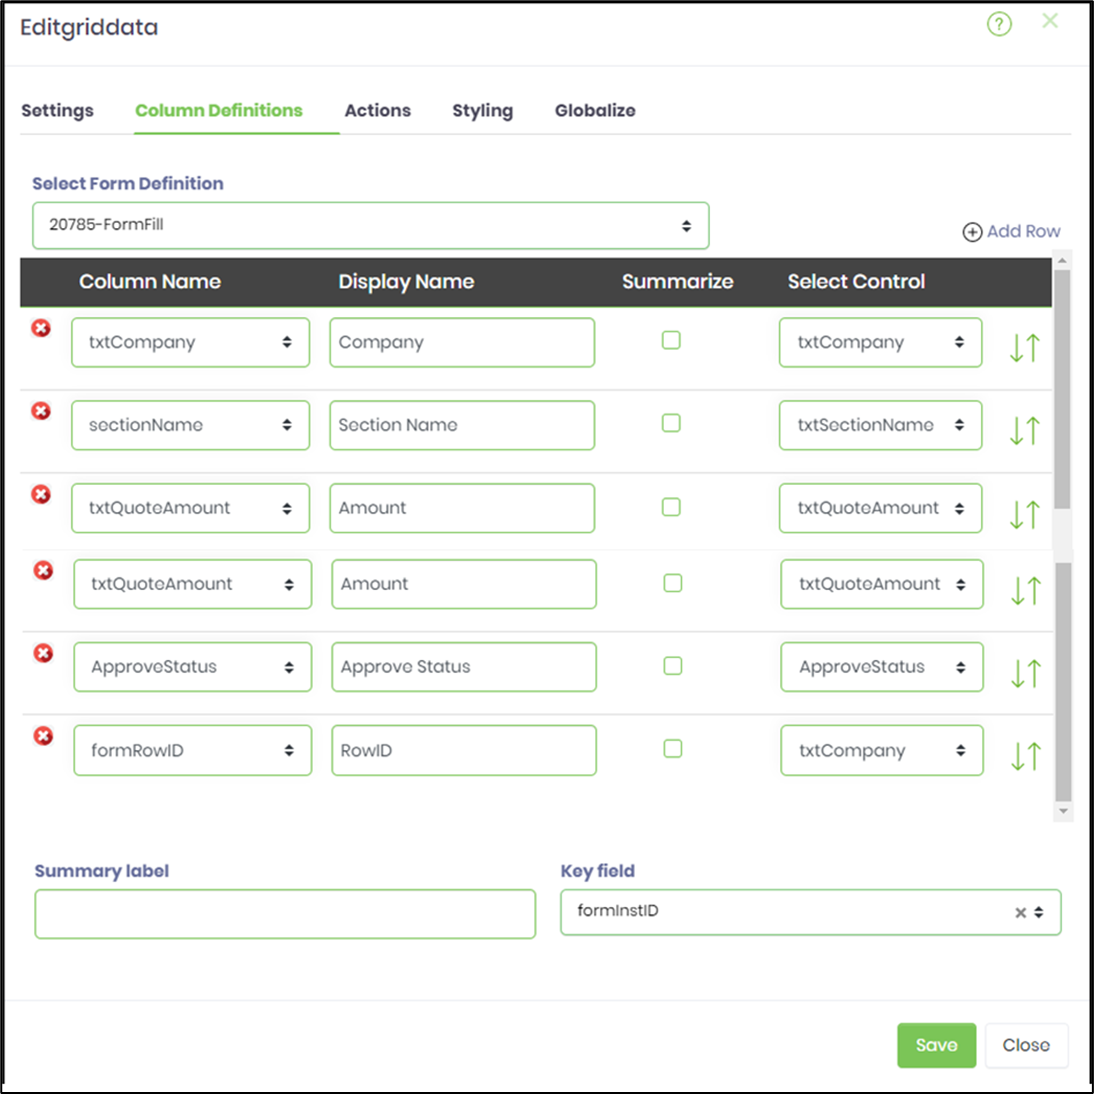
- In the Column Definitions tab, map the column names to the select control fields, as shown in the graphic below.
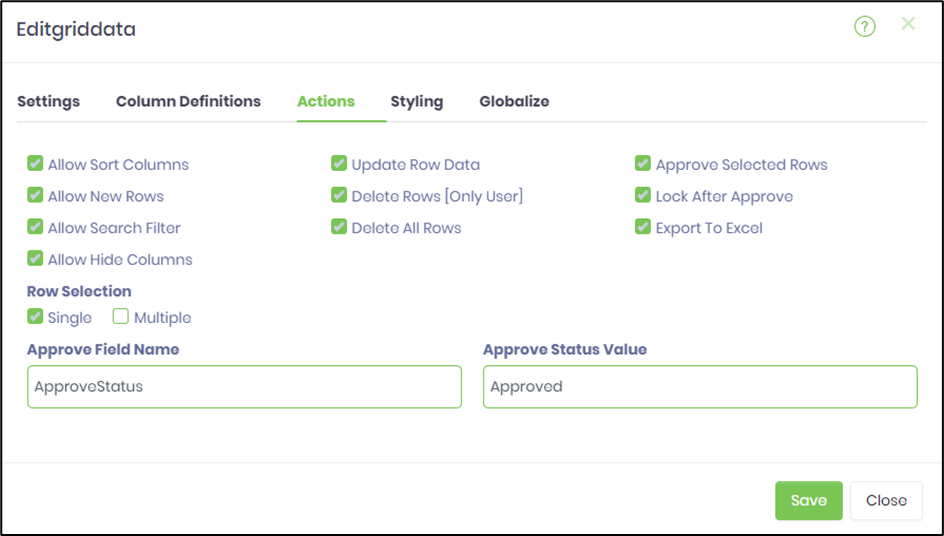
- In the Actions tab, configure the required actions as necessary, as shown in the graphic below.
- Save the form definition to confirm the changes.
Let’s build the ApproveForm example.
- Create a new process definition called “ApproveForm.”
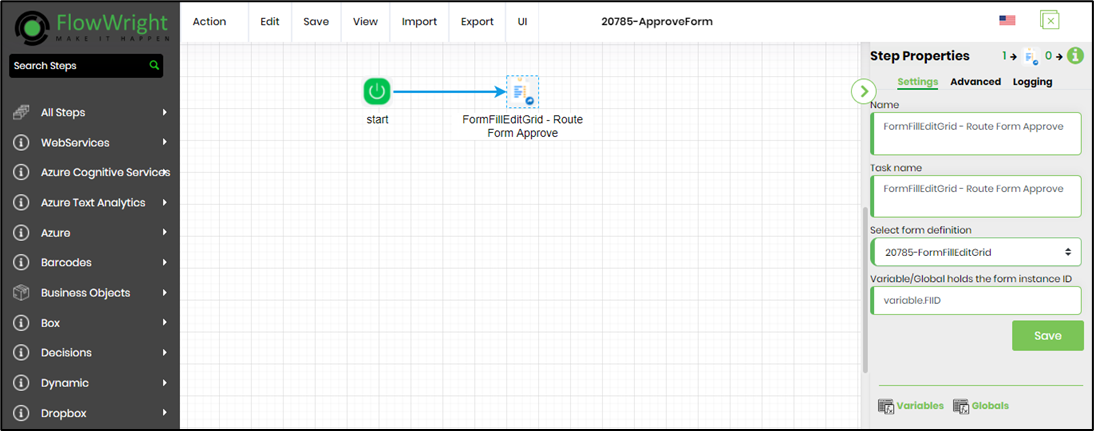
- Drag the RouteForm step to the canvas. Configure the step properties as shown in the graphic below. Map the definition of the form to the FormFillEditGrid created above. Configure the variable.FIID to hold the form instance ID. Route the step to a user. Save the process definition to confirm the changes.
Let’s build the WorkflowFillForm example.
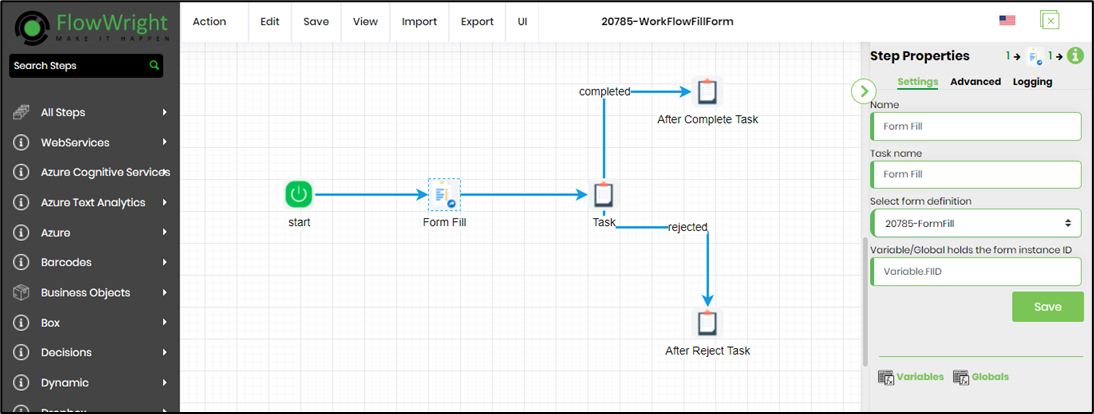
- Create a new process definition called “WorkflowFillForm.”
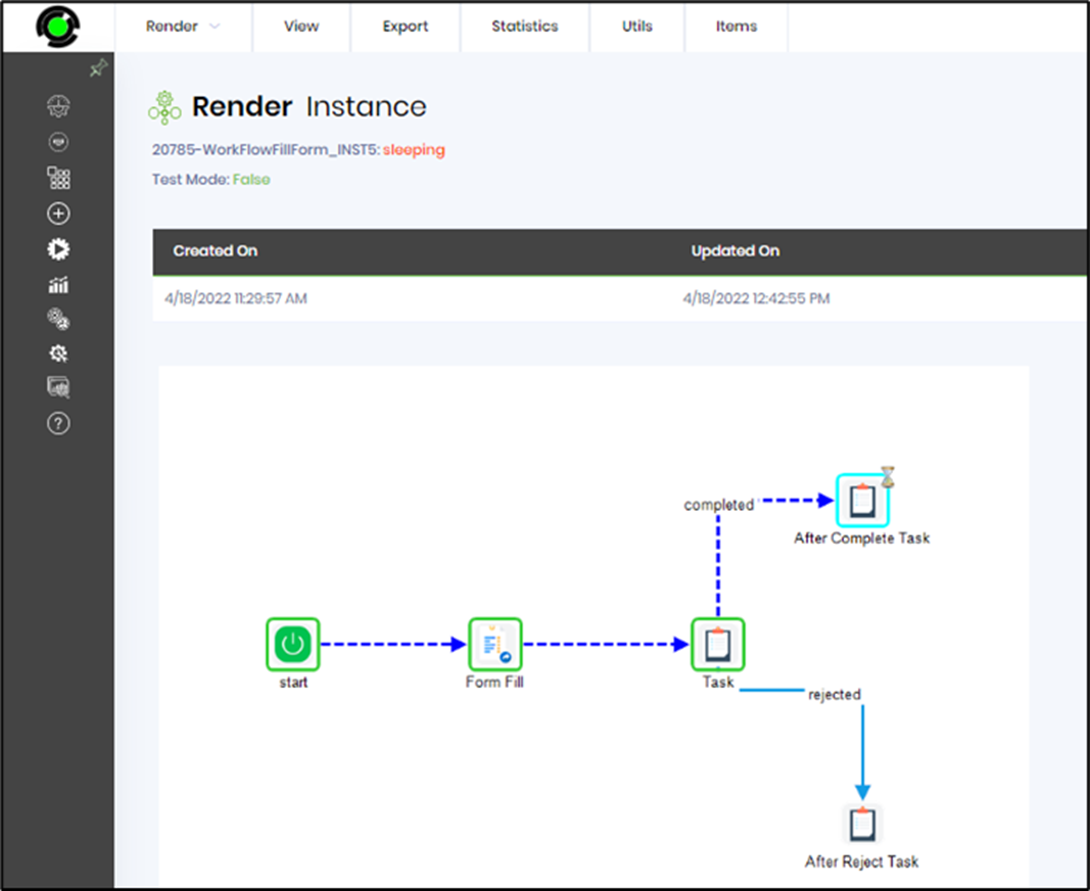
- Drag the RouteForm and task steps to the canvas. Configure the step properties as shown in the graphic below. Map the definition of the form to the FormFill created above. Configure the variable.FIID to hold the form instance ID. Route the step to a user. Save the process definition to confirm the changes.
Example (execute):
Open the WorkFlowFillForm process definition, create and execute a new process instance. This instantiates a workflow and routes the FormFill to a user to accept user input and submit it to a data table.
Navigate to Create - Data Table menu option to view the data table records.
Open the ApproveForm process definition, and create and execute a new process instance. This instantiates a workflow and routes the FormFillEditGrid to a user for approval and submission.
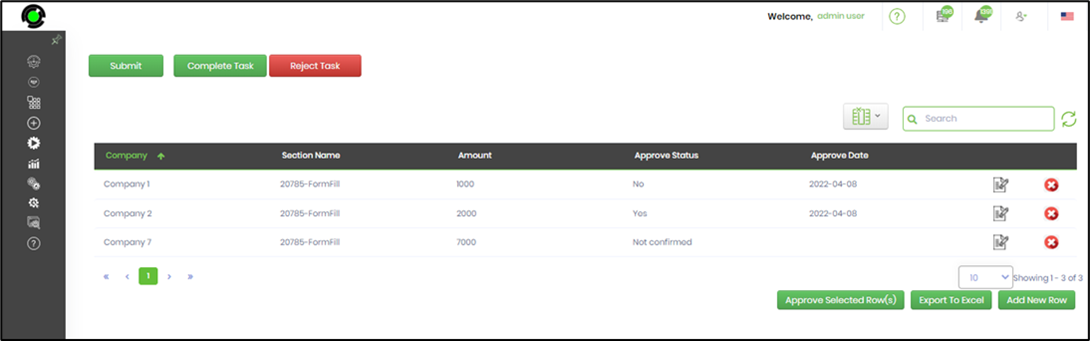
Select the record to modify the contents. Confirm the changes.
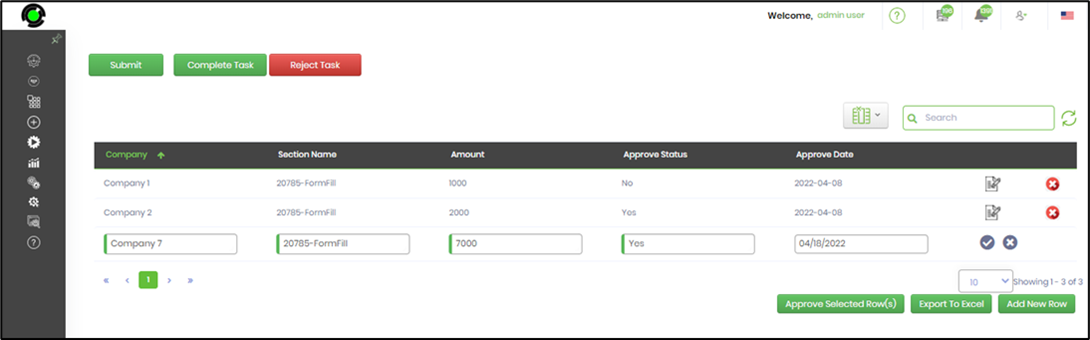
Approve the selected record and submit it.
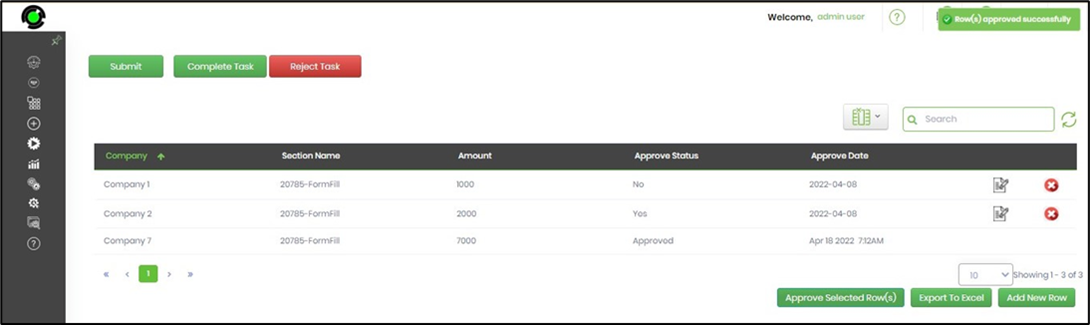
You can just navigate to the WorkFlowFillForm process instance and render to view. The submission of the EditGridData form has triggered an individual process, which has successfully navigated to the completed path.