Description:
This step routes the "checkListTask" to users. The task will include a list of user-defined checklist items.
Inputs
- routeTo – Select the list of users to route the task
- routeToRoles – Select the list of roles to route the task
- checklistitem--Configure checklist items
- taskDesc – Description of the task
- taskBody - Detailed description
- routedItem – Item that is routed
- showURL – URL to render within the task
- emailAddressses- Email addresses to route the task to
- priority – Priority of the task
- daysToComplete - # of days, minutes, hours, and months to complete the task by
- expireType – Task expire type (days, months, hours, minutes)
- includeWeekends - Include weekends (toggle ON/OFF)
- useFullDuration - the task uses the full duration and continues
- taskRoutingRules – Task routing rule types (default, task locking, least # of
- tasks in total, least # of tasks in definition)
- taskReminder- Set Task reminder to send reminder mails
- waitForAll – Yes = all users must act on the task, No = requires only 1 user to act on the task (toggle ON/OFF)
- storeRouteToUsers – Variable to store which users the task was routed to
- sendEmailNotifications – Yes = email notification will be sent to each user for the task (toggle ON/OFF)
- fromEmail – Set From email address
- emailSubject – Subject of the email message
- emailBody – Body of the email message
- emailFiles – Set the server path for file attachments
- emailCCList - Email CC List
- sendExpireEmail - Yes = email notification will be sent to each user on task expiry (toggle ON/OFF)
- sendSeparateEmails - Send separate emails (toggle ON/OFF)
- sendAckLink - Send acknowledgment link (toggle ON/OFF)
- approveButtonLabel-- Set text for Approve button label (e.g., OK)
- rejectButtonLabel-- Set text for Reject button label (e.g., Not OK)
- hideRejectButton--Hide reject button (toggle ON/OFF)
- userCanReAssign – Yes = user can re-assign the task to other active users (toggle ON/OFF)
- commentRequired - User comments are required
- storeSelections - Store the selection in a variable or global
Returns
- completed – task was approved and completed
- rejected – task was rejected
- timeout – task timed out
Step Returns Collection
- stepReturn.routeTo - list of users (GUID), the task is routed to
- stepReturn.completedByUsers – user (GUID), the task completed by
- stepReturn.rejectedUserList – list of users (GUID), the task is rejected by
Usage:

Example:
Let’s build and execute the “checkListTaskDef” example.
- Create a new process definition named “checkListTaskDef” and open it in Designer mode.
- Drag a "checkListTask" step to the canvas.
- Connect the dots between the “Start” and “checkListTask” steps.
- Define a few variables or global variables to store the list of routed users and the user selection.
-
Click the "checkListTask" step to configure its "Required" properties. Provide a name for the step and a task description. Note: The task step has one incoming connection and zero outgoing connections. Click the Save button. Then click the "AI Predict" button to have Copilot add new process steps that match your process description.

- Click the globe icon to globalize the task step using the following UI. Select the language from the dropdown list. Click the “Translate” button to convert the description into the selected language. A notification message is displayed in the top-right corner.

- Click the "checkListTask" step to configure its "Optional" properties. Click the button to select the users to route to from the list. Click the button to choose the application roles to route from the list. Click the button to configure the task's checklist items. Provide a task detail description. Provide information on the items that are likely to be routed. Provide the URL to be rendered when the user opens the task. Provide a list of external email addresses (separated by semicolons).

- Select the task priority from the list (low, medium, high, normal, urgent). Select the task expiration type (days, hours, months, minutes). Provide the task completion duration value. Select the include weekends option as “Yes” if desired. Select “Yes” for the task to wait for the entire duration, even after completion.

-
Task Routing Rules - Select task routing rules (default, task lock, least # of tasks in total, least # of tasks by definition) to be applied during runtime.
- “Default” means the task has no lock status.
- “Task lock” means the task is locked by a user.
- “Least # of tasks in Total” means the task is assigned to the user with the fewest total tasks.
- “Least # of tasks by Definition” means the task is assigned to the user with the least count of tasks by definition.

- Configure task reminders. Click the Add Row (+) button to insert an empty row. Enter the time duration, subject, and message body. Click the Save button. You can insert multiple Task Reminders using the Add Row function.

- Click the button to provide information to the email body. Click the button to configure email attachments (from the app server path). Provide an email CC list (semicolon-separated). Select “Yes” to send expired notifications (the Status determines the notification duration - Status - Settings - Email - Expired Task Notifications section). Select “Yes” to send separate emails when multiple recipients are configured. Select “Yes” to email an acknowledgment link. Provide new text to change the Approve and Reject button labels (e.g., OK and Not OK). Select “No” to hide the Reject button. Select “Yes” to reassign the task at runtime. Select “Yes” for mandatory task comments. Provide the variable or global reference to store the checklist task selection. Click the Save button.

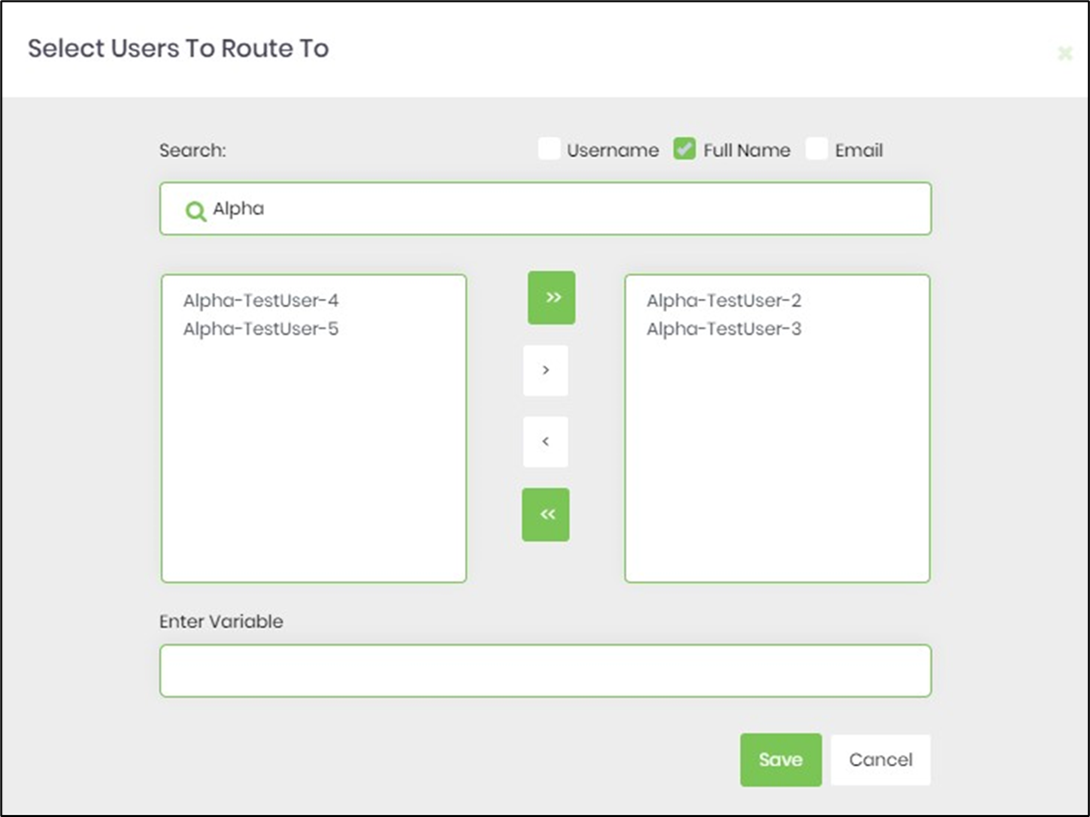
- Search for users by the first three characters and select from the list in the left pane using the arrow buttons. The task can be assigned to multiple users.
- The Task can also be assigned to a user by GUID (provided we know the value beforehand). Configure the variable to contain the reference to the user's GUID. The username selection should be empty, as the function is mutually exclusive, as shown below. Note: When routing a task or form to the queue, the system recalculates the task expiration date upon assignment to a user from the queue.

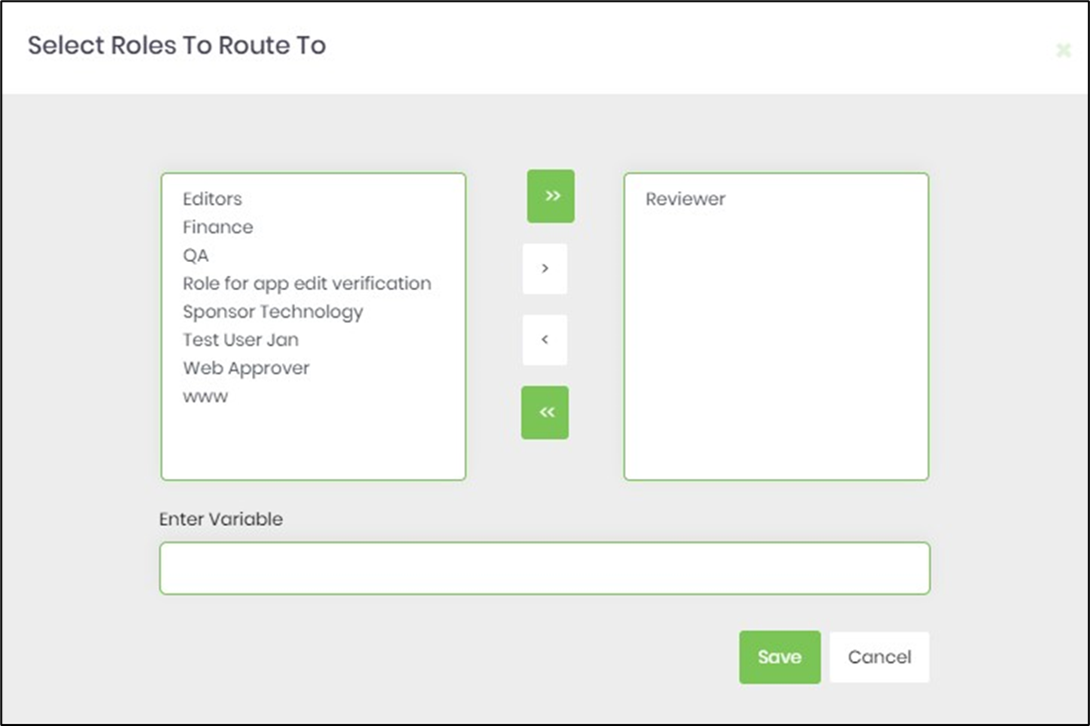
- The Task can also be assigned to users grouped by application role. Use the arrow buttons to select from the list in the left pane.
- Click the Task Reminder to set the task reminder interval. Enable "Send Email Notification" to “On”. Task reminders with a positive value are calculated from the task creation date. Task reminders with a negative value are calculated by subtracting that duration from the task's due date. The task reminder message body supports line breaks.

- Use variable references for more meaningful reminder messages, as shown below.
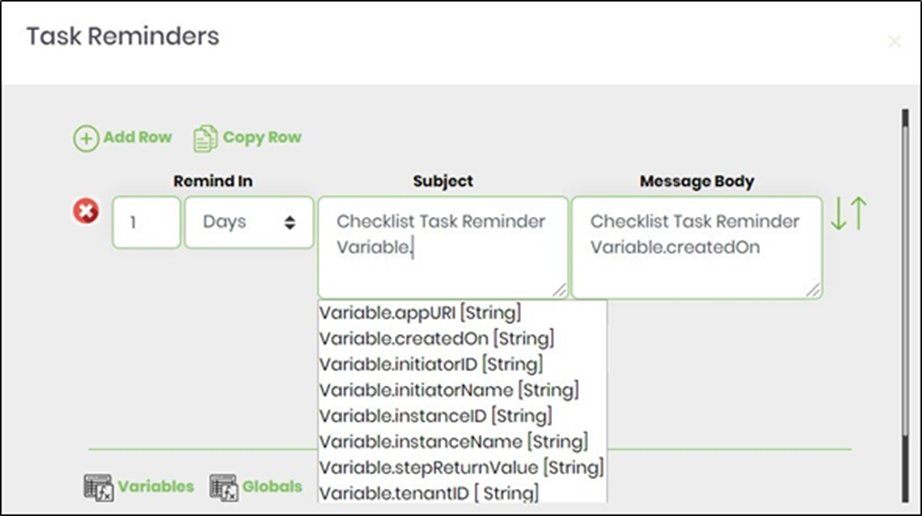
- Use variable references for more meaningful reminder messages, as shown below.

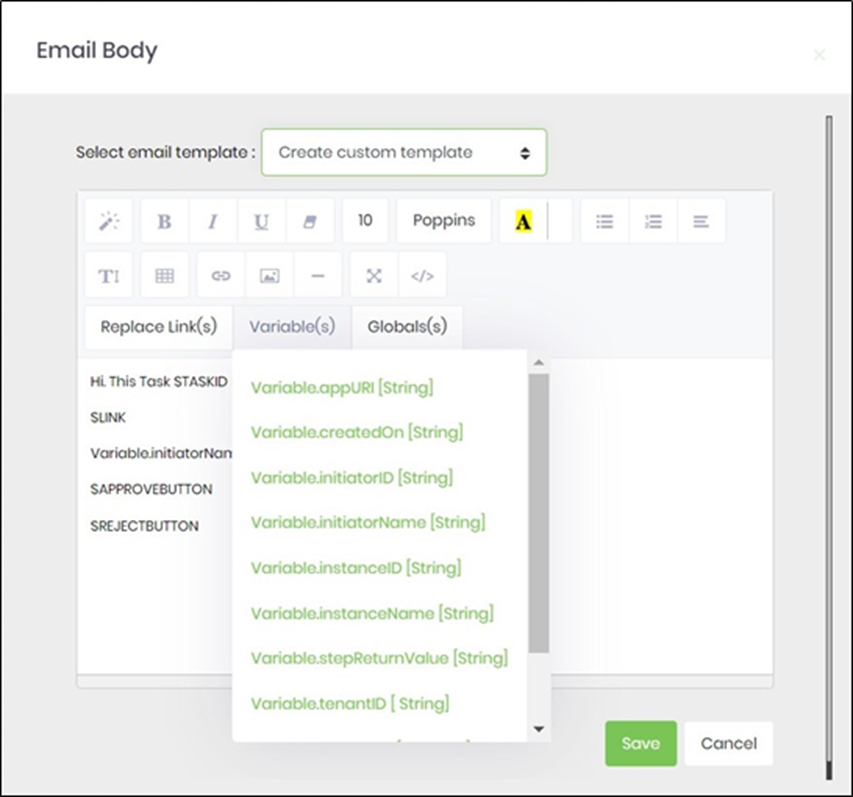
- Click the Email body and use the existing template (you can also edit it), or create a custom one. Learn how to use Replace Links in the body of the task email.

- Click Replace Link(s), Variable(s), or Global(s), then select any reference to add a more meaningful email message.
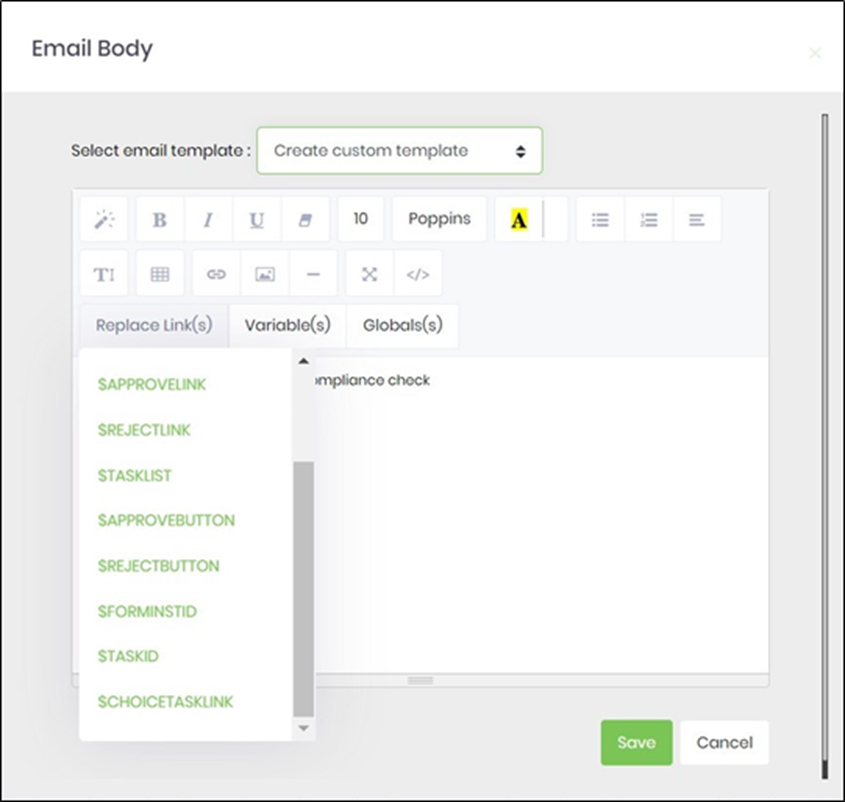
- Click Replace Link(s), Variable(s), or Global(s), then select any reference to add a more meaningful email message.
- Click the Configure Checklist button to add custom items. When "Is Required" is selected, the user must check it before completing the task. When "Let user add custom items" is selected, the user can add custom checklist items to the task at runtime. Drag and drop checklist items to manually rearrange their order.

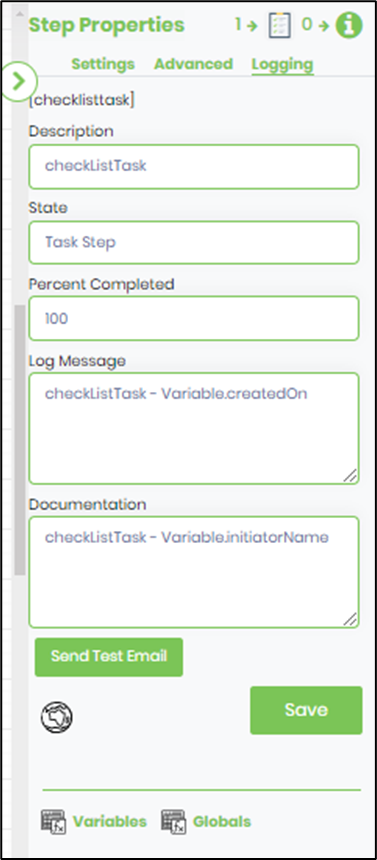
- The “Logging” configuration is necessary for documentation and also measures workflow progress and percent complete. This is achieved by configuring the step state and percent fields individually, as shown below. Configure the “Logging” using the following properties. The "Send Test Mail" feature sends a test email with the configured email body to the current (logged-in) user.
- Save the process definition, create a new instance, and execute it. Render the process instance.

- Click “Items > Tasks”. The step should route the checklist task to users.

- The checklist task is rendered for the user as shown below. The user can attach files to the task, select the checklist value, and provide comments. In this example, the user can select multiple checklist values and add a custom task checklist value. Note: The files attached to the checklist task are stored in the application server's file system or in the DMS file storage folder, whose configuration is defined in the “Start” process step.

Definition Sample:
You may download the sample definition(s) from the link provided and later import them (drag-and-drop) into your FlowWright Process Definition (XML file) or Form Definition (HTML file) page.
Note: Please verify and complete the import process steps for any missing configurations, such as file path references and database connections. Then, save the definition to confirm the changes.
Click here to download the sample file.