Description:
This step routes a Form Task to a selected queue. Users with view privileges can view the tasks in the queue and assign them to themselves or others. The queue admin may also assign tasks as needed.
Inputs
- selectQueue – select a queue to route the task to
- taskDesc – task description
- taskBody – task detail description
- formDefinition – select form definition to route
- formInstanceID –Variable/global holds the form instance id
- hideReadOnlyFields– set forms fields hidden or read-only
- hideReadOnlySubForms– set sub forms fields hidden or read-only
- taskPriority – task priority (low, medium, high, normal, urgent)
- queuePriority – queue priority (low, medium, high, normal, urgent)
- expireType - task expire type
- daysToComplete – days to complete
- includeWeekends - include weekends
Returns
- True – step executed successfully
- False – step failed to execute
Usage:

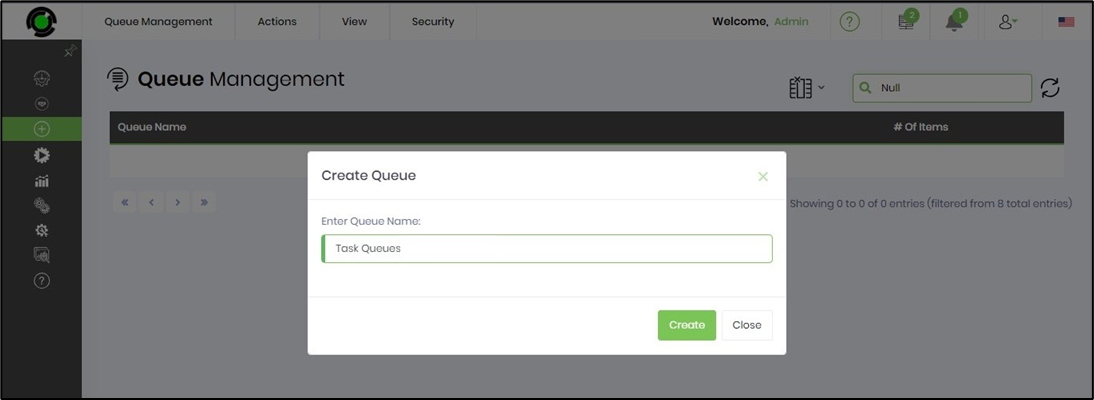
A queue must be configured in the FlowWright Application to use this step. Navigate to Create, then select the Queue Management menu option. If configured previously, the page displays all queues. Select Action > Create, then enter a queue name, as shown in the image below.
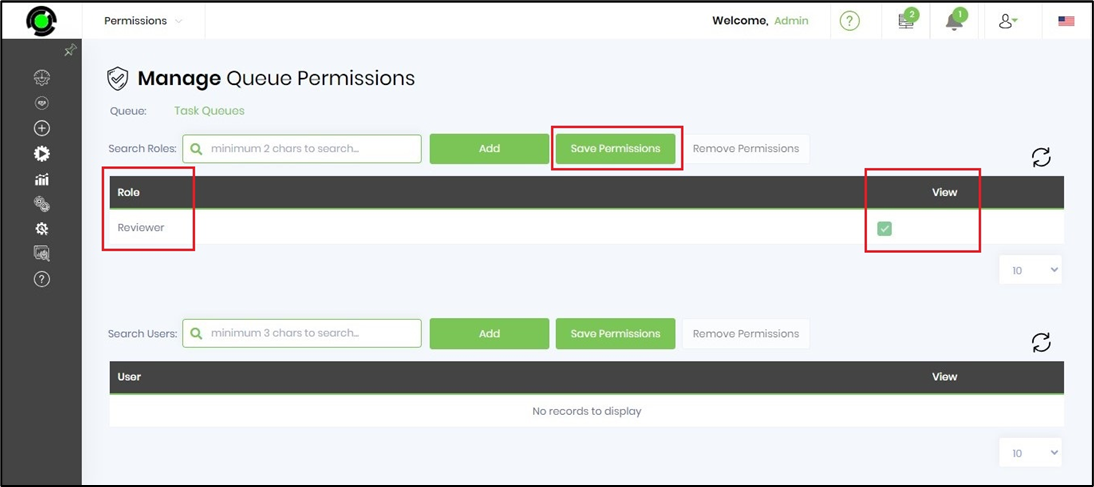
Select the queue from the table, then click Security > Permissions. The Manage Queue Permissions page appears. Search for and add application roles and/or users. Click Save Permissions to confirm the permissions. In the example below, the Reviewer app role (users) has View permissions on the Task Queues. User access privileges may be modified as needed.
Example:
Let’s build and execute the “RouteFormToQueueDef” example and assign a task to the queue.
- Create a new definition named “RouteFormToQueueDef” and open it in designer mode.
- Drag a “RouteFormToQueue” step from the toolbox to the canvas
- Connect the dots between the Start and the “routeFormToQueue” step
- Click the “RouteFormToQueue” step to configure its “Settings” properties. Enter a step name. Select the queue from the dropdown list. Enter a task description. Select the Form Definition from the dropdown list to route the form to the queue. Enter a variable or global reference to store the Form Instance ID. Click the Save button. Note: Click the "AI Predict" button to have the Copilot add new process steps that match your process description.

- Click the “RouteFormToQueue” step to configure its “Optional” properties, as shown in the graphic below. Provide a task description. Configure the Form and subForm fields to show or hide at runtime. Select the task priority from the list (low, medium, high, normal, urgent). Select the task expiration type (days, hours, months, minutes). Provide the task completion duration. Select Include weekends if desired. Click the Save button to save the configuration.

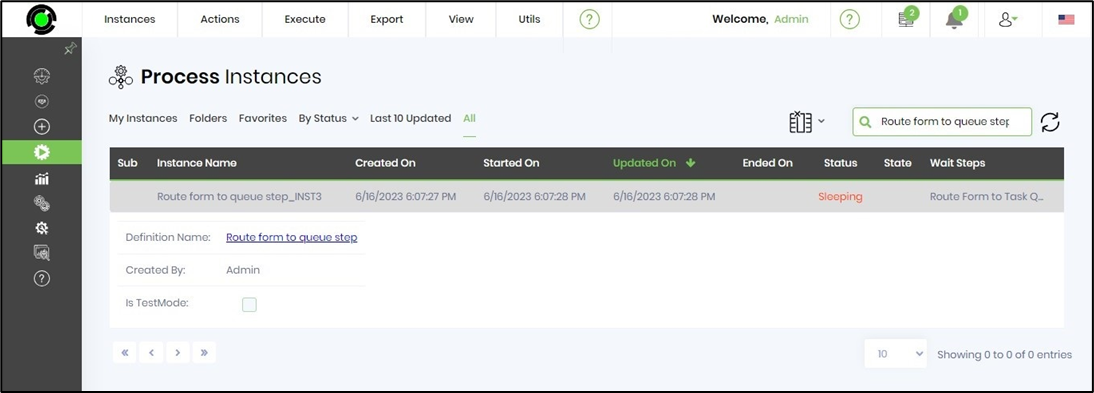
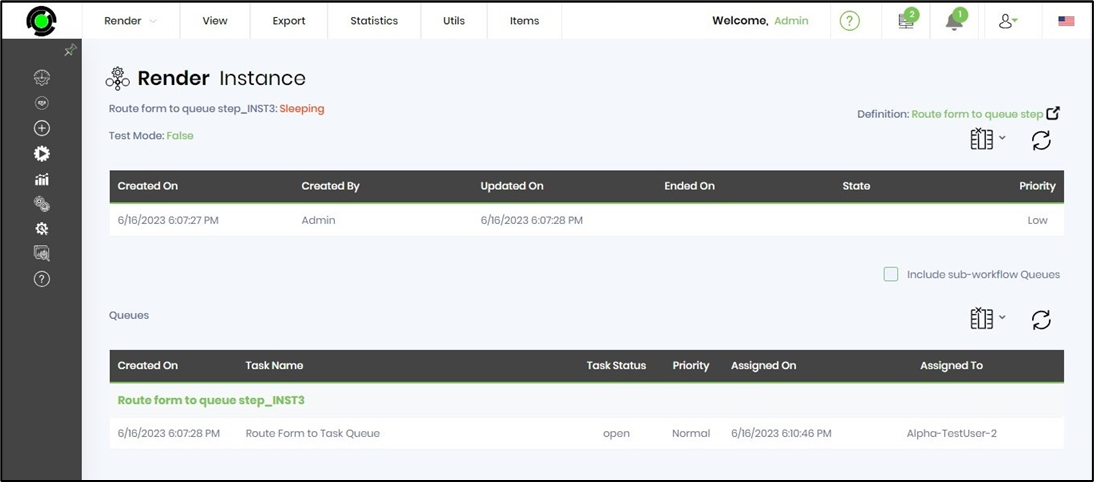
- Save the process definition, create an instance, and execute it. The step should route the Form task to the configured queue. Navigate to Run > Process Instance, select the process instance, then choose View > Render.
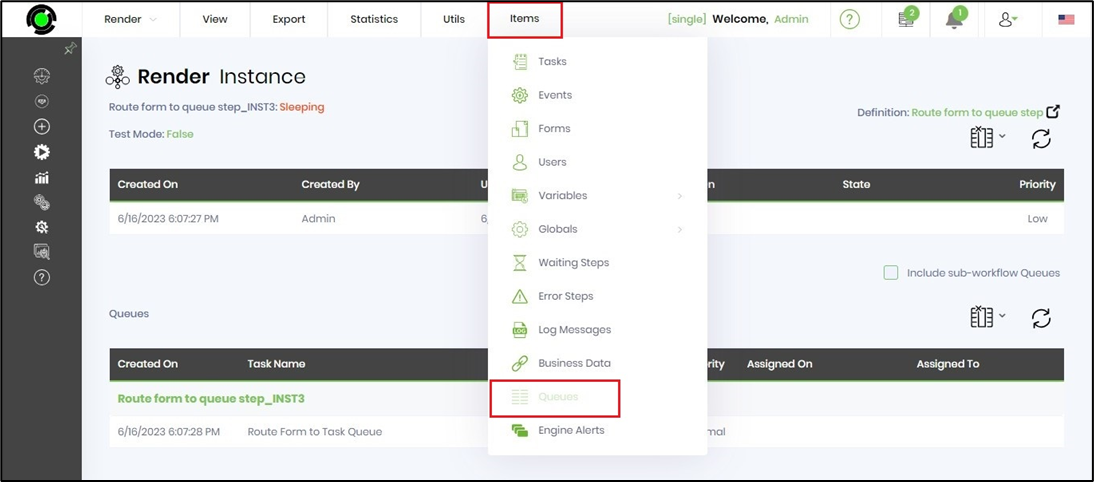
- On the Render Instance page, select Items > Queues to view the tasks assigned to the queue.
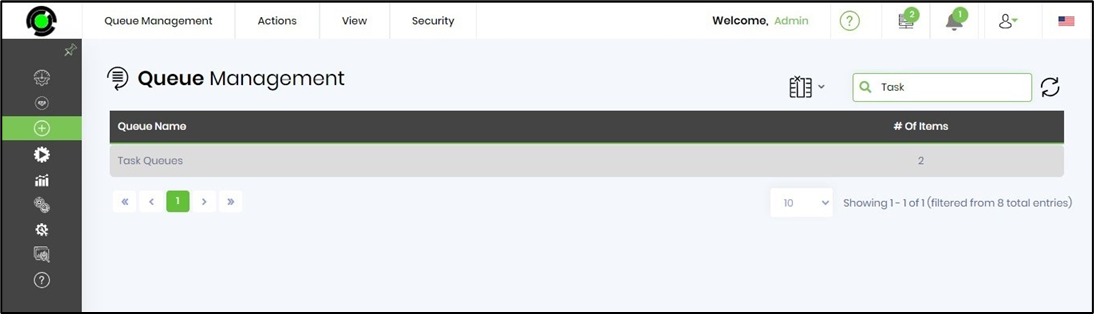
- Navigate to the Create - Queue Management page to view the number of items in the queue.
- Navigate to the Engage—Task—Queue Assignment page and select the queue from the dropdown. As configured, the queue will be visible to the application role (users).
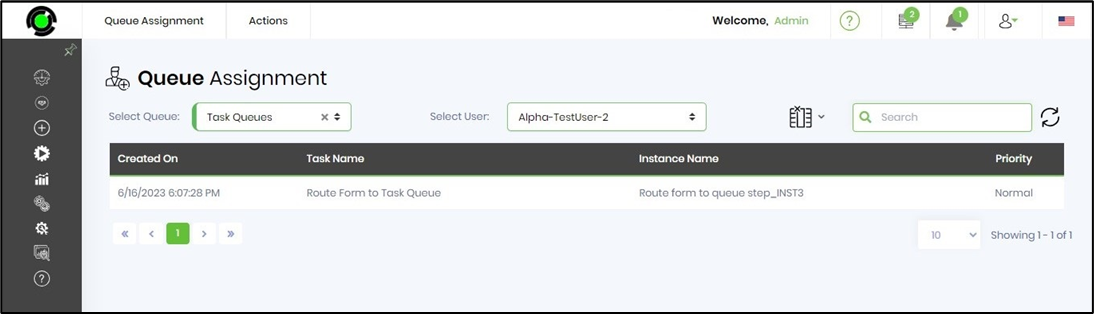
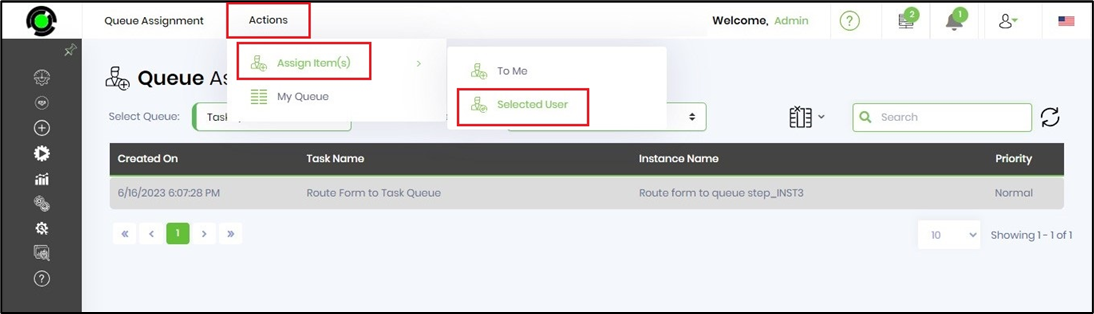
- Here, users can select a task from the queue and assign it to themselves or another user.
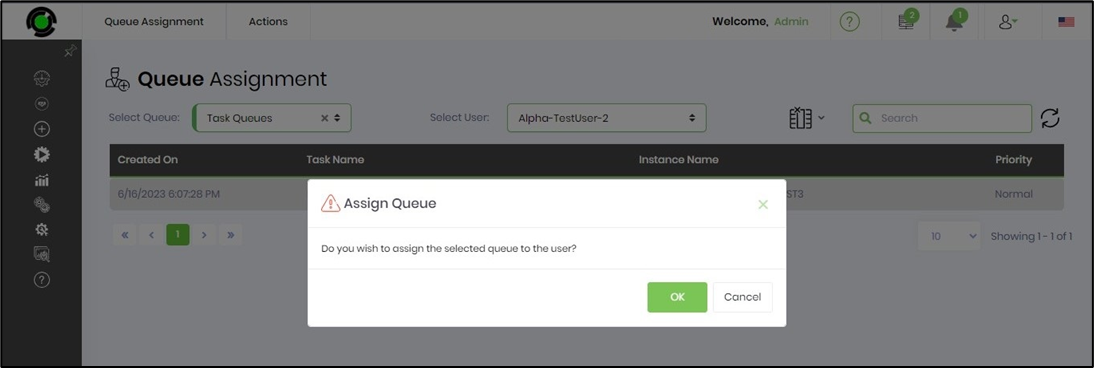
- Click OK to confirm the queue assignment.
- Refresh the process instance page. The task from the queue is now assigned to the selected user.
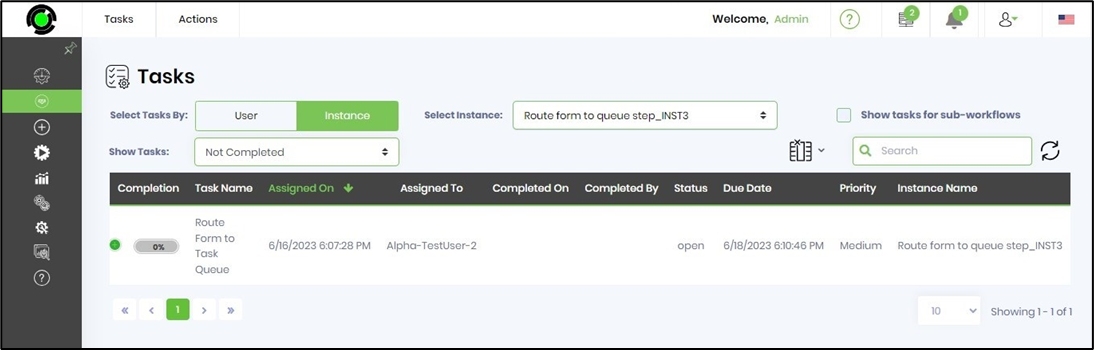
- Navigate to the Engage - Tasks page to view the task assigned to the user by the selected process instance.
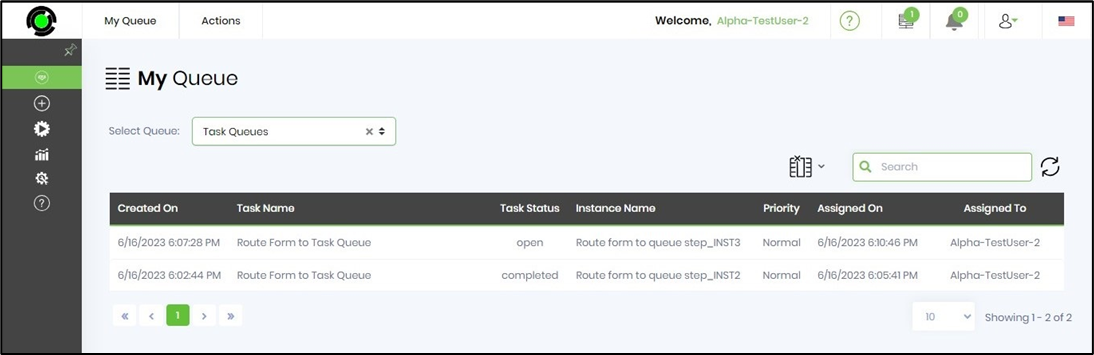
- To view all tasks assigned to the queue, the application role (users) navigates to the Engage—Task—My Queue page and selects the queue from the dropdown list, as shown below.
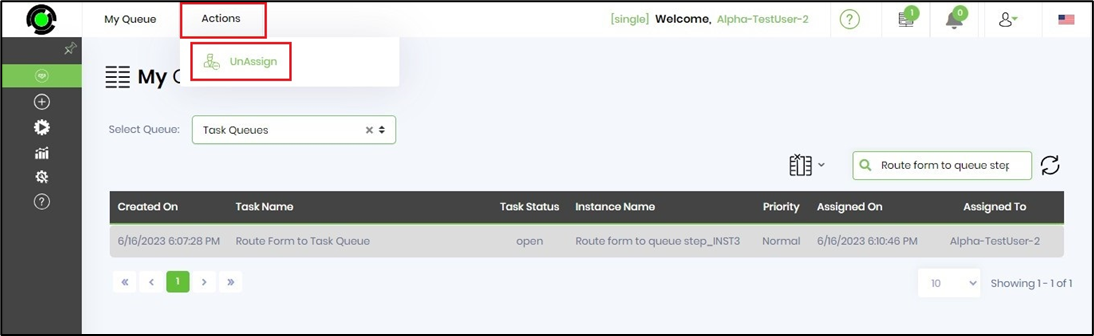
- To unassign the OPEN task from the user, the user selects Actions > Unassign, and the task is returned to the queue.
Definition Sample:
You may download the sample definition(s) from the link provided and later import them (drag-and-drop) into your FlowWright Process Definition (XML file) or Form Definition (HTML file) page.
Note: Please verify and complete any missing configuration steps, such as file path references and database connections, after the import. Then, save the definition to confirm the changes.