Authentication Connections lets you define and manage user-configured connections for a selected service provider. The screen below displays the list of connections and service providers using a definition for configured selections only.

The following operations can be performed using the UI:
- Create an authentication connection
- Edit an authentication connection
- Make a copy of the connection
- Remove the selected connection
- Upload the security certificate
- Export and Import the connection definition
All dates and times are stored in the database as UTC and displayed based on the user's local time zone. The new FlowWright application offers a user interface for adjusting the time zone.
Note: Engine runtime data is in ISO + UTC format.
Create an Authentication Connection.
A new authentication connection can be created by clicking the Actions - Create menu item.

A pop-up window is displayed for configuration as shown below.

Provide a name and description for the connection. Select an authentication provider from the list. Provide the auth key. Choose the icon image file from the local folder and upload it. Click the Create button to create a new authentication connection.

The new Authentication Connection is created, and a confirmation message is displayed in the top-right-hand corner as shown below.

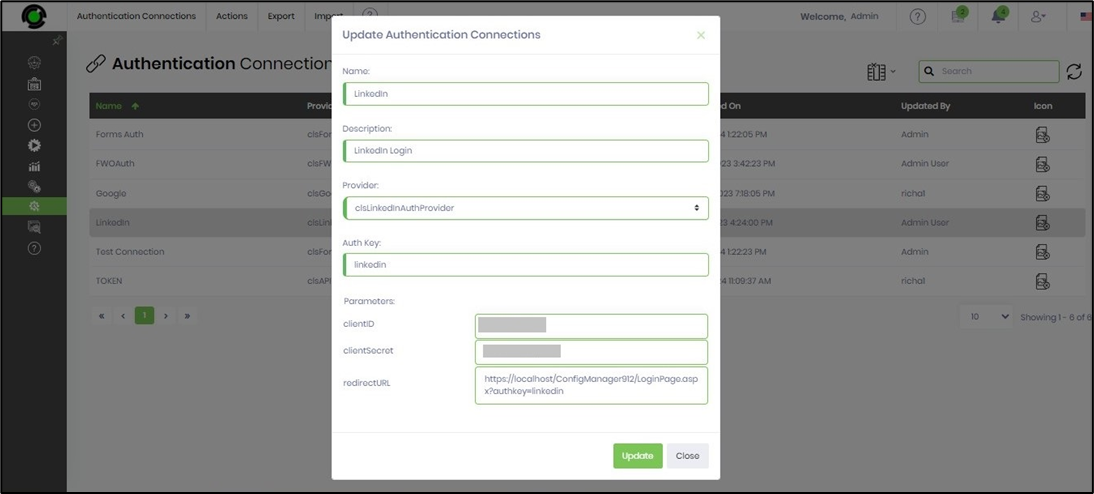
Edit an Authentication Connection.
An authentication connection can be updated by selecting an existing connection from the table and selecting the Actions—Edit menu option. The authentication connection table only displays a list of configured selections.

The connection details are displayed in the pop-up window as below. After updating the field values, click the Update button to confirm the changes.

The UI is different for different types of Authentication Connections. In this example, the LinkedIn Auth Connection has the following UI.