Description:
Menu — Provides a menu-related form widget that can be included in a FlowWright form as part of the user interface.
Design:
The MenuWidget is a FlowWright form widget in the Engine category. It is implemented by FlowWright.Forms.clsMenuwidget in FlowWright.Forms.dll and is displayed in the form designer as Menu.
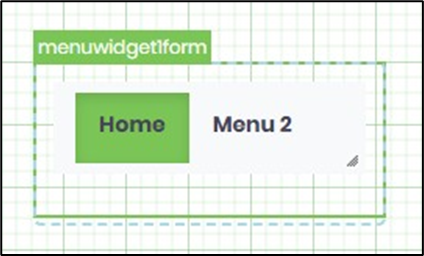
Use the MenuWidget when a FlowWright form requires a menu-related component as part of its user interface. A menu can be useful in forms that organize related information or provide access to different sections of a business application
Typical Workflow Suggestions
Customer Management
Use the MenuWidget as a potential interface component on a customer management form where customer-related information is organized into sections.
Example workflow:
Start → Customer Management Form → Review Customer Information → Update Customer Record → End
Evaluate the widget for the form's menu area after confirming its available items and behavior.
Employee Information Management
Consider the MenuWidget for an employee information form where users need an organized interface for employee-related information.
Example workflow:
Start → Employee Information Form → Review Employee Details → Update Employee Record → End
The widget may suit the form layout if its implementation supports the required menu functionality.
Service Request Management
Use the MenuWidget as a potential interface component on a service request form that presents different groups of request-related information.
Example workflow:
Start → Service Request Form → Review Request Details → Assign Service Team → Process Request → End
Confirm whether the widget supports the required menu structure before using it to organize the form.
Document Management
Consider the MenuWidget for a document management form where users work with document-related information and operations.
Example workflow:
Start → Document Management Form → Review Document Information → Verify Document → Approve or Reject → End
Evaluate the widget for organizing the form interface, depending on its supported functionality.
Order Management
Use the MenuWidget as a potential interface component on an order management form where users need to work with order information.
Example workflow:
Start → Order Management Form → Review Order Details → Validate Order → Process Order → End
Include the widget in the form design after verifying how it is configured and rendered.
Example:
Let’s build and execute the “MenuWidgetDef” example.
- Create a new Form Definition called “MenuWidgetDef.”
- Drag a “MenuWidget” to the canvas and arrange it as shown below.

- Double-click the widget to configure the inputs as shown below. Click the Menu List (+) button to add an empty row. Enter the menu name and URL. Choose the display position from the drop-down menu. Select the radio button to activate this menu when the Form appears. You can add multiple menus using the Menu List button. Click the red (x) icon to remove a menu from the setup. Click the “Lock Widget” button to toggle the lock/unlock feature and prevent accidental configuration changes. Click the “Save” button.

- Double-click the widget to open the “Styling” tab. Provide the pixel values for width and height. Click the “Lock Widget” button to toggle the lock/unlock feature and prevent accidental configuration changes. Click the “Save” button.

- Double-click the control to configure the “Globalize” properties. The application will notify you if nothing needs to be globalized, as shown below. Otherwise, select a language from the drop-down list and click the Translate button. Then, click the Save button.

- You can build a sample Form with a menu widget using images, lines, and background colors, and it will appear in the designer view below.

- A sample menu link is displayed below.
RenderForm.aspx?formDefID=a38780a0-716e-4f9f-b914-6692fef70c10&displayHeader=no
- Navigate to Page > Globalization menu. Select a language from the drop-down list and then click the “Translate” button. Click the “Save” button.

- Save the Form Definition. Choose Actions > Create Form Instance. Generate a new Form Instance, then check the box to edit it.

- The form appears for the user as shown in the image below. The page displays the configured menu and form controls.

Tips:
- Verify the widget's actual appearance and behavior in the FlowWright form designer before using it in production forms.
- Confirm whether the widget supports the menu structure and interactions required by the business process.
-
Review the purpose of the optional
Test datainput before configuring it.
- Keep the form interface organized and ensure that any menu items have clear purposes.
- Test the widget with the complete form to confirm that it behaves correctly alongside other controls.
- Do not assume navigation, dropdown, nested-menu, or event-handling capabilities from the XML definition alone.
Definition Sample:
You may download and extract the sample definition(s) from the link provided and later import them (drag-and-drop) into your FlowWright Process Definition (XML file) or Form Definition (HTML file) page.
Note: After the import, verify and complete any missing configuration steps, such as file path references and database connections. Then, save the definition to confirm the changes.
Click here to download the sample file.