Description:
Use this inline dynamic grid view control on the Form to add a table of controls at runtime. The table of controls can be configured during the form design phase.
Inputs
- ID/Name - Name of widget generated by FlowWright (read-only field)
- Add Column - Construct the grid by adding columns before or after the selection
- Hide - Select the checkbox to Hide (tick mark)
- First Row is Header - Select the checkbox to configure the first row of the grid as the header
- Save - Save the input values
- Delete - Remove this form widget from the designer page
- Delete Column - Remove the desired column from the grid
- Close - Close the input popup window
Design:

Example:
Let’s build and execute the “GridViewControlDef” example.
- Create a new Form Definition called “GridViewControlDef.”
- Drag a “BootstrapGrid,” “GridViewControl,” and “Submit” control onto the canvas and arrange them as shown below.
- Double-click the widget to configure the inputs. Click the “Add Column” button to add the necessary columns and arrange them using the UI control. Select the checkbox to hide this grid during runtime. Select the checkbox to set the first row of the grid as a header.

- Drag and drop labels and other controls into the grid view's columns to build an interface for users to input data.
- Save the Form definition. Choose Actions > Create Form Instance from the menu. Generate a new form instance, then check the box to edit it.

- The form with the grid appears on a new page. Click the plus sign (+) to add new rows. Enter values into the grid controls, then click Submit to save the information to the form instance.
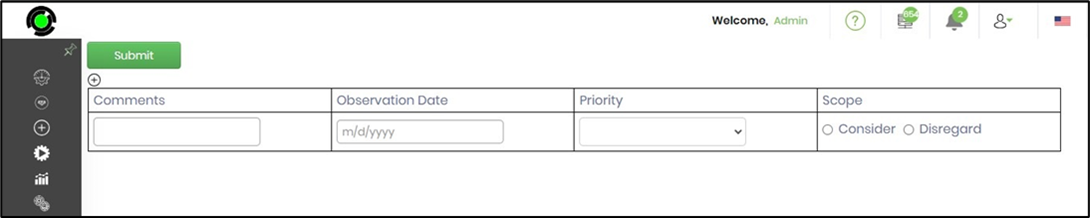
- Click the delete icon to remove rows. Click “Submit” to complete the form.

Definition Sample:
You may download and extract the sample definition(s) from the link provided and later import them (drag-and-drop) into your FlowWright Process Definition (XML file) or Form Definition (HTML file) page.
Note: Please verify and complete the process steps for any missing configurations, such as file path references and database connections, after the import. Then, save the definition to confirm the changes.