Form Widgets administration activities are managed through this UI.
Navigate to Administration > Form widgets.

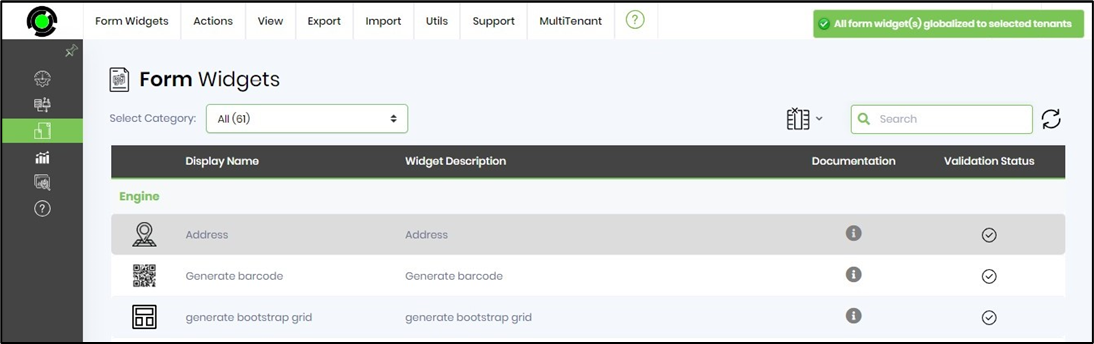
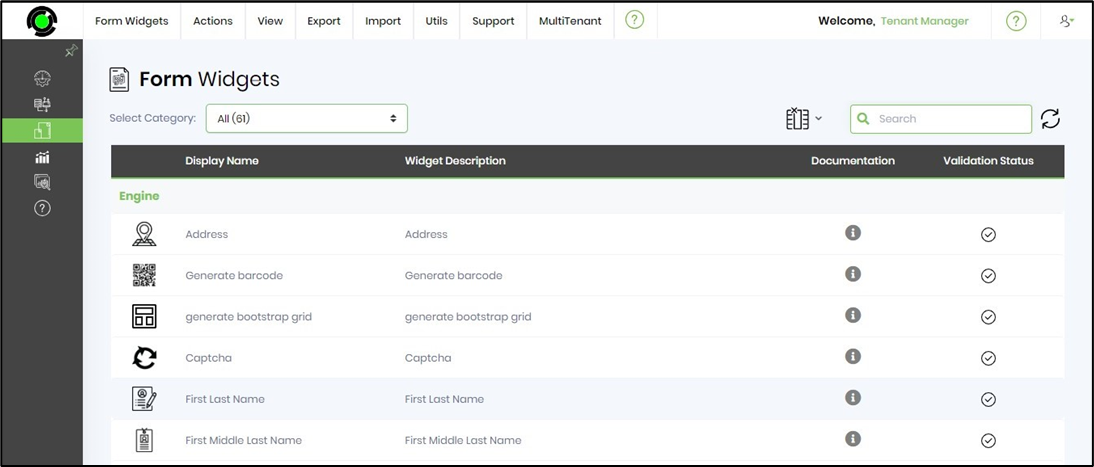
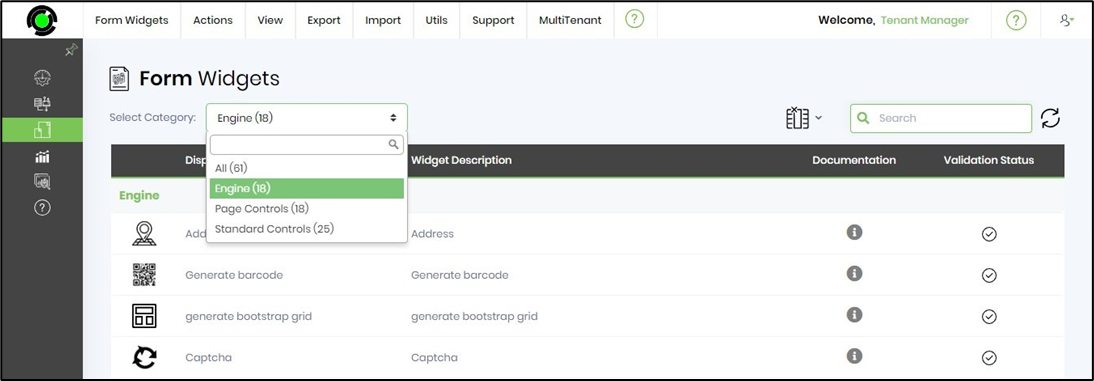
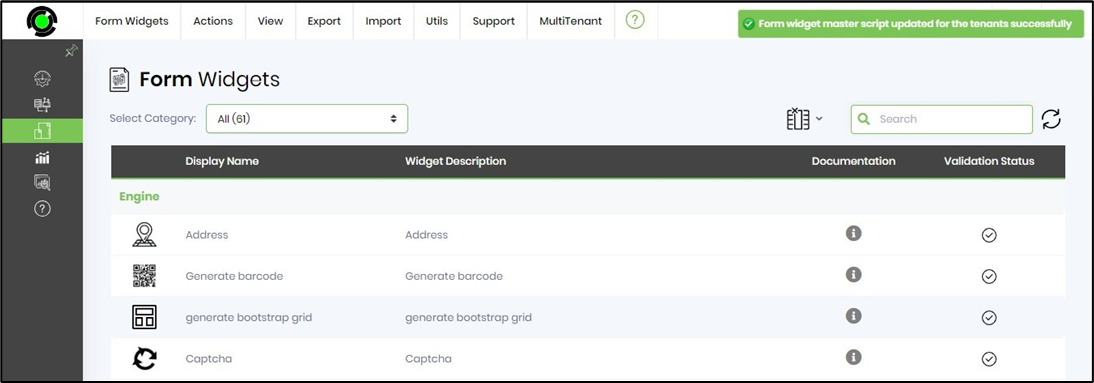
The Form Widgets UI is rendered as shown below.

Select the category dropdown list. The form widgets are labeled “All” or are specific to their feature, as shown in the following UI. The widget categories are sorted alphabetically. The total number of widgets is shown in parentheses.

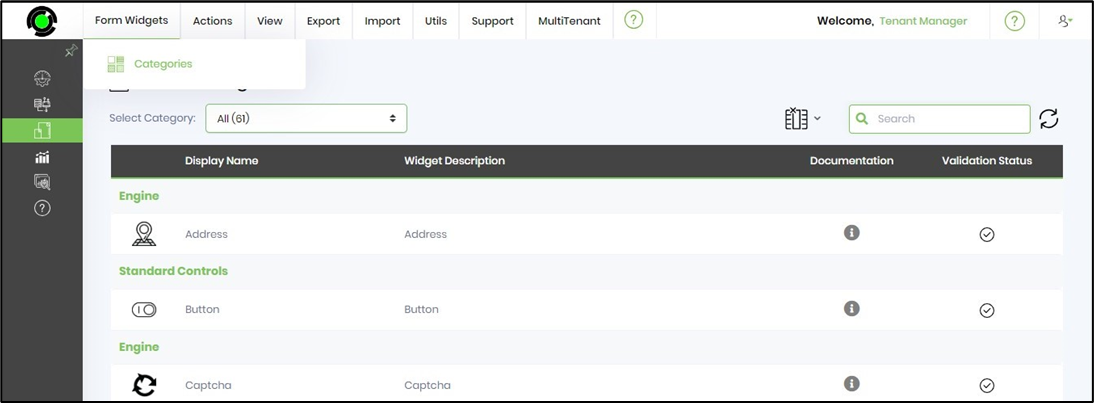
Select “All” categories to display the form widgets sorted alphabetically in a table. Each row shows the widget icon, name, description, help documentation link, and validation status. Use the search box to narrow your results. Use the column selector to add or remove columns from the table.

Select the Form Widgets menu to navigate to the Categories page.

Actions - Create.
The Admin User can create a new custom form widget by navigating to Administration > Form Widgets > Actions > Create.

A pop-up window appears for configuration. Enter the name and description. Select the widget category from the drop-down list. Provide the widget namespace and DLL path. Click the Validate button to check the inputs. Then, click the Create button to add the new process step. The widget is created, and a confirmation message appears in the top-right corner.

Actions - Edit.
Select the step name from the table and click Actions > Edit.

The widget information is provided for your modifications, as shown below. Note: Any widget changes that do not pass validation will revert to their previous settings.

You can change the Form widget's display name here. Click the Update button to confirm the changes.

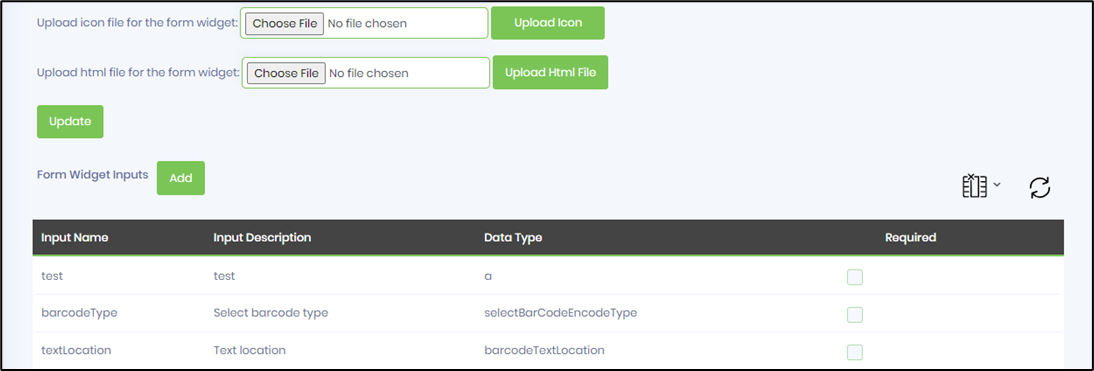
The widget icon can be changed by uploading the icon file here. You can also add new inputs here. The input fields and their data types can be modified here. The field hierarchy can be reordered via drag-and-drop. The input fields can be marked as required here.
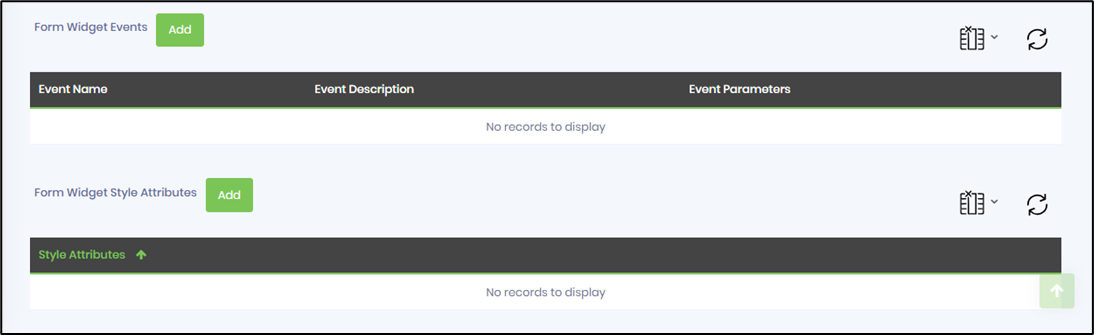
The widget events and style attributes can be configured here.
Search Form widgets.
Select a category from the dropdown menu to see the widgets in that category. Use the search box to filter results.

Actions - Copy.
Search and select the widget name from the table displayed. Navigate to the Actions > Copy menu option.

A pop-up window is displayed for configuration. Provide the new widget name. Click the Copy button.

The new widget shall be created and listed in the category. A confirmation message is displayed in the top-right corner.

Actions - Remove / Auto Detect a widget.
The Form widget can be removed and reconfigured as needed. Select the widget name from the table list. Navigate to the Actions - Remove menu option.

Click the OK button to confirm.

The Form widget was removed successfully. Navigate to the Utils - Auto Detect menu option.

New Form widgets are usually added during application updates via patch releases. These widgets may be entirely new or feature-enhanced. All widgets, including those removed, are shown in the table after auto-detection. Select a widget to configure it manually.

The Form Widget is configured for use in the FlowWright application. Repeat this process for all widgets in the Auto-Detect Form Widget table.

View With Errors.
To view Form widgets that have failed configuration, go to the View—With Errors menu option.

The widgets that failed validation are listed in the table shown in the image below. You can select a widget, click Actions > Edit to modify its configuration, or click Actions > Remove to remove it.

View usage.
Select the widget category from the dropdown list. Then go to View > Usage.

As shown below, usage information is provided for all widgets.

View - Used By.
Search and select the widget from the table. Then, navigate to the View - Forms - Used by / Not used by menu option.

The application runs a background task using this widget to list all form definitions. When the task finishes, the user is notified. Upon job completion, a notification (including email) is sent to the user.

Navigate to Notifications and select the “View all Notifications” button. The notifications are rendered in a new tab.

Select the notification and click the navigation icon to view it.

A pop-up window shows the list of Form definitions using this Form widget. Click the Form definition hyperlink to view its design.

Email notifications are sent to the user's mailbox.

View - Not Used By.
Navigate to the View - Not Used Form Widgets menu option.

Similarly, a list of form definitions that do not use this widget is generated by selection. The application runs a background task to list all Form definitions that are not using this widget. The user is notified when the process completes.
Export - XML.
Search and select the widget name from the displayed table. Navigate to Export > XML to export and download the widget information as an XML file for sharing between the FlowWright environments.

The XML content is included here for reference.

Export - SQL.
Search and select the widget name from the displayed table. Navigate to Export > SQL to export and download the widget information as an XML file for inserting into the FlowWright Database.

The SQL content is included here for reference.

Import - XML.
Navigate to the Import > XML menu option to import the widget into a FlowWright environment.

Select the XML file from the local folder, then click the Import button to apply the changes.

The Form Widget's configuration is overwritten with changes, and a confirmation message appears in the top-right corner.

Auto Detect.
Navigate to the Utils > Auto Detect menu option to identify new Form widgets and modified widgets that must be manually configured for your FlowWright environment.

The auto-detect feature opens on a new page. The table lists the widgets by name, namespace, and DLL path configuration. Select the widget row, then click Manage > Configure. The widget will be configured manually. Use "Select all records” to configure more than one widget row in the table.

An alert notification confirms successful widget configuration.

The form widget is now available for use in the FlowWright process.

Auto Detect from DLL.
Navigate to the Utils—Auto Detect option from the DLL menu to identify new and modified custom widgets that must be manually configured for your FlowWright environment.

Select the custom widget DLL from the drop-down list. Click the Select button to confirm. The widget shall be configured manually. A confirmation message is displayed in the top-right corner.

Auto Detect from Directory.
Navigate to Utils > Auto Detect in the Directory menu to identify new or modified custom widgets that require manual configuration in your FlowWright environment.

Choose the directory from the drop-down menu. Click the Select button to confirm.

The Auto Detect Form Widget shows a list of widgets. You need to select one to configure it manually. In this example, no widgets are available for configuration. Once configured, the widget will be ready for use, and a confirmation message will appear in the top-right corner.

Utils - Update Master Scripts.
When new form widgets are configured, each includes a JavaScript code file. These code files must be updated for the forms to work correctly. The master script file will be rebuilt by selecting the “Utils - Update master scripts” menu item.

The master script file is rebuilt, and a confirmation message is displayed in the top-right corner.

Utils - Globalize.
This feature allows you to globalize the Form widget resources. Search for and select the widget name from the displayed table. Navigate to the Utils > Globalize > Selected Widget menu option. You can also globalize “All Widgets”.

Click the OK button.

The form widget is globalized, and a confirmation message is displayed in the top-right corner.

Form Widget Request.
Navigate to Support> Request Item to report any enhancements or issues to the FlowWright support team.

You need to register on the FlowWright Atlassian site using your email address. This is FlowWright's support portal for collaboration and tracking.

You must sign up to continue.

The FlowWright Customer Support Portal page is displayed below. Click the “Suggest a new feature/improvement.” link.

On this page, provide a summary and description of the changes you'd like FlowWright to make. You can attach images for additional context. Click the “Send” button to submit your suggestion. The details will be emailed to the product team automatically.

Multi-Tenant Form Widgets Administration.
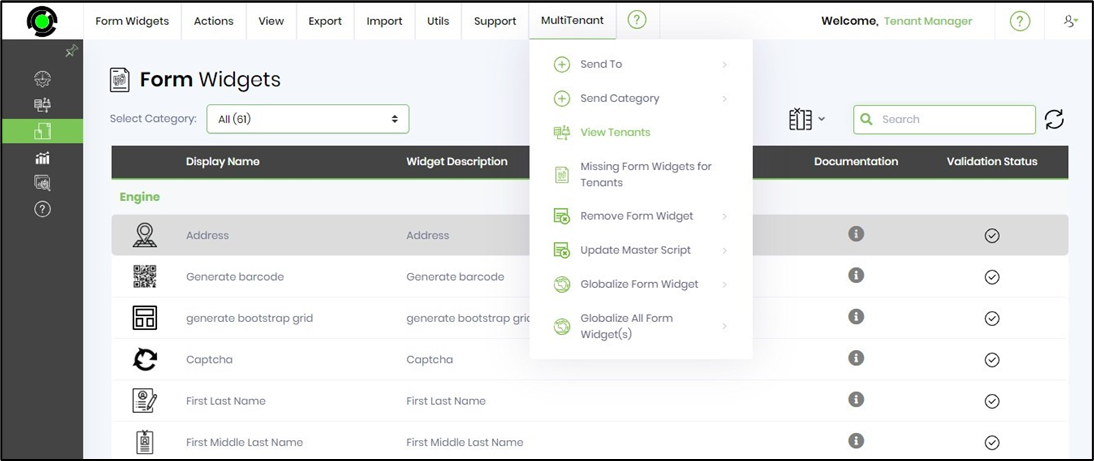
The multi-tenant UI resembles the one below, offering functionality similar to a single-tenant system, along with a dedicated menu for multi-tenant administration.
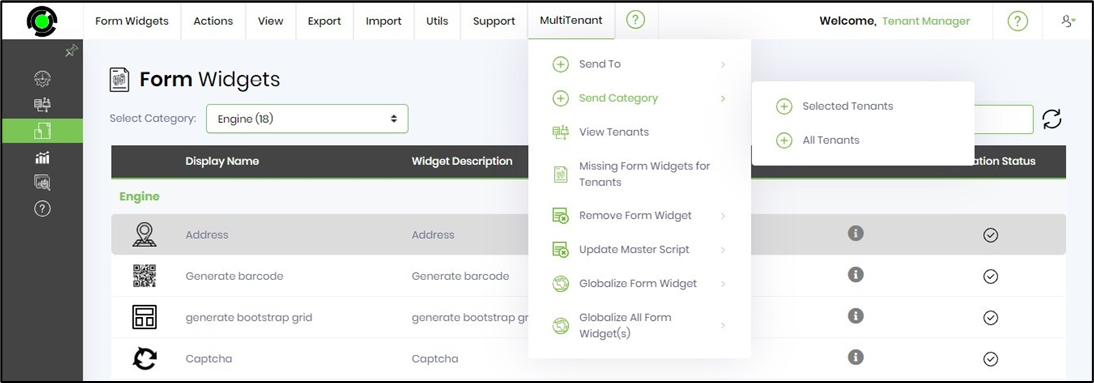
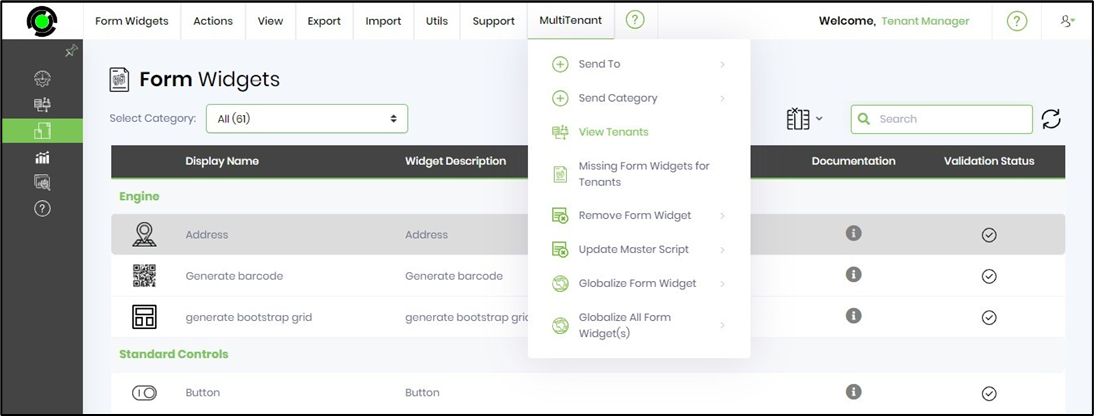
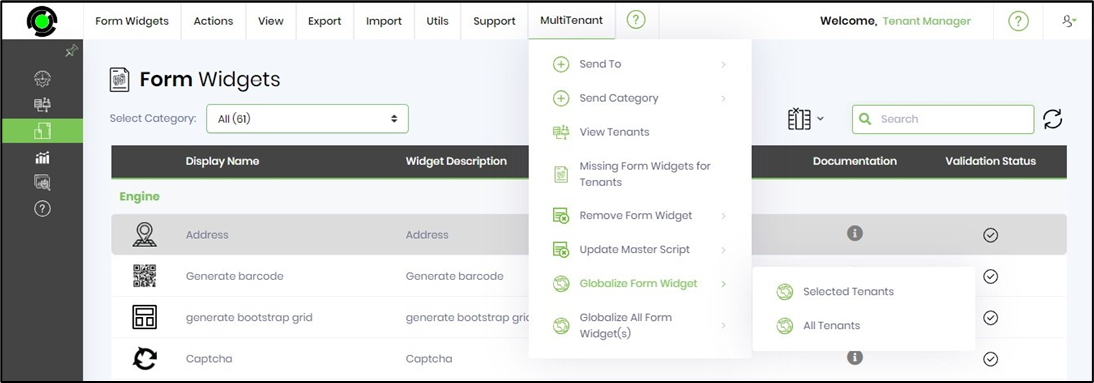
Select a Form widget from the table and click on the MultiTenant menu as shown below. Here, you can perform multiple operations based on the widget selection.
Send To feature.
The feature sends a widget to a selected tenant or all tenants.
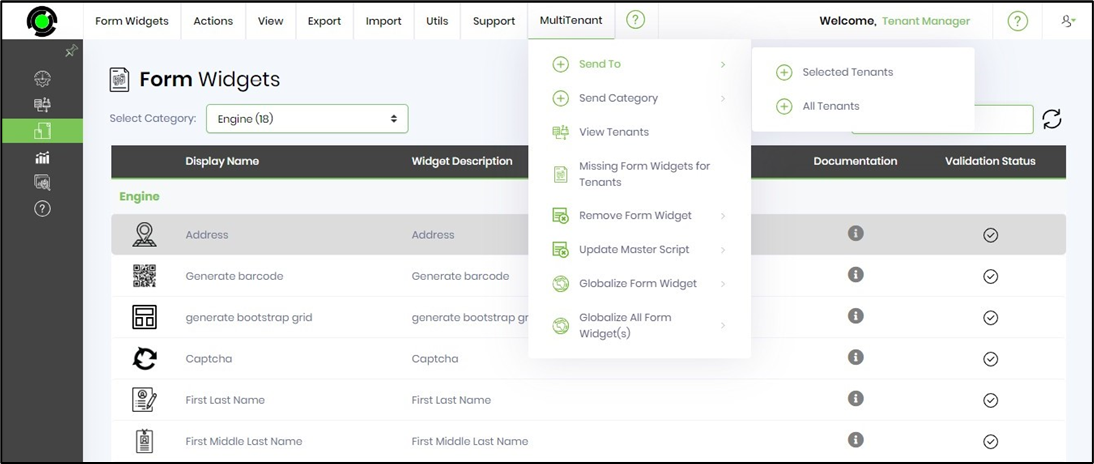
Select a Form widget from the table and click on the MultiTenant menu, as shown below. Then, select the Send To—Selected Tenant menu option.
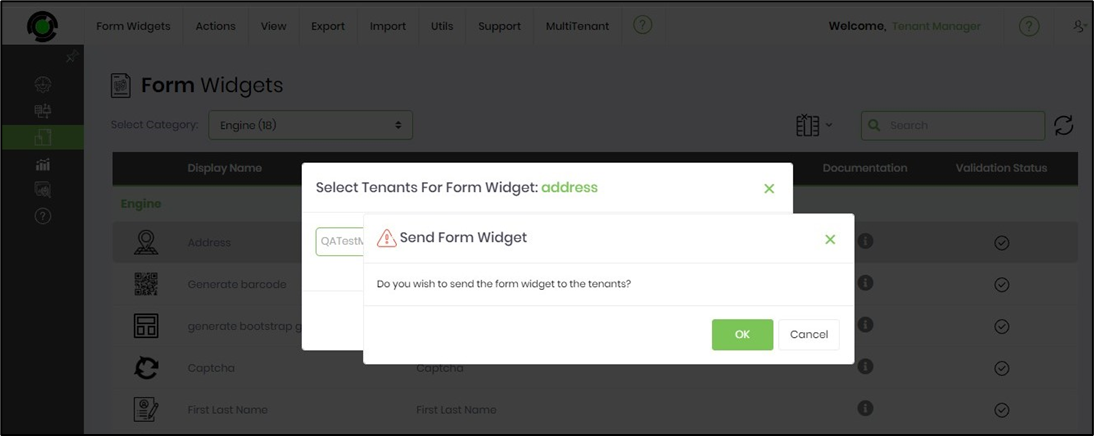
A pop-up window is displayed for configuration. Select the tenant(s) from the drop-down list. The selected tenants are arranged comma-separated in the display box. Click the Send button to confirm.

Click the OK button.
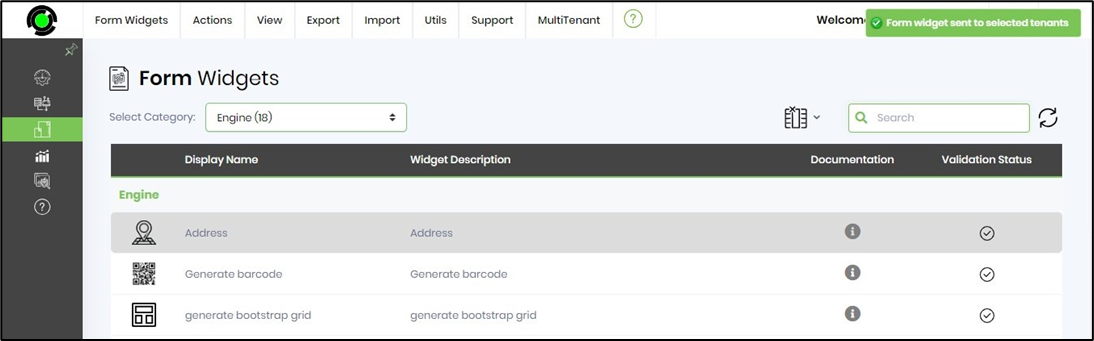
The selected Form widget is sent to the tenant and configured. A confirmation message is displayed in the top-right corner.
You can also send the selected Form widget to all tenants by navigating to the Send To—All Tenants menu option.
Send Category feature.
The feature sends a widget category to a selected tenant or all tenants.
You can select the category from the drop-down list below. Each category displays the count of Form widgets associated with it.
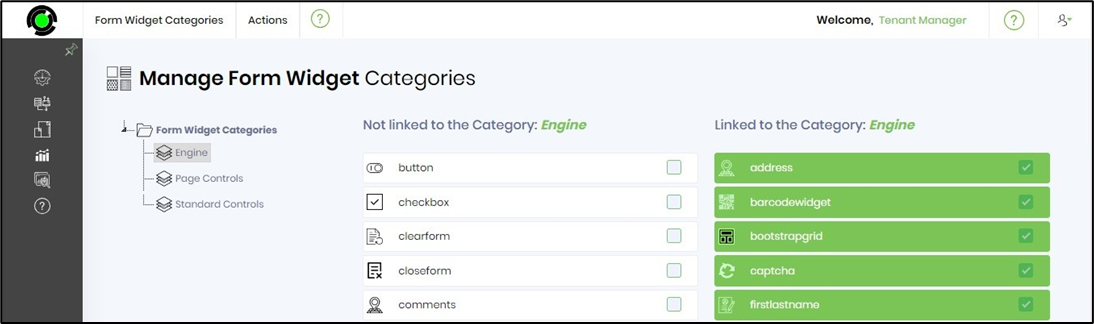
Click the Form Widgets - Categories menu option to navigate to the widget categories page.
The Form Widget Categories page is rendered as below. You may use the Actions menu to create, rename, remove, and Update Globalization for widget categories.
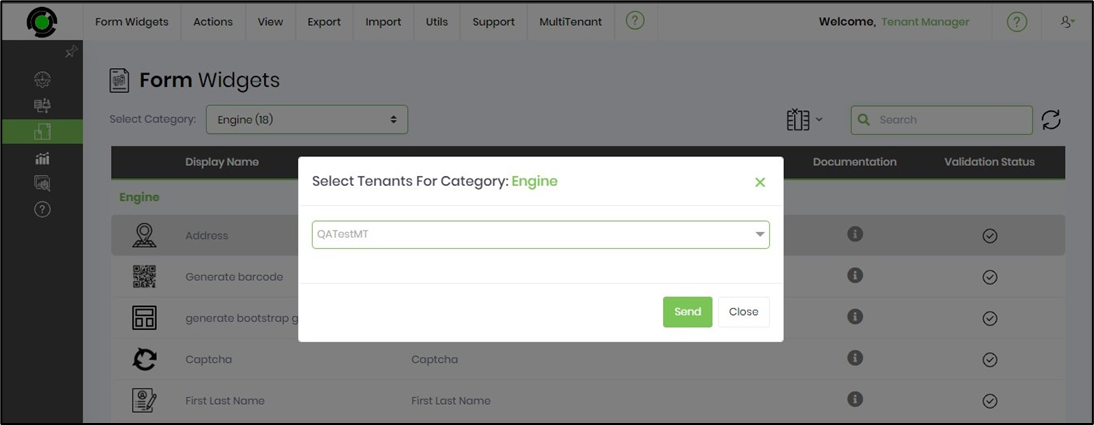
On the Form Widgets page, select the Category from the drop-down list. Next, select the MultiTenant - Send Category - Selected Tenants menu option.
A pop-up window is displayed for configuration. Select the tenant(s) from the drop-down list. The selected tenants are arranged comma-separated in the display box. Click the Send button.
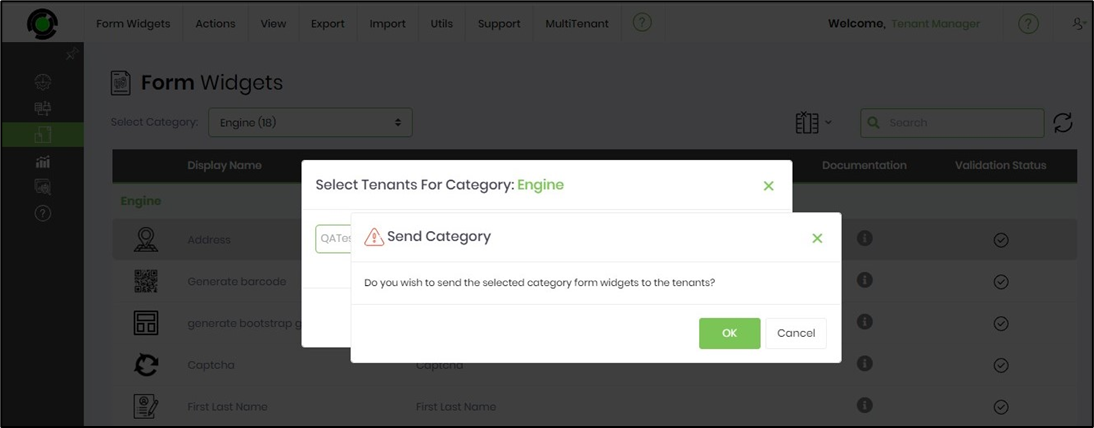
Click the OK button.
The selected widget category is sent to the tenant and configured. A confirmation message is displayed in the top-right corner.
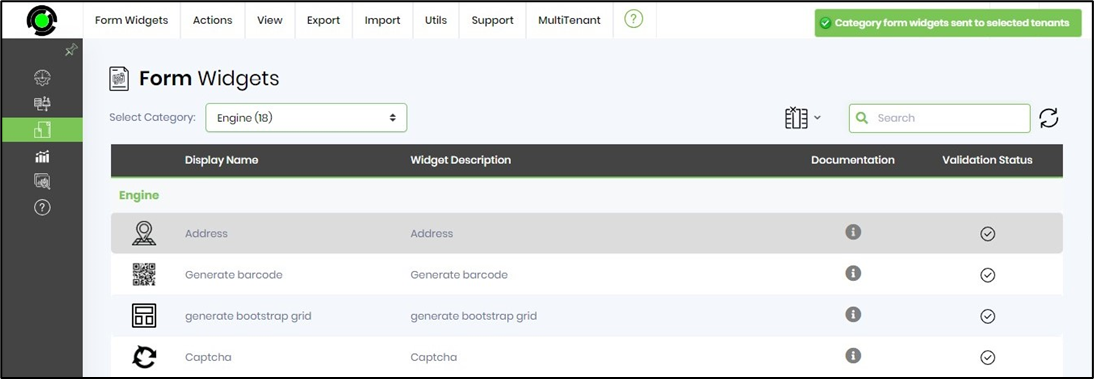
You can also send the selected category to all tenants by navigating the Send Category—All Tenants menu option.
View Tenants feature.
The feature displays a list of tenants configured with the widget.
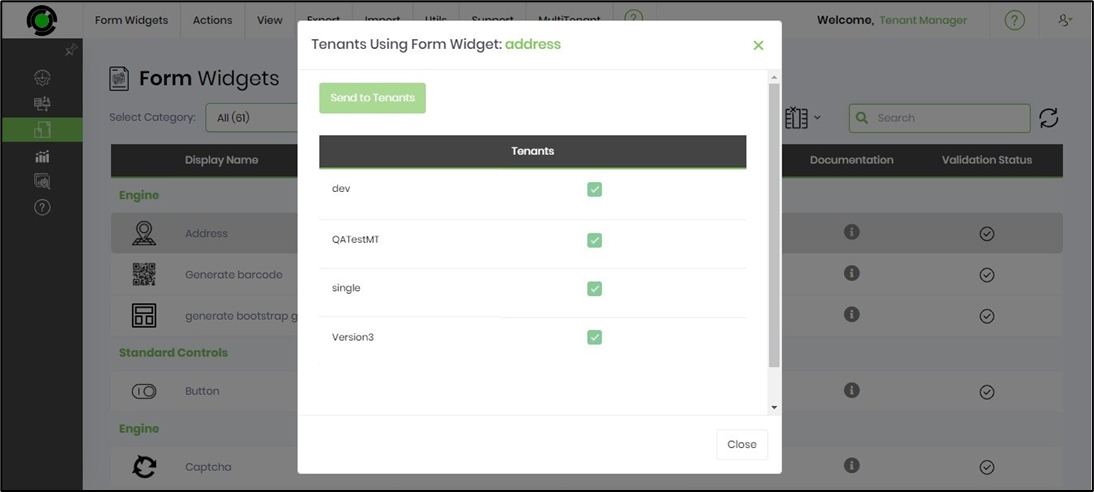
Select a Form widget from the table and click on the MultiTenant menu, as shown below. Then, select the View Tenants menu option.
The pop-up window below displays the list of tenants using the Form widget. After verifying, click the Close button.
Missing Form Widgets for Tenants feature.
The feature displays a list of widgets missing for a selected tenant.
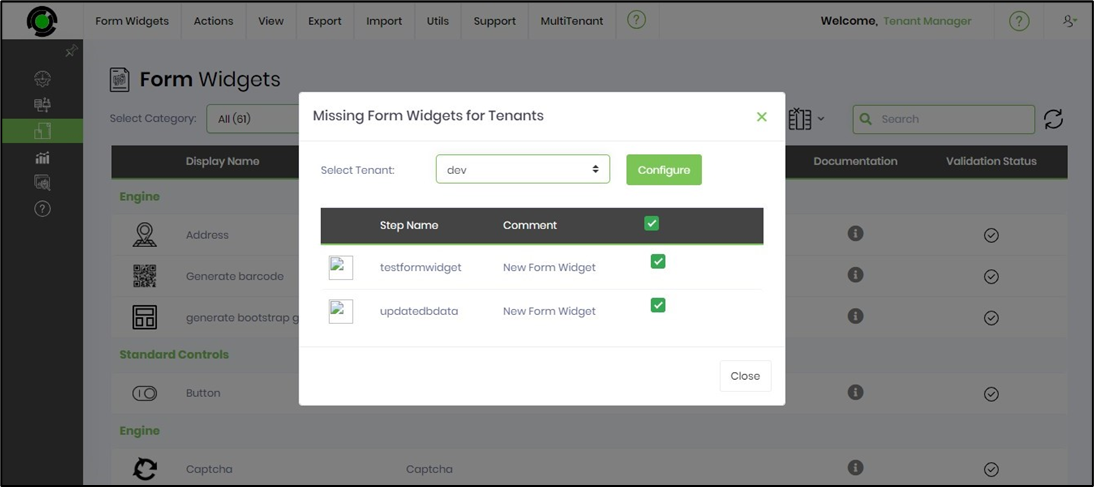
On the Form Widgets page, navigate to the MultiTenant - Missing Form Widgets for Tenants menu option.

A pop-up window is displayed for configuration. Select the tenant from the drop-down list. A table lists the form widgets that require configuration. You may select All or the necessary ones by using the checkboxes. Click the Configure button when ready. The missing widgets shall be configured on the tenant, and a confirmation message will be displayed in the top-right corner.
Remove the Form Widget feature.
The feature helps remove a Form widget from the selected tenant.
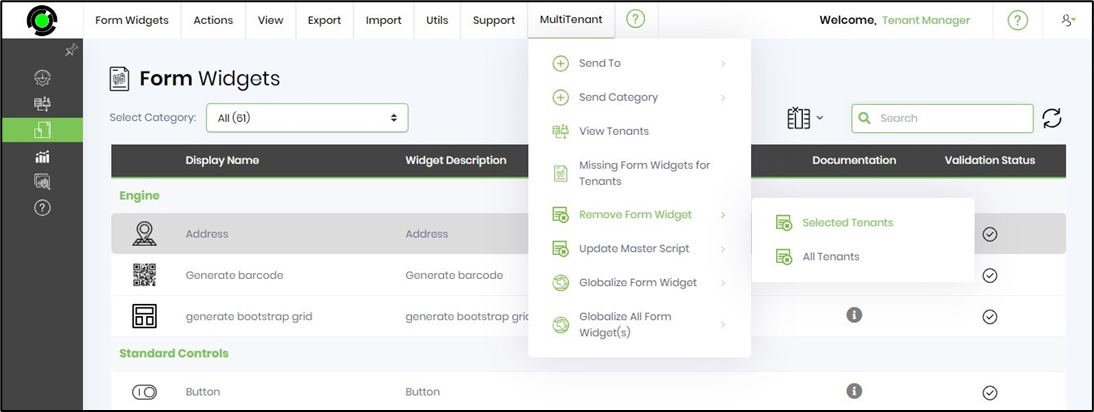
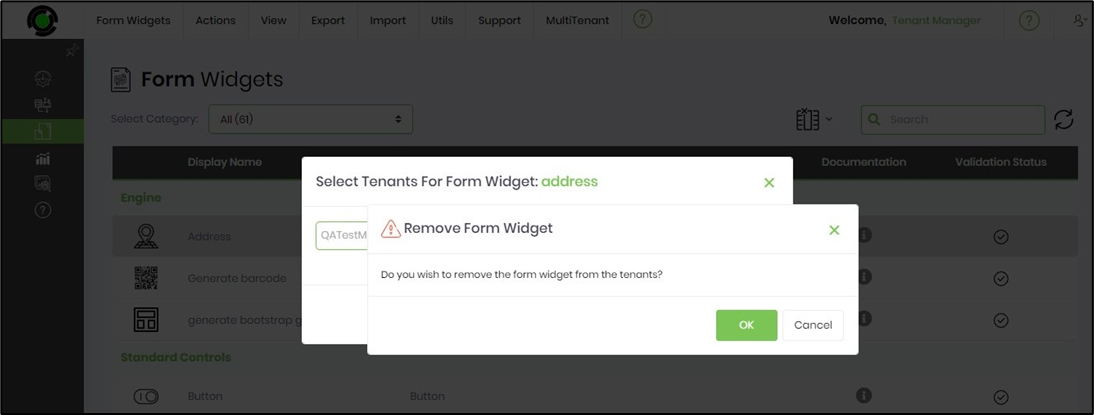
Select a Form widget from the table and click the MultiTenant menu, as shown below. Then, select the Remove Form Widget - Selected Tenants menu option.
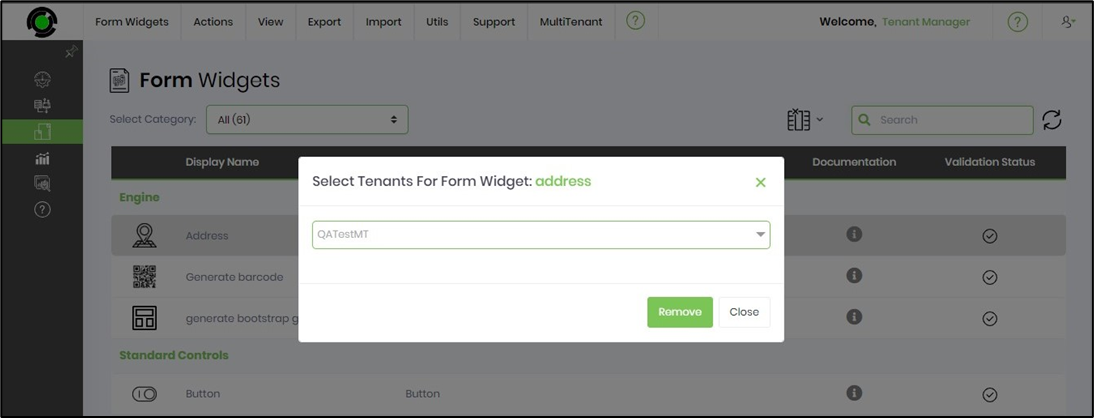
A pop-up window is displayed for configuration. Select the tenant(s) from the drop-down list. The selected tenants are arranged comma-separated in the display box. Click the Send button to confirm.
Click the OK button.
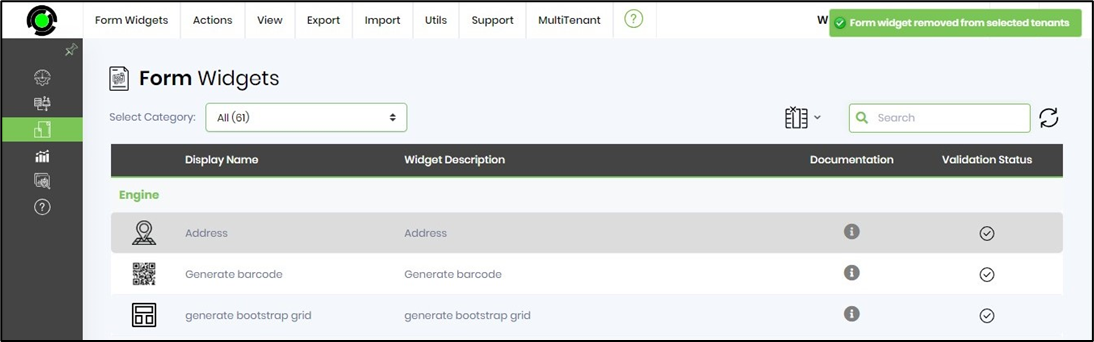
The selected widget category is removed from the tenant. A confirmation message is displayed in the top-right corner.
Update the Master Script for the Tenants feature.
The feature updates the master script for the selected tenant's page functions.
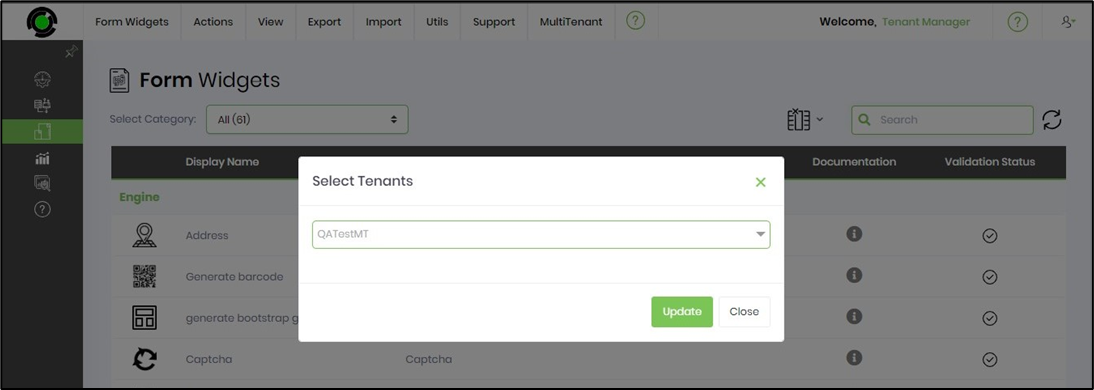
On the Form Widgets page, go to the MultiTenant - Update Master Script - Selected Tenants menu option.

A pop-up window appears for configuration. Choose the tenant(s) from the drop-down menu. The selected tenants are listed in the display box, separated by commas. Click the Send button to confirm.
Click the OK button.
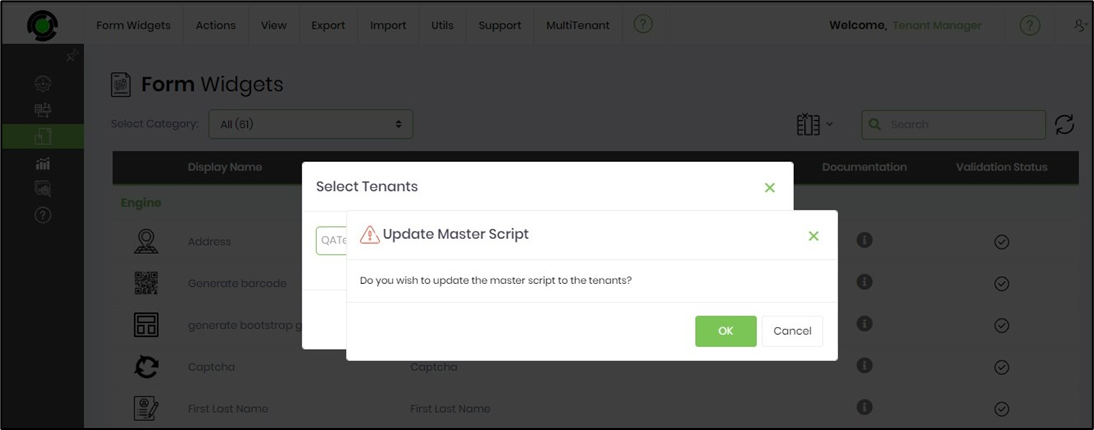
The tenant's master scripts have been updated. A confirmation message appears in the top-right corner. You can also update the master scripts for all tenants by going to the All Tenants menu option.
Globalize Form Widget for Tenants feature.
The feature globalizes the widget selected by a chosen tenant.
Select a Form widget from the table and click the MultiTenant menu, as shown below. Then, choose the Globalize Form Widget - Selected Tenants option.
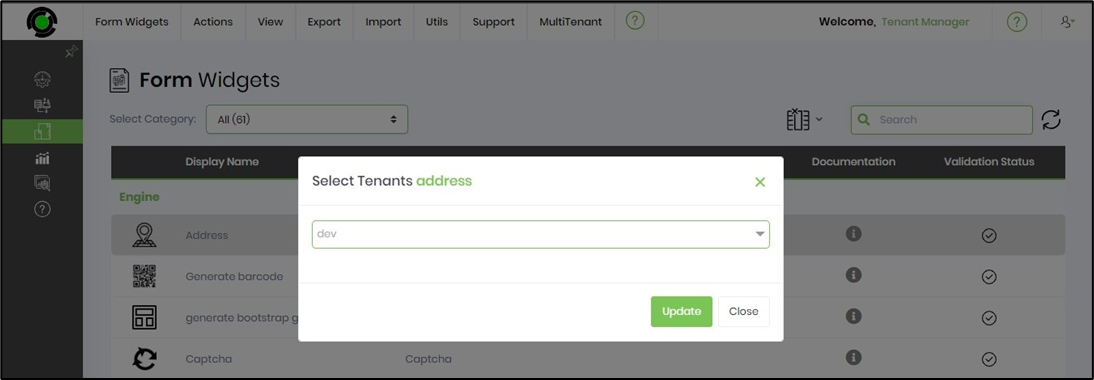
A pop-up window appears for configuration. Choose the tenant(s) from the drop-down menu. The selected tenants are displayed as comma-separated values in the display box. Click the Send button to confirm.
Click the OK button.
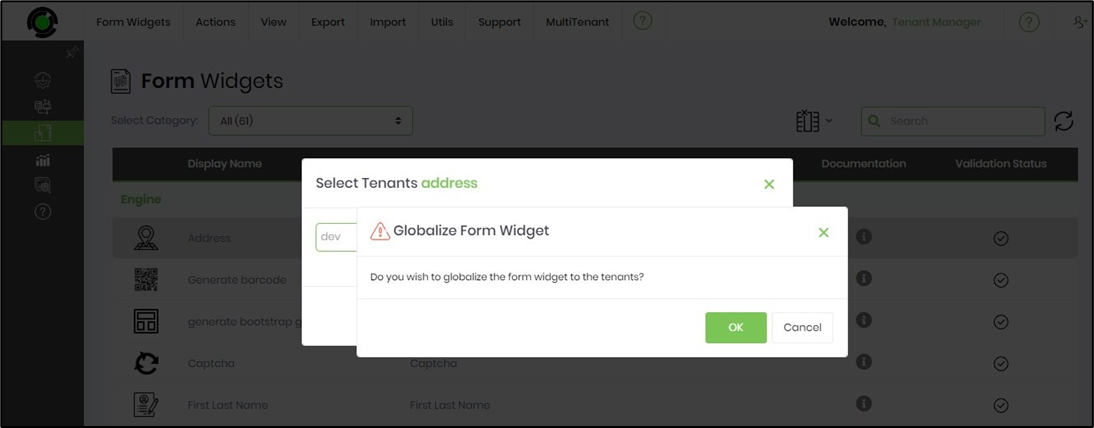
The Form widget is globalized for the selected tenant. A confirmation message appears in the top-right corner. You can also provide the Form widgets to all tenants by navigating to the All Tenants menu.

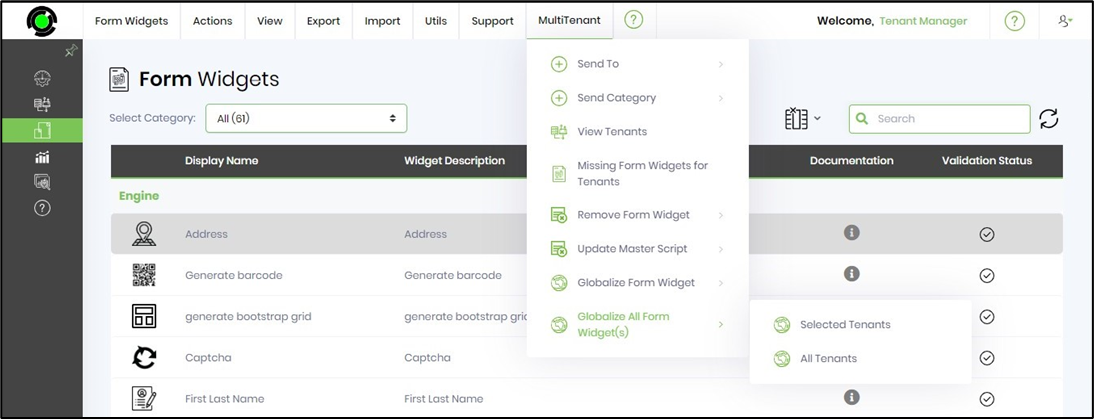
Globalize All Form Widgets for the Tenants feature.
The feature applies globally to all Form widgets of a selected tenant.
On the Form Widgets page, go to the 'MultiTenant - Globalize all Form Widgets - Selected Tenants' menu option.
A pop-up window appears for configuration. Choose the tenant(s) from the drop-down menu. The selected tenants are listed, separated by commas, in the display box. Click the Send button to confirm.
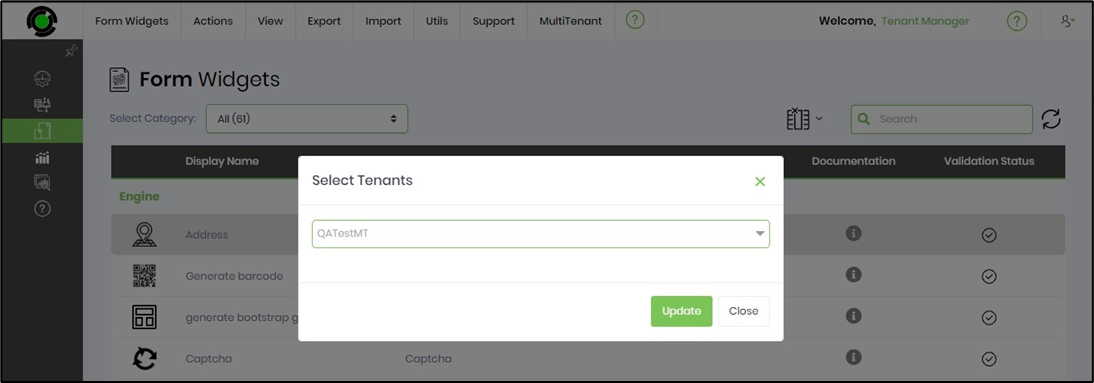
Click the OK button.
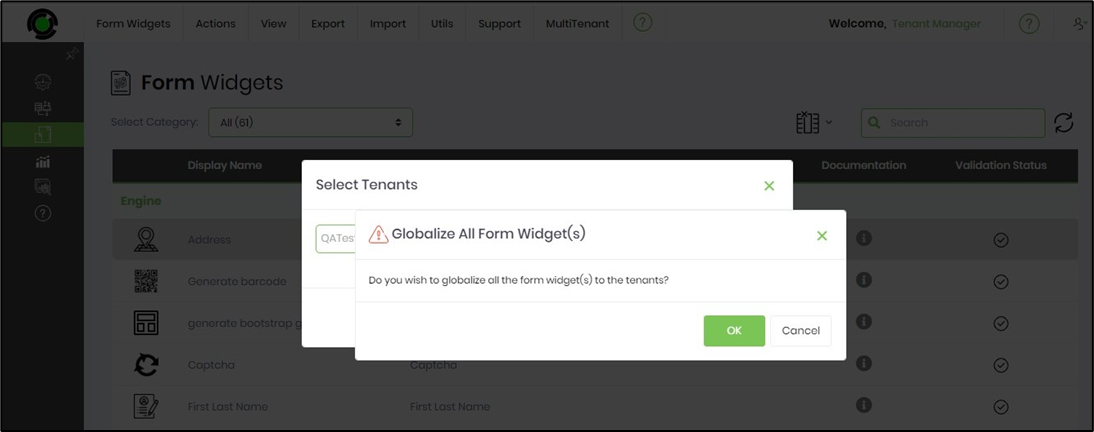
All the Form widgets are available globally for the selected tenant. A confirmation message appears in the top-right corner. You can apply the same Form widgets across all tenants by selecting the “All Tenants” menu option.