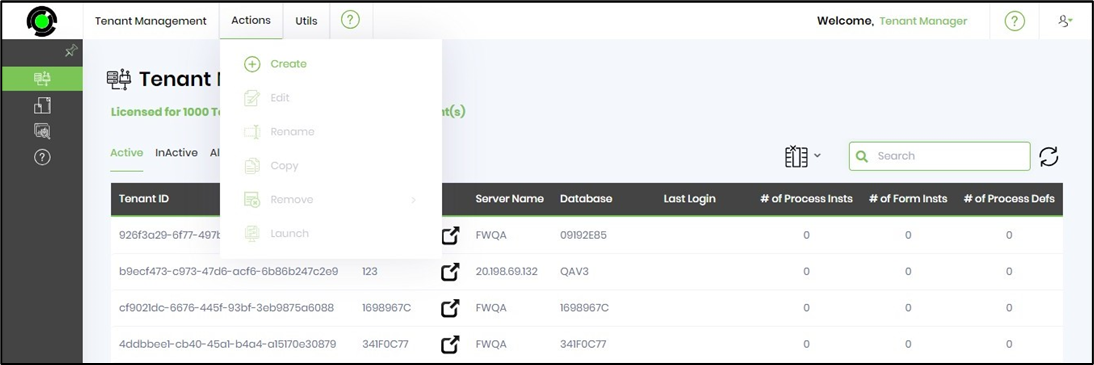
With the new tenant database in place, configuring a new tenant is a straightforward process. Navigate to the following menu option:
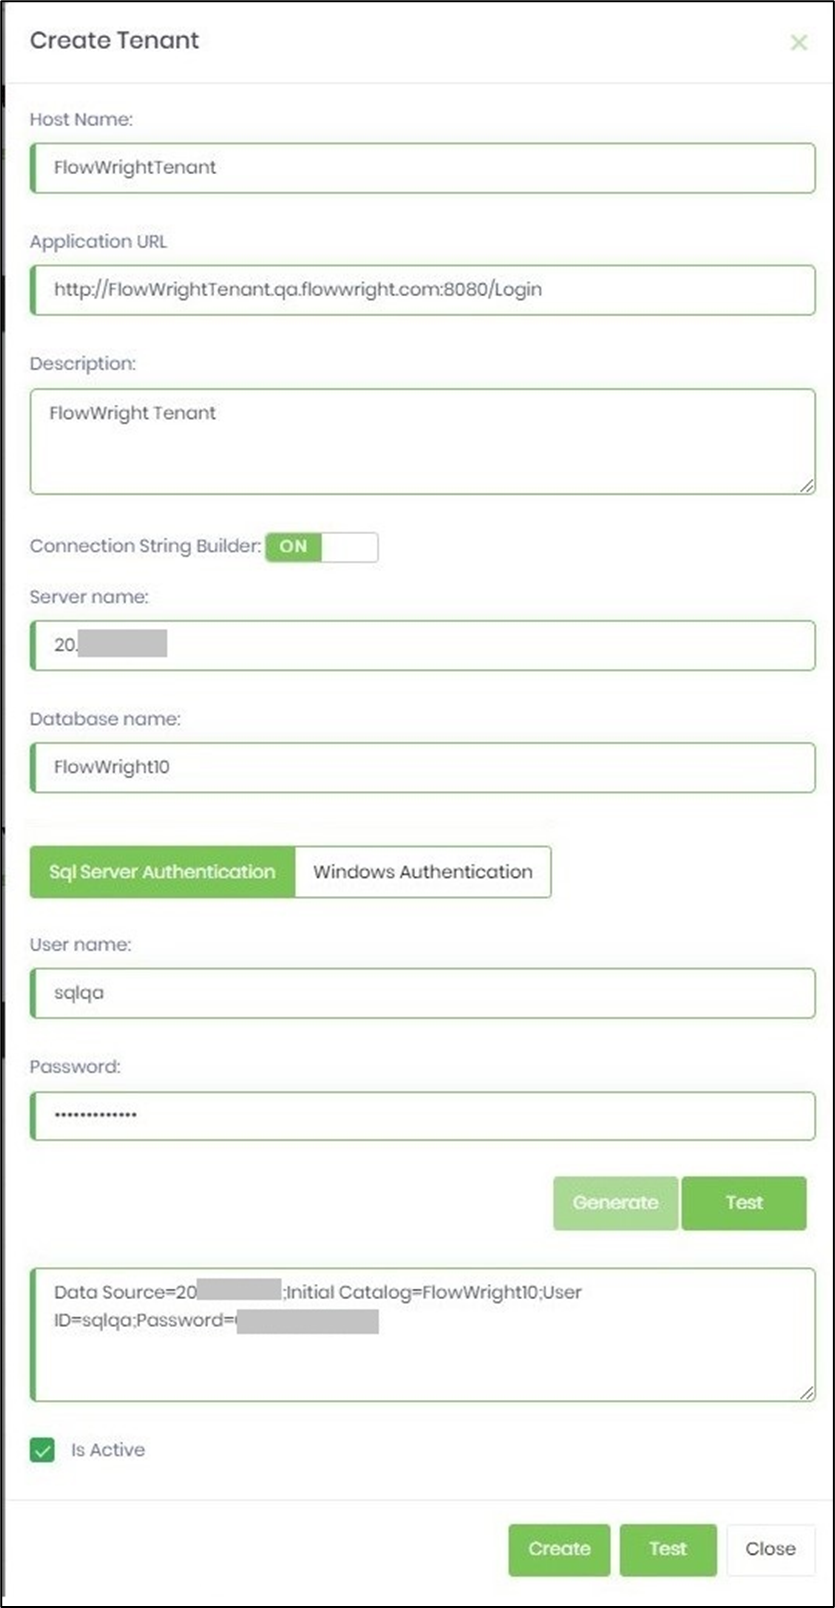
Upon selecting the menu option, a dialog will appear. Here, you need to provide the hostname and application URL, including this name and a brief description of the tenant. Enabling the connection builder to build the connection string is a crucial step. Provide the server and database names, and if applicable, configure this tenant for Windows Authentication. Your SQL username and password are also needed. Click on the Test button to validate this connection and then on the Generate button to generate the connection string in the textbox, as shown below.
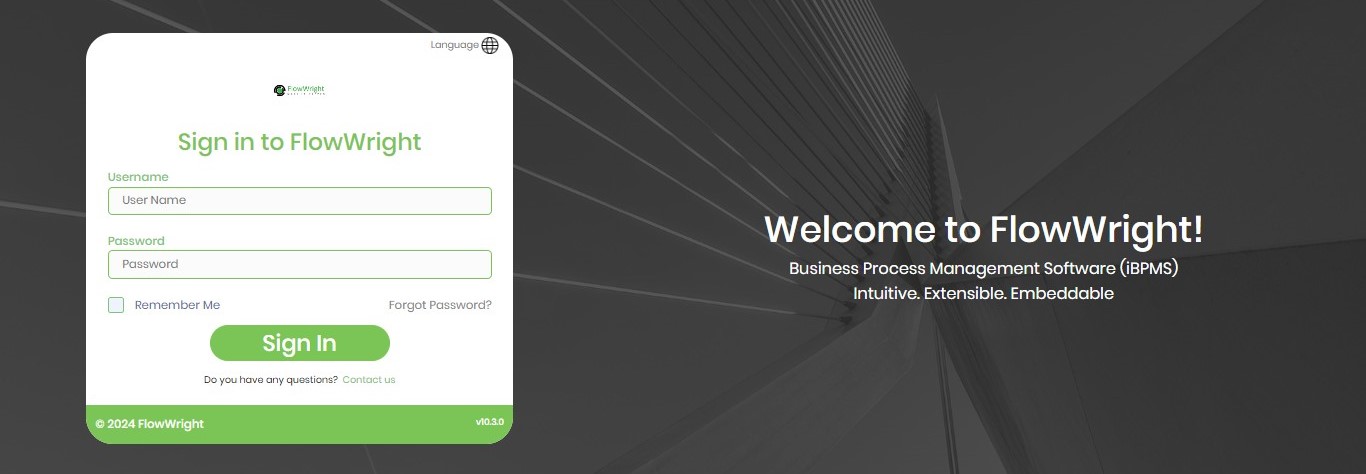
Once the tenant is created, it should appear in the active tenants list. Now, the tenant is ready, and you can log in to the tenant. Access the tenant using the tenant URL. The URL for the new tenant is:
http://flowwrighttenant:8080/login
The FlowWright Tenant login screen should look as follows:
Use the default login credentials to log in to tenant1:
Once you log in, the FlowWright UI should be the same as the existing FlowWright UI. Refer to the “FlowWright Configuration Manager User Manual” for instructions on how to use this user interface and FlowWright features.