This function lets you manage workflow users within FlowWright as an Admin user.
You can navigate to the Administration > User Management menu option.

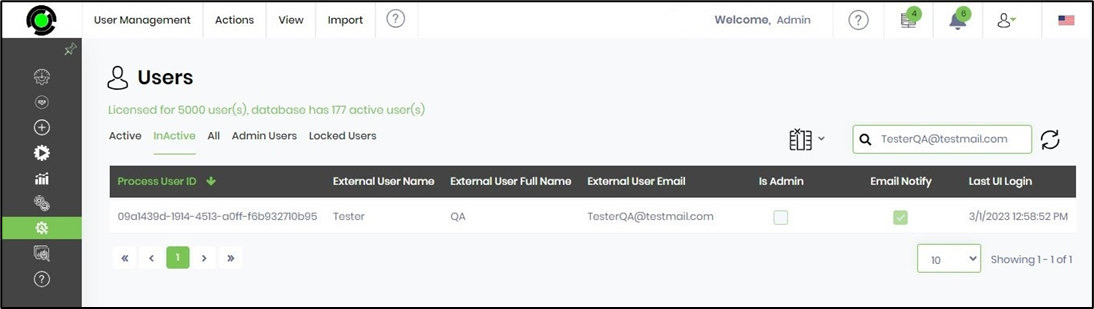
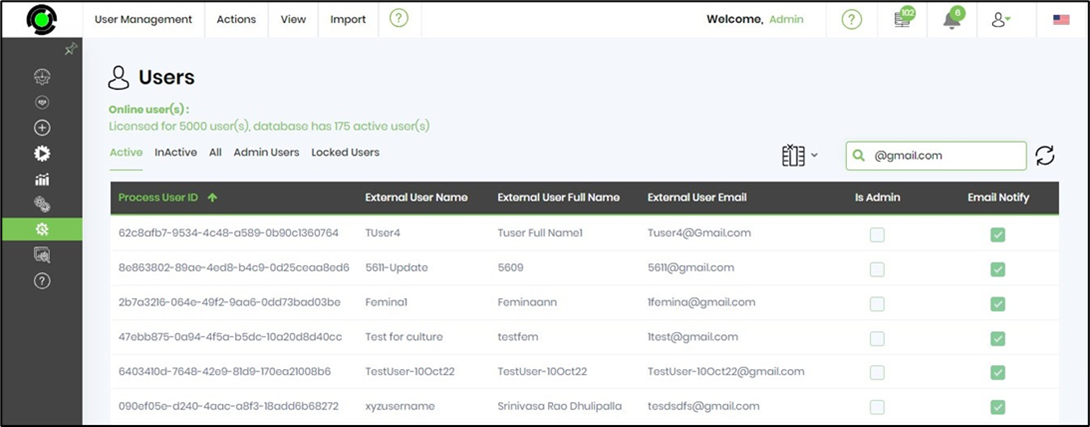
The Users page opens in a new tab, as shown below. The application license user count and the total number of active users are displayed at the top. The “Active” tab shows the list of active users in the system. The “Inactive” tab lists users who no longer participate in the system. The “All” tab lists both active and inactive users. The “Admin Users” tab lists users with admin privileges. The “Locked Users” tab lists users who have been locked out for failing authentication three times in a row. You can use the search text box to filter the user list.

User Management.
Select the Users management menu to navigate to System Roles, Application Roles, New User Default Roles, Organizational Structure, User-Connectors, View Logins, View Invalid Logins, and User Access Requests page.

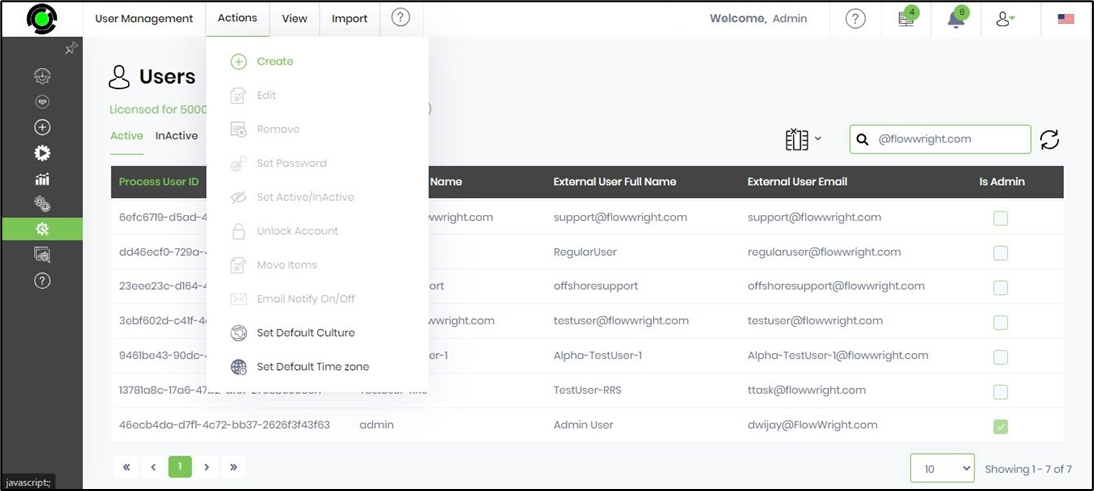
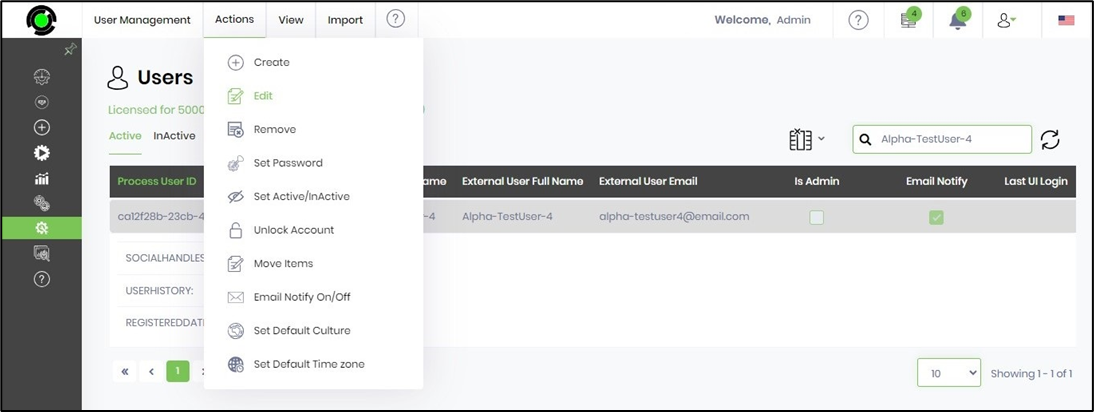
User Management - Actions.
Select the Actions menu to navigate to Create, Edit, Remove, Set Password, Set Active/Inactive, Unlock Account, Move Items, Email Notify On/Off, Set Default Culture, and Set Default Time Zone pages.

User Management - View.
Select the user record from the table and click the Actions menu to navigate to the view Roles, History, Logins, Statistics, and Generate API Token page.

User Management - Import.
Select the Import menu to navigate to the CSV and XLS features. You can use this function to import a large number of new users into the system.

Create a new user.
On the Users management page, navigate to the Actions> Create menu option, as shown below.
A pop-up window appears for configuration. In the text boxes, please provide an external username and full name. The External User Name is the Login Username, and the Full Name is displayed in the Welcome title at the top of the menu. Provide an email address to receive email notifications. Select the Authentication mode between “Forms and External”. The “Forms” authentication requires “UserID and Password” to use the application. The “External” relies on “Windows, SAML, Facebook, etc.” for authentication. Please provide a login password in accordance with the policy terms. Select the Culture from the drop-down list. Select the user's time zone from the drop-down list. Use the checkbox to grant or revoke “Admin” privileges. Use the checkbox to activate or deactivate the user's access. Use the checkbox to enable or disable email notifications sent to the user. Click the Create button to confirm. Once the new user is created, a new row will be added to the Users table.
The configuration sample for the “Forms” authentication mode is provided below.

The configuration sample for the “External” authentication mode is provided below.

Active and Inactive users.
This function allows you to mark the User as active or inactive within FlowWright.
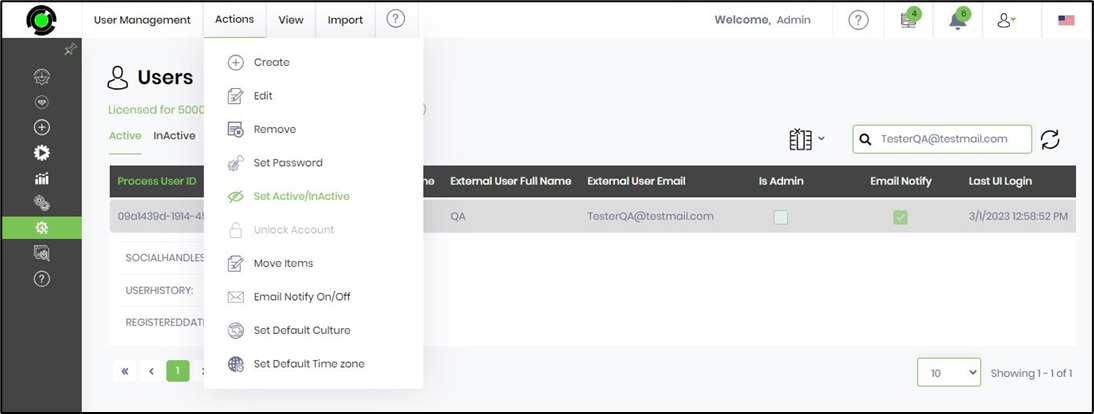
On the Users management page, select the user from the list, then navigate to the Actions > Set Active or Inactive menu option, as shown below.
The selected user is marked as Inactive, and an alert notification is displayed in the top-right as shown below. The user's details are moved to the Inactive tab.
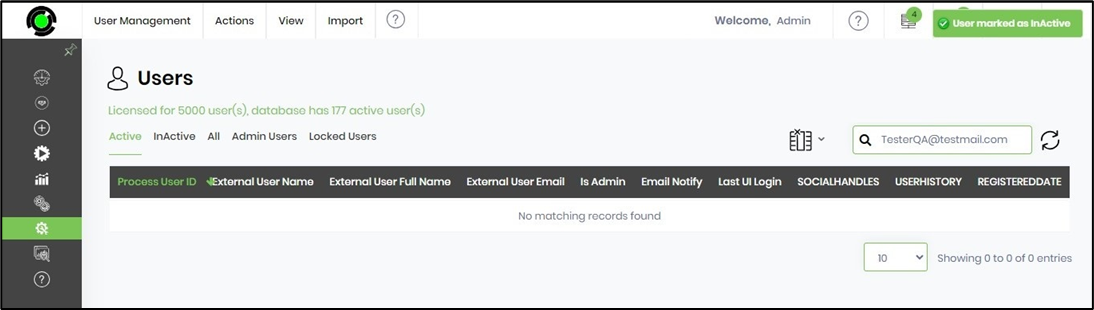
Navigate to the Inactive tab to view the list of inactive users. Use the Search box to narrow the results.
Users can be removed when they are no longer active in an organization, but they remain associated with items they created. Using active and inactive users helps us move items from inactive to active users, thereby overcoming the problem described above.
Edit User's Info.
This function lets you manage workflow users within FlowWright.
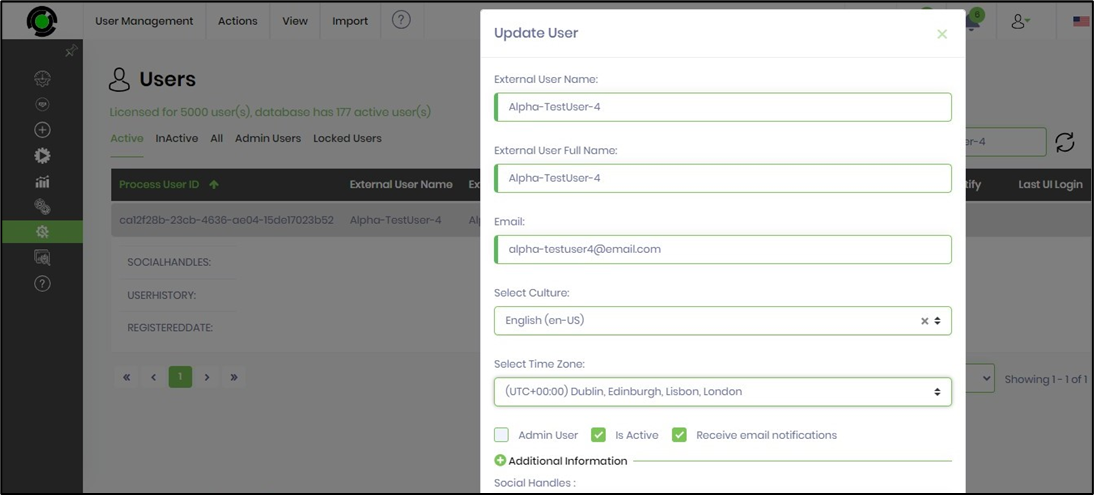
Select the user from the list on the Users management page, then navigate to the Actions > Edit menu option, as shown below.
The User's details for modifications are displayed in the pop-up window below. Click the Update button to confirm the changes. An alert notification is displayed in the top-right corner.
Set User Password.
This function allows you to reset a user's password as a FlowWright Administrator.
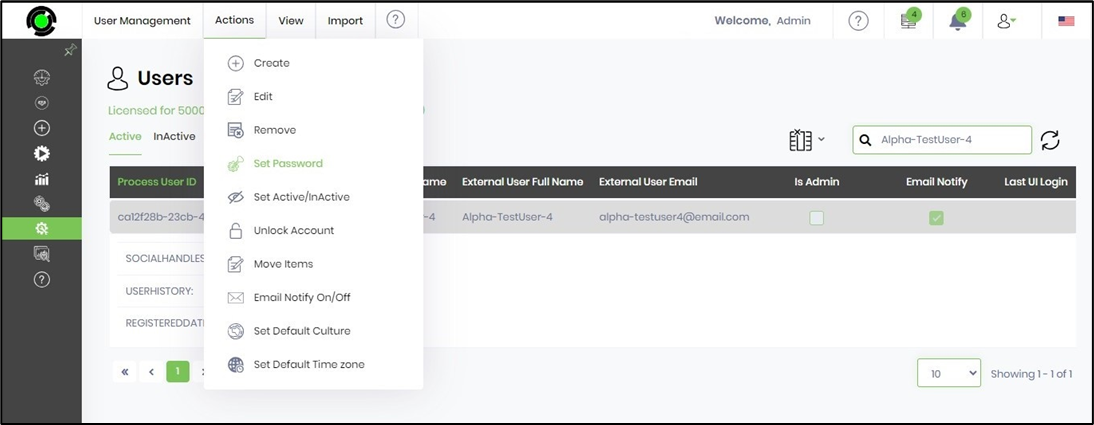
Select the user from the list on the Users management page, then navigate to the Actions > Set Password menu option, as shown below.
You must provide the new password in accordance with the Password Policy. Click the Set Password button.

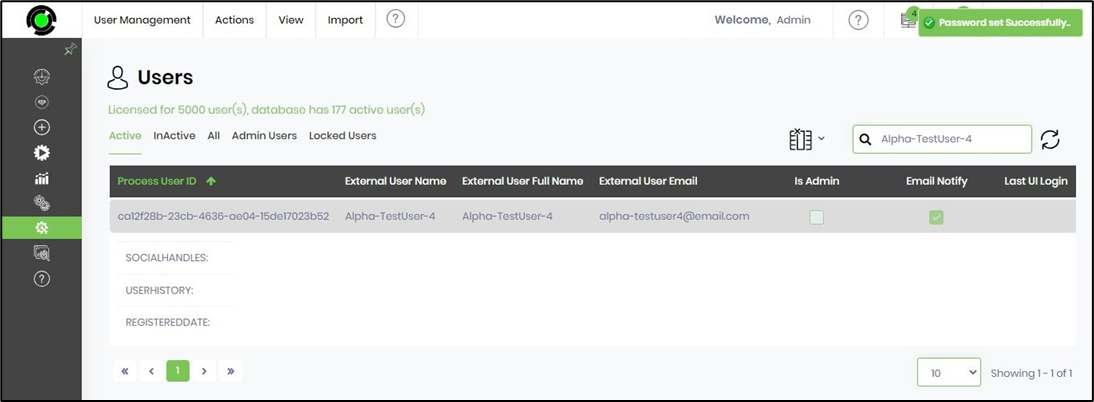
The user’s hash-encrypted password has been reset successfully, and a confirmation message is displayed at the top right, as shown below.
View Admin Users.
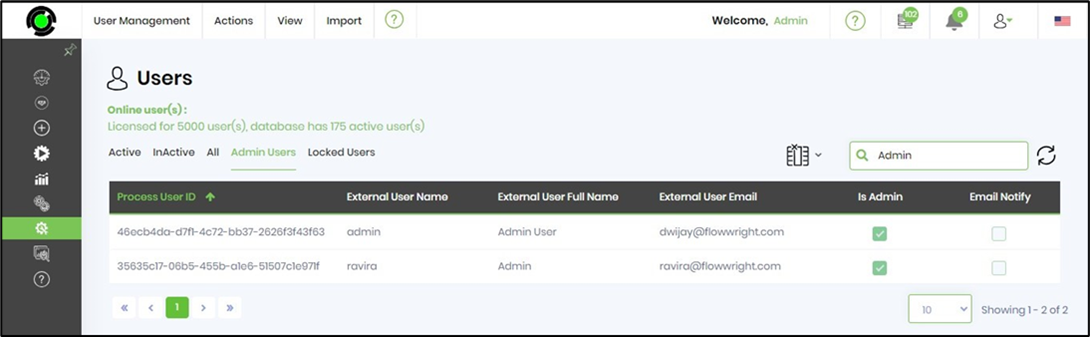
Use the new "Admin Users" tab to view all FlowWright application administrators, listed by their Process User IDs. Click the column headers to sort the table list. Use the Search feature to view the list, as shown below.
View Users Online and Last Login.
The "Online Users" indicates the number of users online.
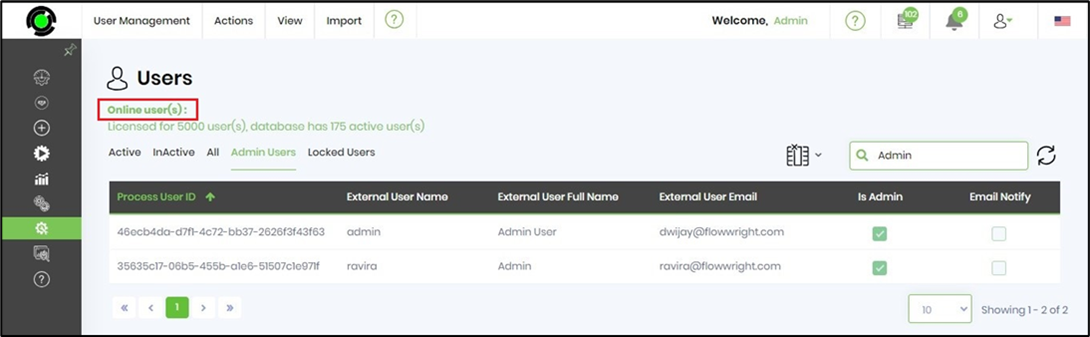
Click the text link to view the online users list, as shown below.
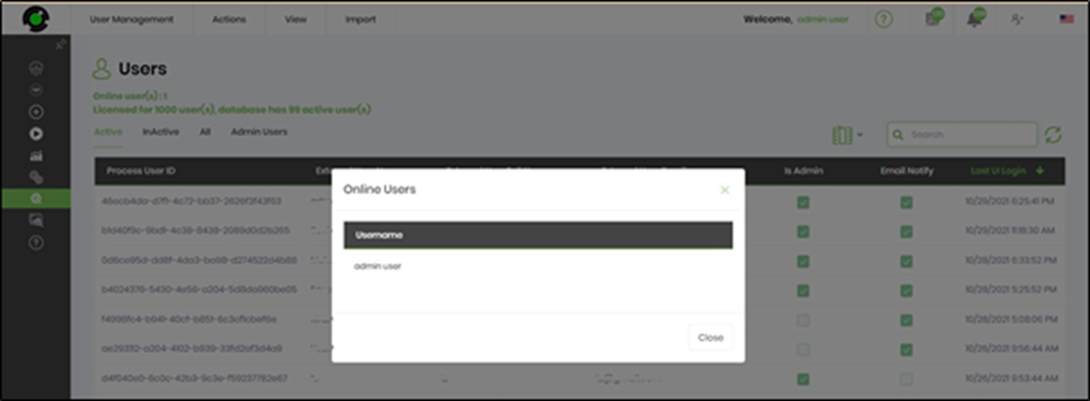
The list of Active users is displayed as a table. Click the column headers to sort the table, and type user information to quickly search the list.
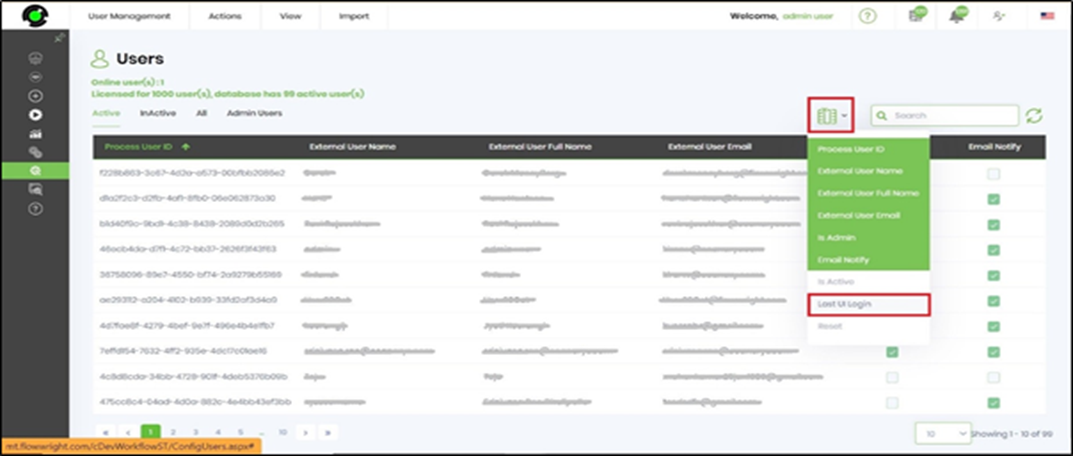
Click the Columns selector drop-down menu and select the Last UI Login column, as shown below. The table list will be refreshed to include the new column. If this column is not visible, click again to unselect any other column.
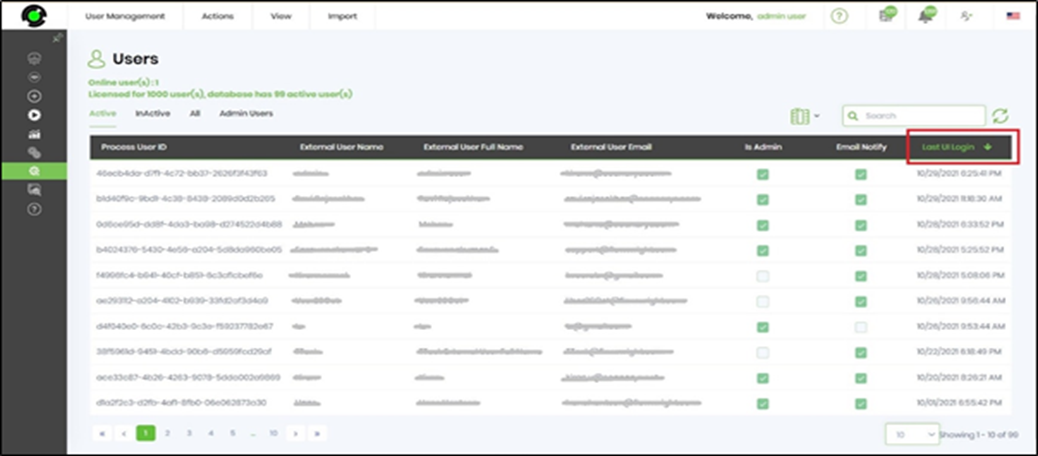
The list of users, including their last UI login date and time, is displayed as a table. Click the column headers to sort the table list.
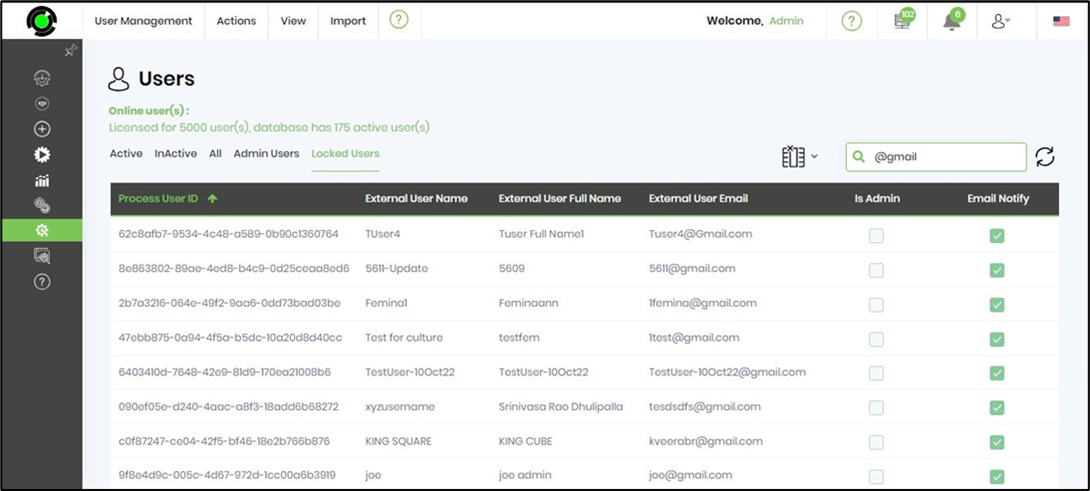
View Locked Users.
The "Locked Users" tab lists users who have failed Form-based authentication 3 times in a row due to incorrect passwords. Users are locked out of the system for 30 minutes. The user may attempt to log in again after this time limit or use the “Forgot Password” option on the login screen.