Description:
This step sends an email to a selected number of users.
Inputs
- replyTo – reply to email address
- fromEmail – from email address
- emailTo – select users to send emails to
- emailToRoles - select roles to send emails to
- emailAddresses – external email addresses
- subject – subject of the email
- body – body of the email
- cc – carbon copy list of email addresses
- bcc – blink carbon copy list of email addresses
- fileList – list of file attachments
- sendUsingQueue – sends the email message using the email queue
- priority - set priority
- encryptBody - encrypt and store in queue
Returns
- True – email sent successfully
- False – failed to send the email
Usage:
To use this step, FlowWright must be configured with the SMTP email server information. To do this, navigate to the Status—Settings—Email menu option, as shown below.

The Email Settings page is rendered as shown below. You'll need to set the SMTP host, port, user, and password configuration here. Click on the Save button.

Note: The Email Trigger Service engine must be running to utilize the Email Queue feature for process steps such as RouteTo, Task, and Email.
Example:
Let’s build and execute the “emailDef” example.
- Create a new process definition called “emailDef” and open it in Designer mode.
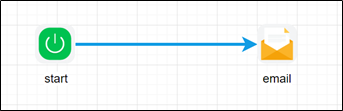
- Drag an “email” step to the canvas.
- Connect the dots between the “Start” step and the “email” steps, as shown above.
- Define a variable or a global to store the file path.
- Click the "email" step to configure its "Required" properties. Provide a name for the step. Provide the path to the Word document file on the app server. Provide the variable or global reference to store the output file path. Click the Save button. Note: Click the "AI Predict" button for the Copilot to add new process steps that match your process description.

- Click the "email" step to configure its "Optional" properties. Provide the reply to the email address. Provide or use the default email address configured in app settings. Click the button to select the users to whom to send emails. Click the button to choose the application roles to which you want to send emails. Provide a list of external email addresses (separated by semicolon). Provide the subject text for the message. Click the button to provide email context information.

- Click the button to select users to whom you want to send emails. You can also search for and add users to the list.

- Click the button to select the application roles for which you want to send emails. You can also search for and add roles to the list.

- Click the button to provide the body of the email message using the Rich-Text editor feature. Click the Save button.

- Click the "email" step to configure its "Optional" properties. Provide the CC email addresses (separated by semicolon). Provide the BCC email addresses (separated by semicolon). Click the button to add file attachments on the application server. Select if an email queue is required to send an email. Select the priority value from the drop-down list. Select “On” to enable the message encryption. Click the Save button.

- Click the button to add file attachments to the application server. Then, provide the file path on the server. Note: Only the email recipients can download the file attachments as a security measure.

- The “Logging” setting is necessary for documentation and measures workflow progress and the percent complete. As shown in the images below, this is achieved by configuring the step state and percent fields individually. Configure the “Logging” using the following properties. The "Send Test Mail" feature is provided to send a test email with the contents configured in the body to the current (logged-in) user.

- Save the process definition, create a process instance, and then execute it. The step should send an email to the selected users and require the FlowWright Email service to run. To check on email delivery, navigate to Status > Email Queue.

Definition Sample:
You may download the sample definition(s) from the link here and later import them (drag-and-drop) to your FlowWright Process Definition (XML file) or Form Definition (HTML file) page.
Note: Please verify and complete the process steps for any missing configurations, such as file path references and database connections, after import. Then, save the definition to confirm the changes.
Click here to download the sample file.