Connection default settings
To design the workflow, the user should drag and drop the step(s) from the toolbox to the design area, connect the steps, and configure the steps with mandatory input.
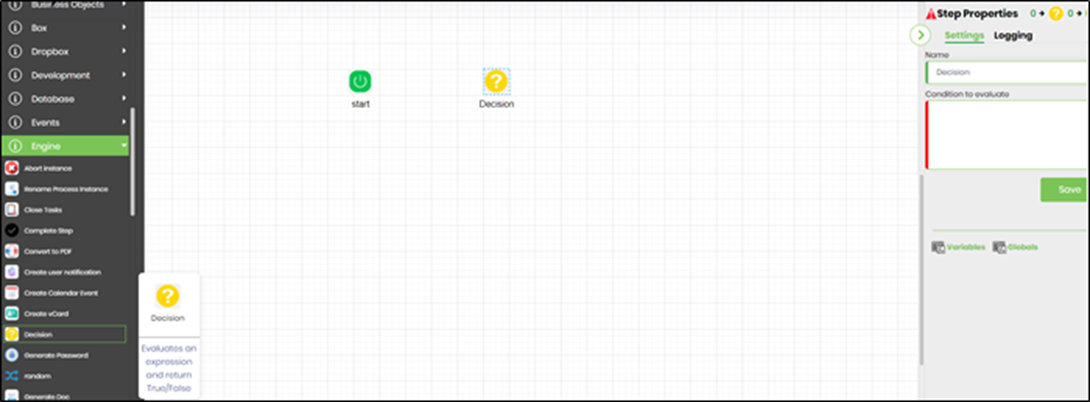
The process step configuration has 3 tabs - Settings, Advanced, and Logging.
Click to select a step. Press the SHIFT key and select another step to connect. The workflow designer prevents self-connections from occurring during any workflow step.

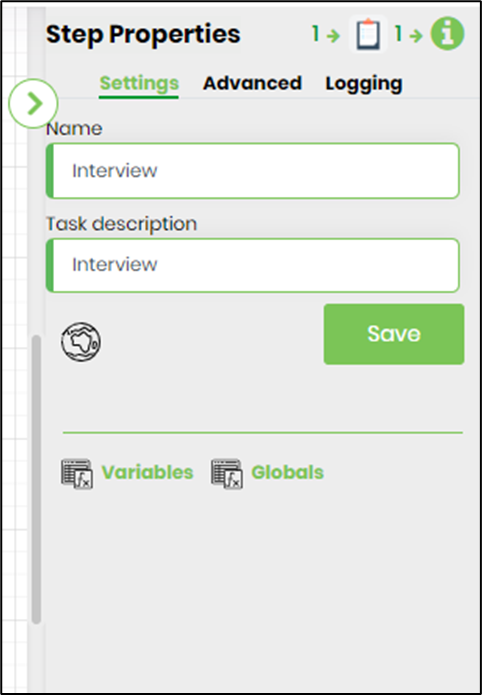
Any step's “Settings” configuration is mandatory as shown in the image below.
As shown in the image below, the “Advanced” setting configuration of any step is optional (but specific field inputs are required depending on the step functions).

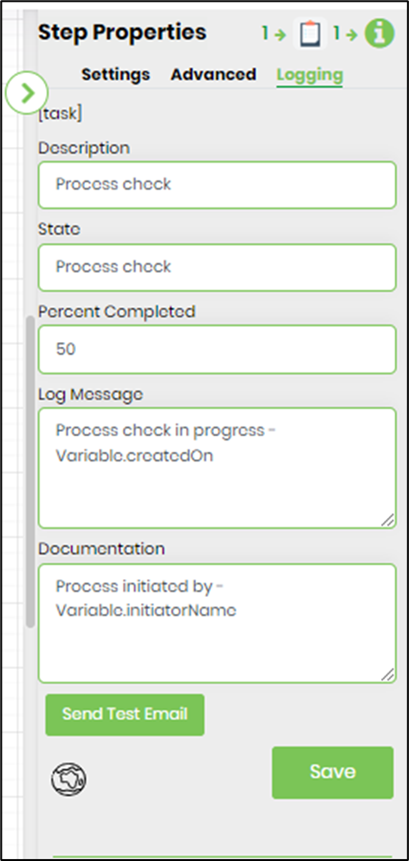
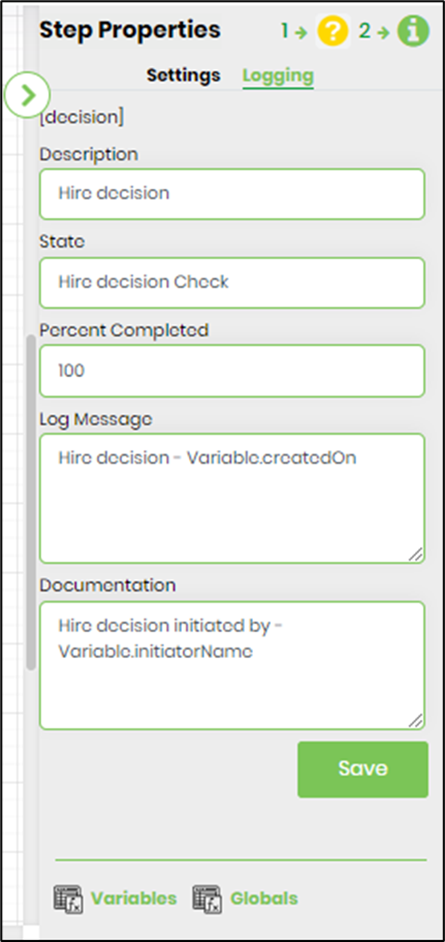
The “Logging” setting configuration is necessary for documentation and measures the workflow progress and percent completion. This is achieved by configuring the step state and percent fields individually, as shown in the images below. In this example, the workflow at the “Process check” step is 50% complete.
The “Hire decision” step is 100% complete.
Save the workflow OR navigate to the Action—Validate menu option. The application displays the last saved date and time and alerts you about incomplete step configurations.

Connection default settings
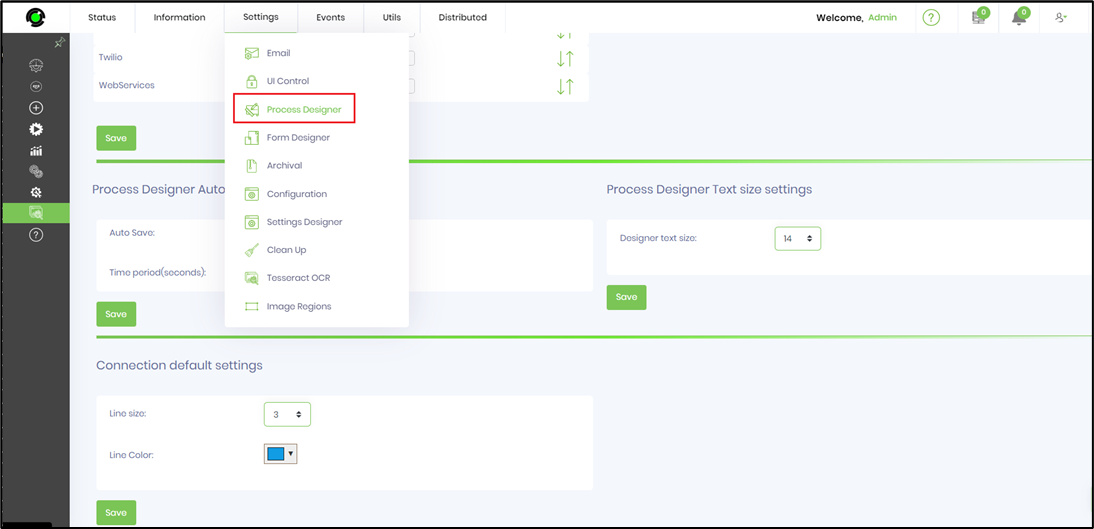
The default color and size of the connections between the steps can be changed at the Status - Settings - Process Designer - Connection default settings as shown below:
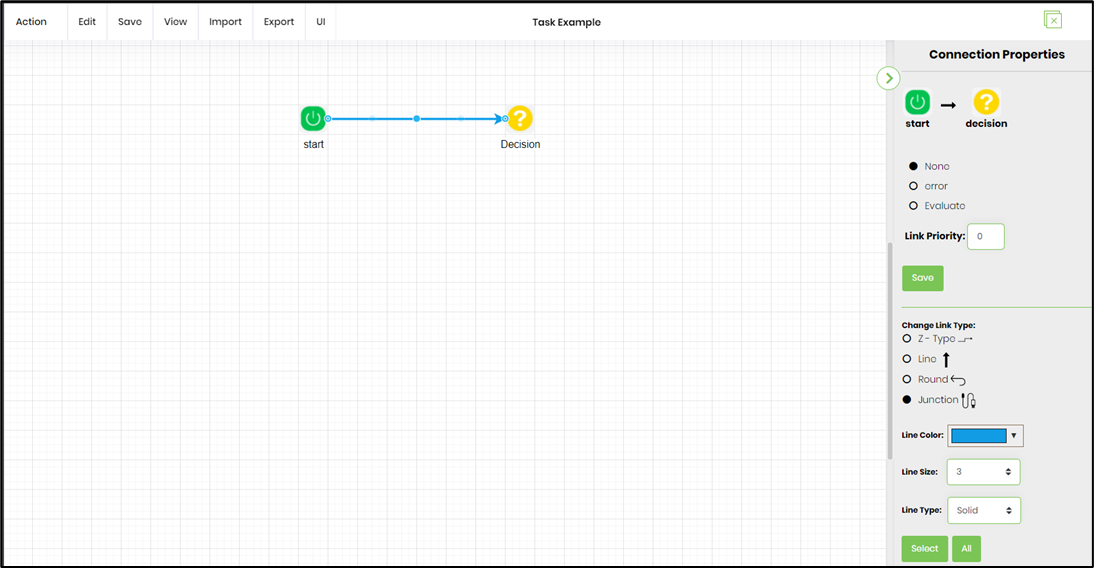
The changes will be reflected in the designer connection settings as shown below :
Create a connection from and to
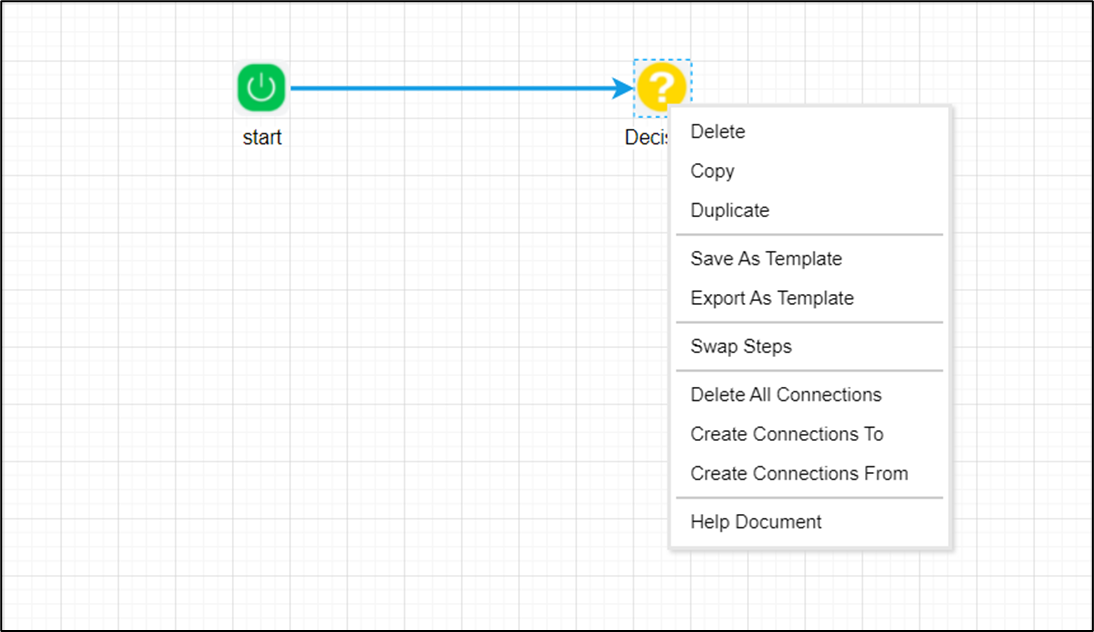
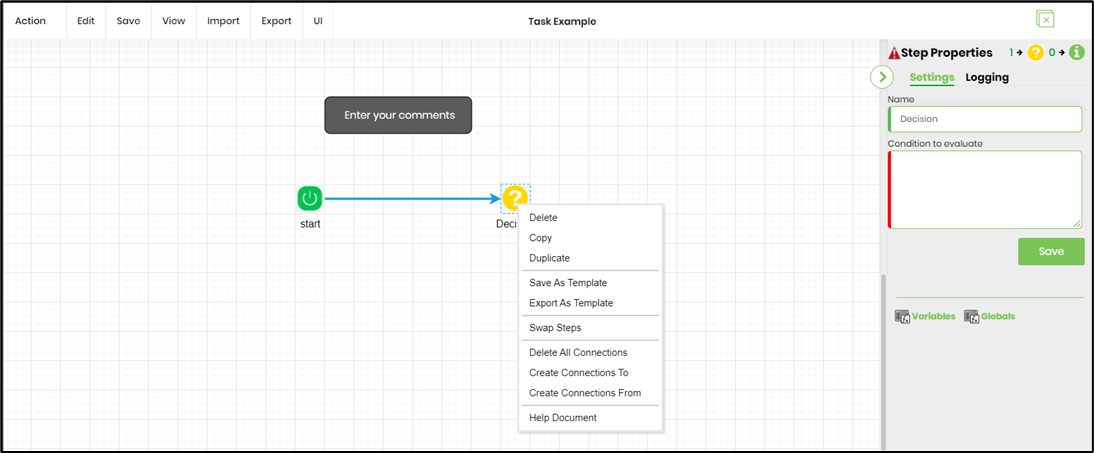
Connections can be created between a single step to multiple steps, or vice versa. Select a bunch of steps, as the target steps, right-click on a source step, and click the context menu item “Create Connections To” as shown below:
Right-click the context menu for the steps.
Users can perform various operations like “Duplicate, Delete, Save as Template, Export as Template, Create Connections To, Create Connections From” by selecting a step and right-clicking on the step as shown below:
Create a connection from the step with the UI
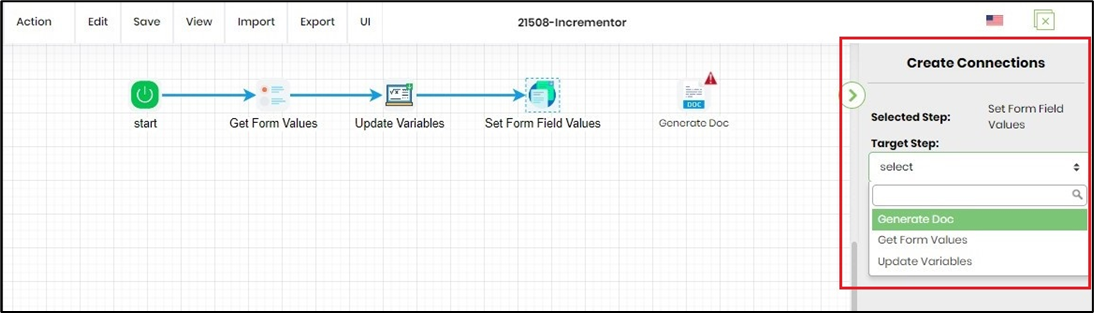
In FlowWright, the UI allows you to create Connections between steps. Select the step and right-click to choose the "Create Connections" menu option. The feature is displayed in the right pane with a list of Step names and a search function.

Select the desired process step and click the Create Connection button to finish.
Warning symbols for invalid steps
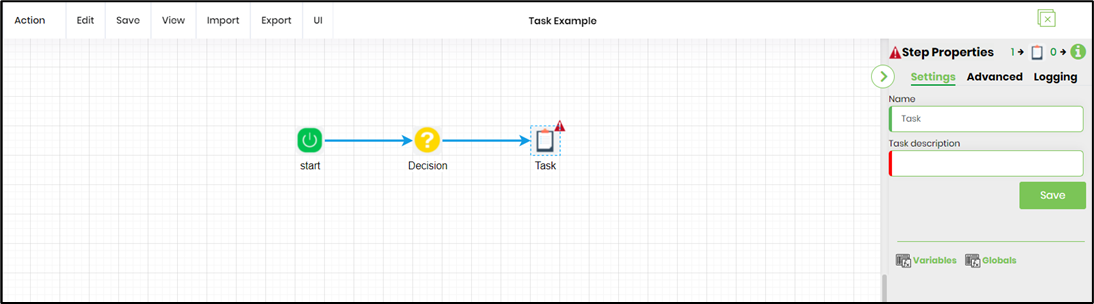
If any of the steps are configured incorrectly, for example, a required value for an input/property is not provided, the step is displayed with a “Warn Icon”. The warning icon is also displayed when the step fails validation. The warning icon next to the step looks as follows:
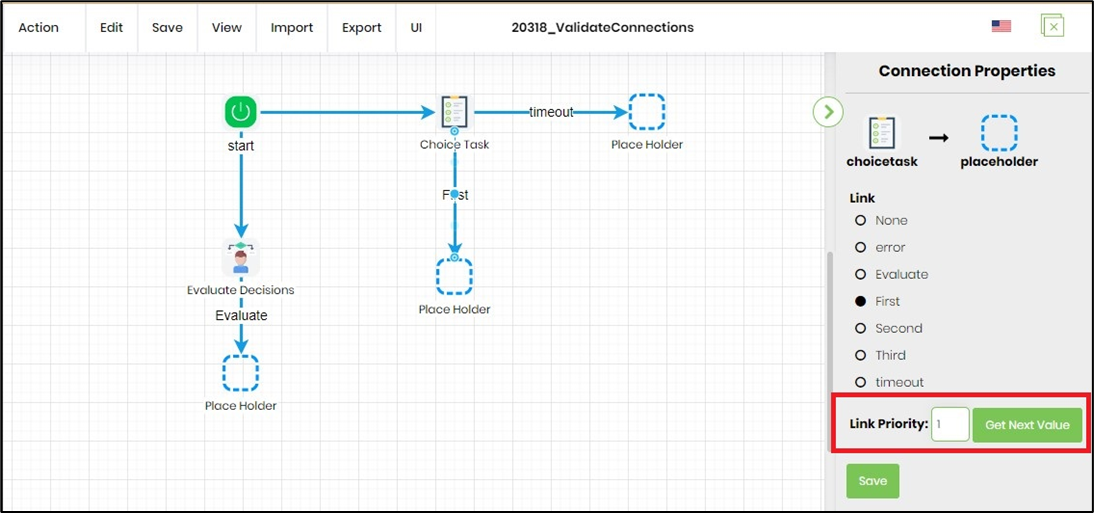
Link Priority connection step
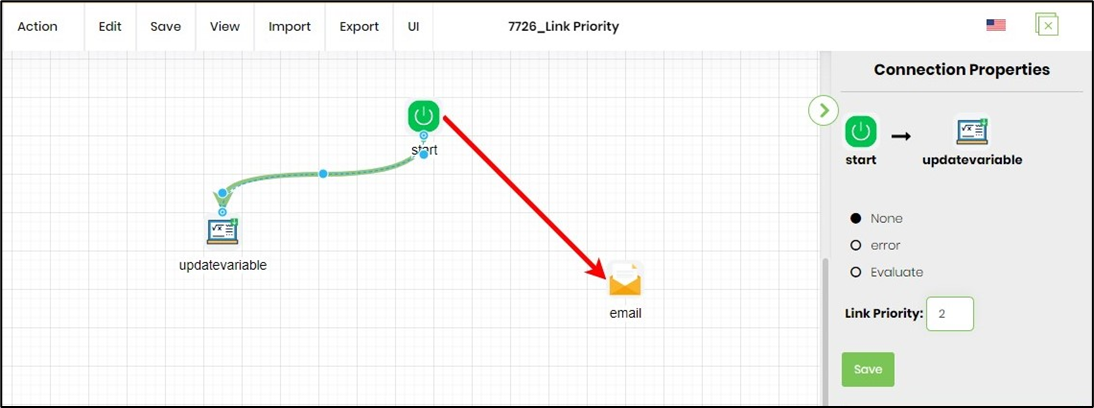
Use the link priority option to define the order of step execution, as shown below. The steps are executed in the increasing order of the priority value. Based on run-time data, the link priority is optimized for execution in real time.
Select the connection and provide the link priority value as shown below.

Select another connection and configure the link priority with a high value.
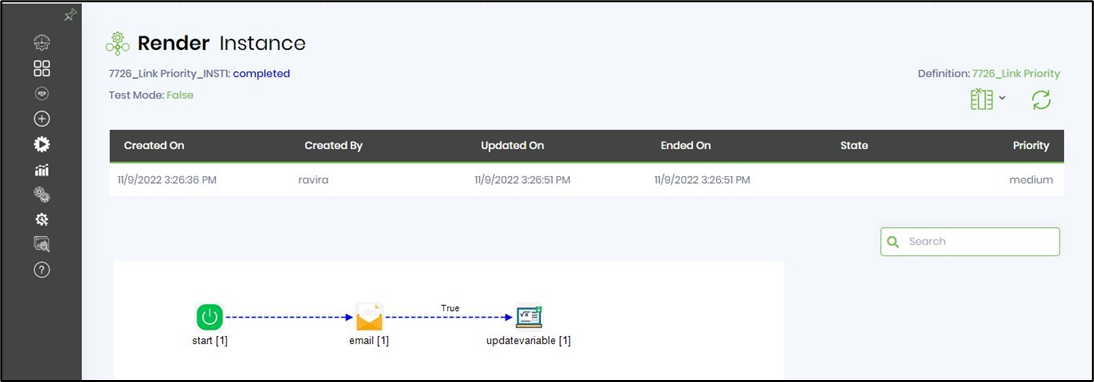
The process instance after execution is shown below.
Get the next link value for the connection.
The workflow designer connection has a Link value text box. On click, the max link value from all the outgoing connections of the source step +1 is calculated and set to the text box value. The link value is saved automatically when the page changes or exits.