This function lets you manage workflow users within FlowWright.
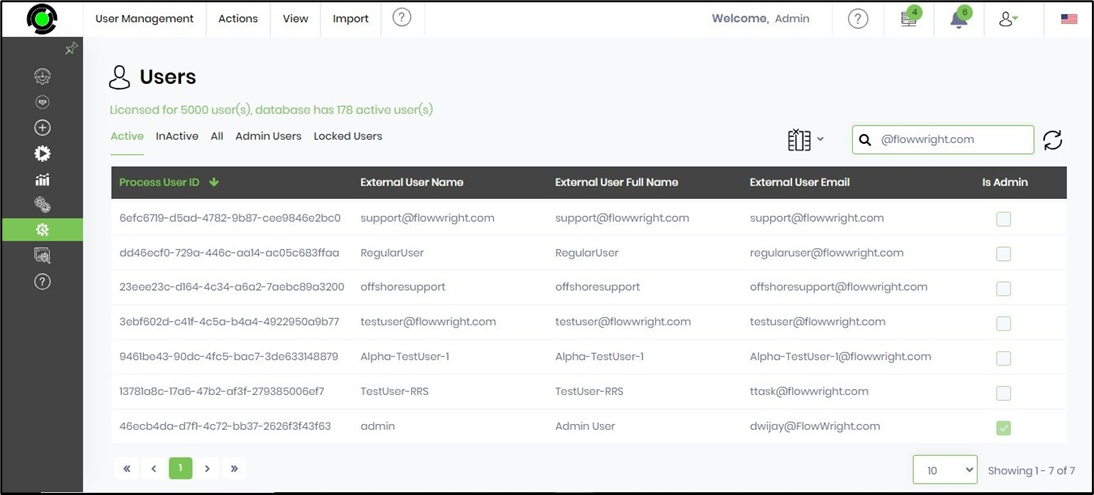
You can navigate to the Administration - User Management menu option. The Users page is rendered in a new tab, as shown below.
Create a new user
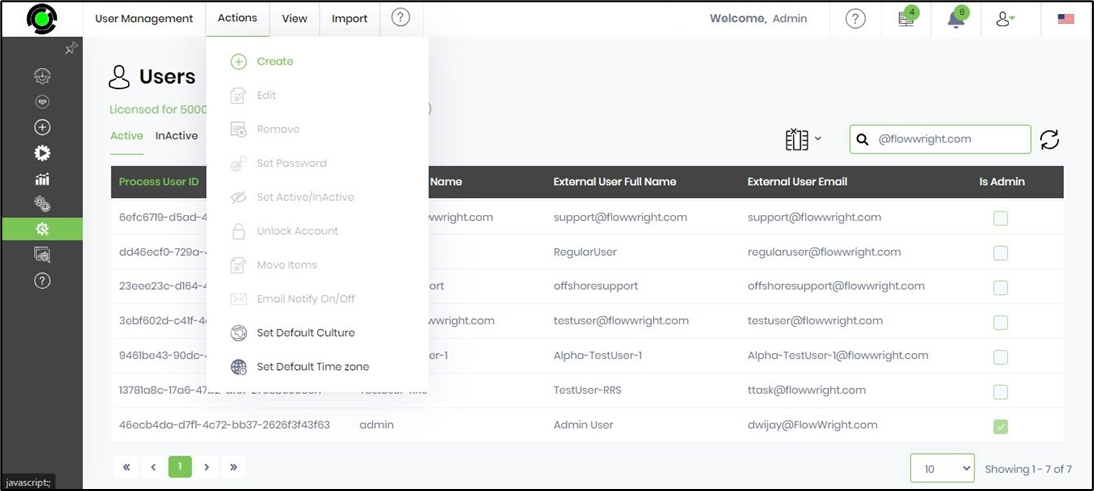
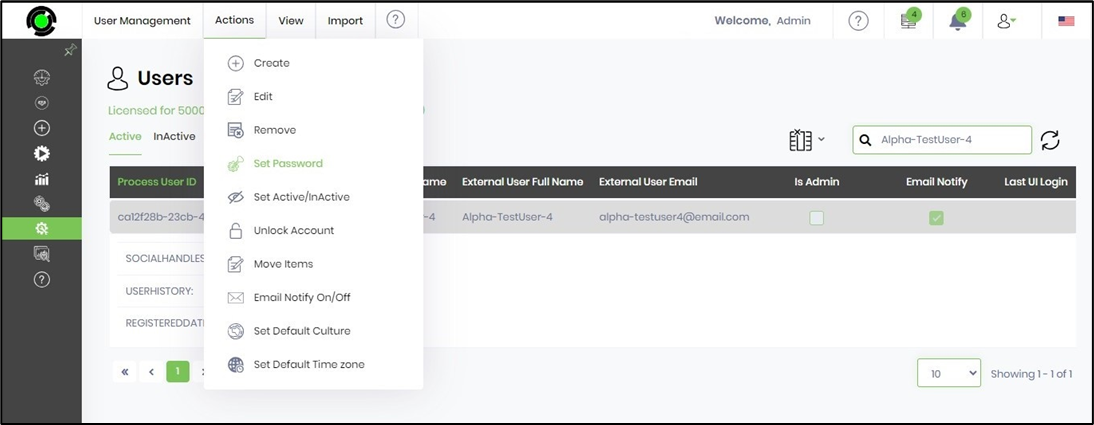
On the Users management page, navigate to the Actions - Create menu option as shown below.
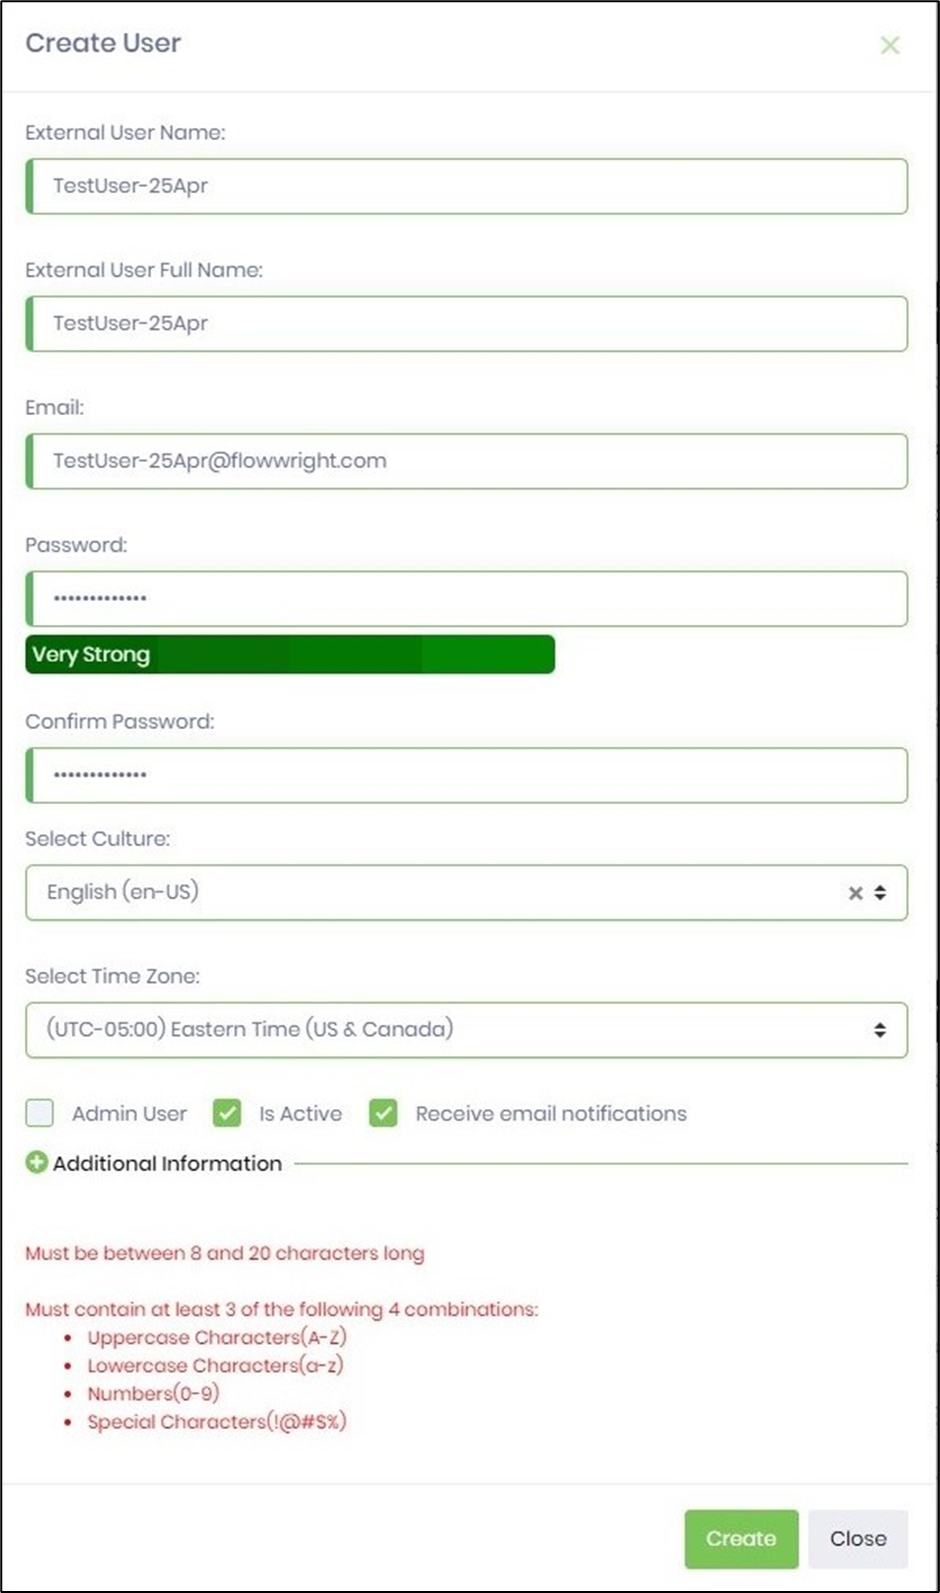
The Create User popup window appears for configuration. In the text boxes, provide an external user name and full name. The External User Name is the Login User Name, and the Full Name is displayed in the Welcome title on the top menu. Provide an email address to receive email notifications. Provide a login password as per the policy terms. Select the Culture from the drop-down list. Select the user's time zone from the drop-down list. Use the checkbox to grant/revoke Admin privileges. Use the checkbox to activate/deactivate the user's access. Use the checkbox to turn on/off the email notifications sent to the user. Click on the Create button to confirm. Once the new user is created, a new row will appear In the Users table.
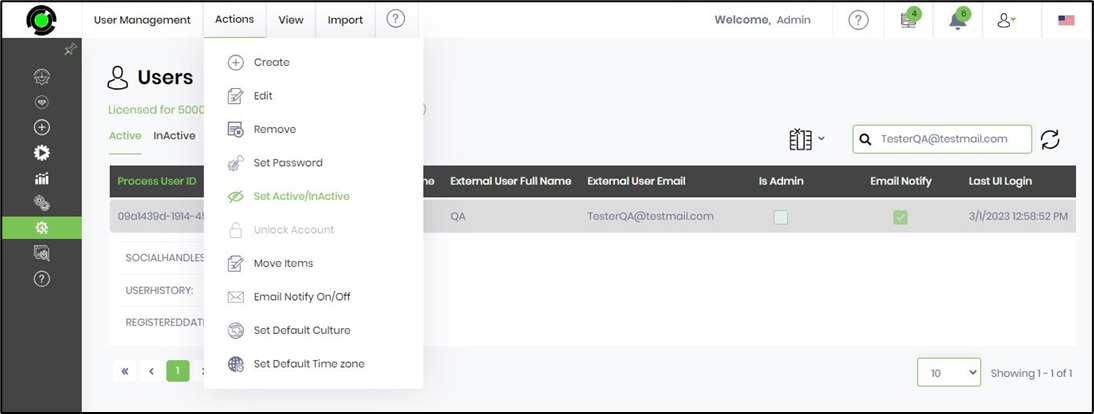
Active and Inactive user
This function lets you mark the User as Active/Inactive within FlowWright.
On the Users management page, select the user from the list and navigate to the Actions - Set Active/Inactive menu option, as shown below.
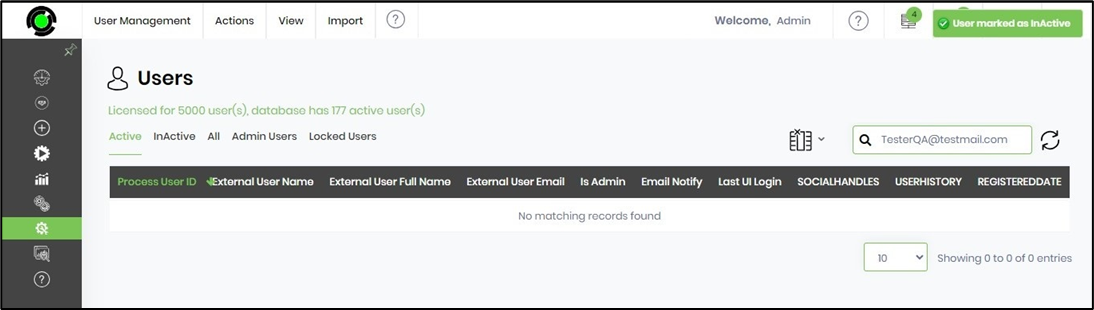
The selected user is marked Inactive, and an alert notification is displayed in the top right-end corner, as shown below. The user's details are moved to the Inactive tab.
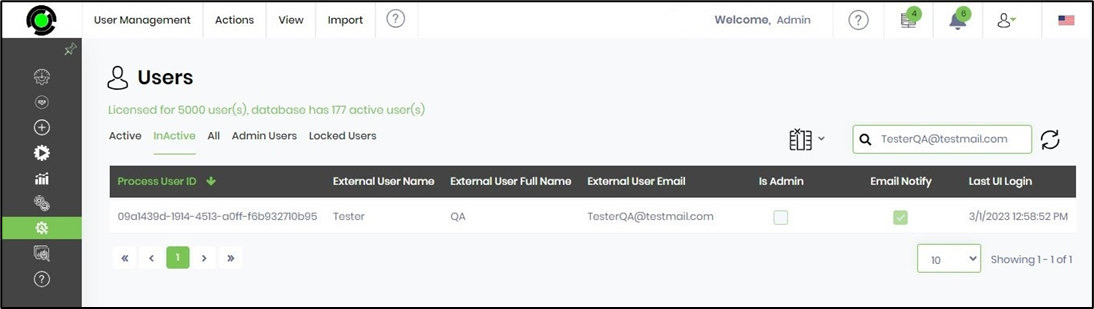
Navigate to the InActive tab to view the list of inactive users. Use the Search box to narrow the results.
Users can be removed When they are no longer active in an organization, but these users are associated with items created. Using active/inactive users helps us move the items from inactive to active users and overcome the above problem.
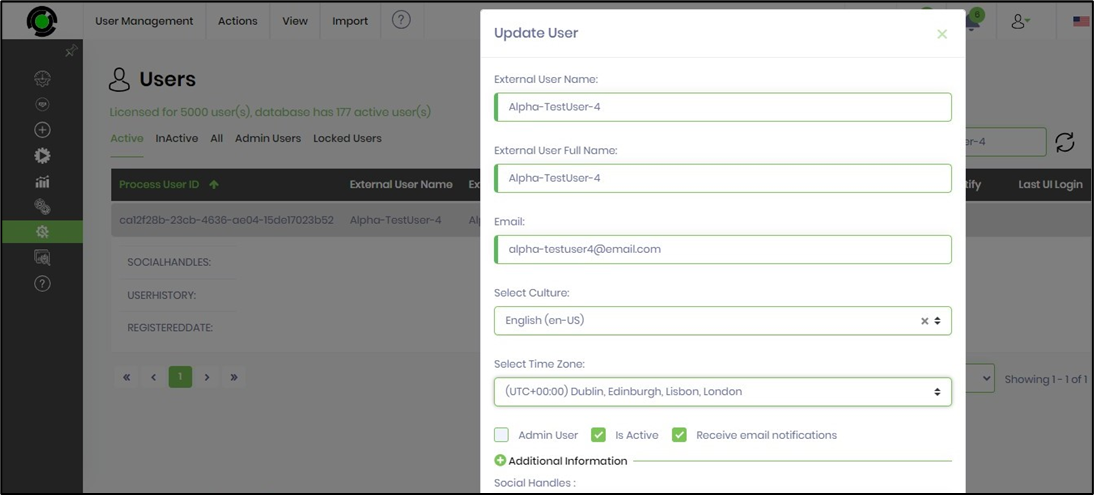
Edit User's Info
This function lets you manage workflow users within FlowWright.
Select the user from the list on the Users management page and navigate to the Actions - Edit menu option, as shown below.
The User's details for modifications are displayed in the popup window below. Click on the Update button to confirm the changes.
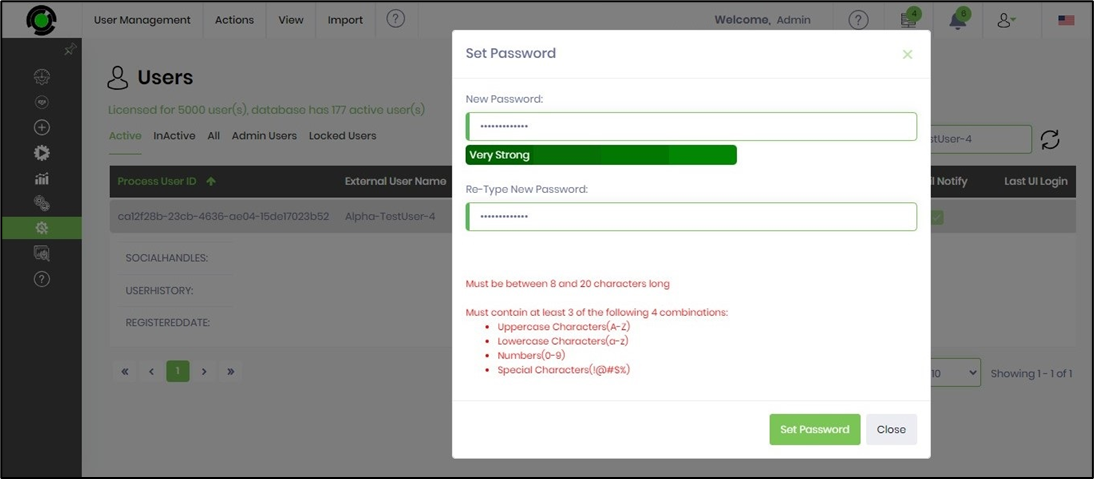
Set User Password
This function lets you reset the User's password as a FlowWright Administrator.
Select the user from the list on the Users management page and navigate to the Actions - Set Password menu option, as shown below.
Please enter the new password in the textbox according to the Policy. Then, click on the Set Password button to confirm.
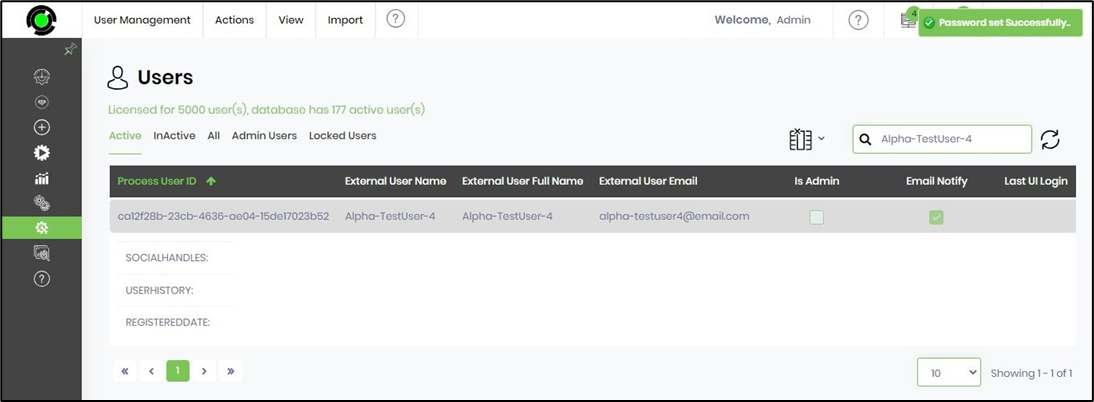
The User’s password has been reset successfully, and an alert message is displayed at the top right-end corner, as shown below.
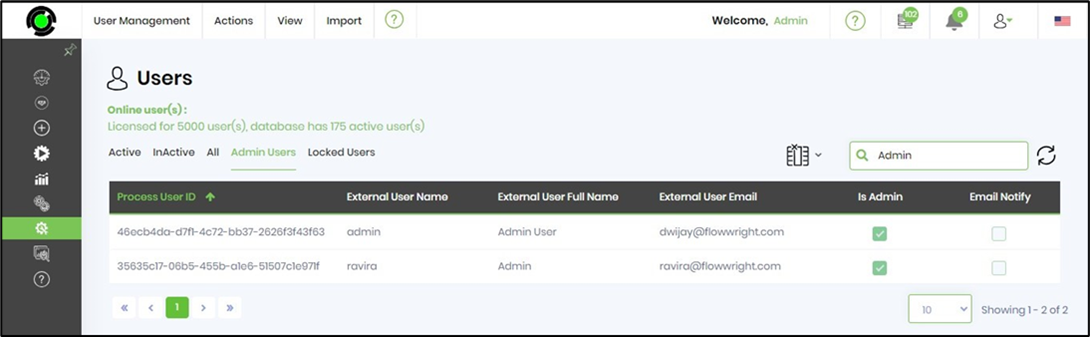
View Admin Users
Use the new tab "Admin Users" to view all administrators of the FlowWright application, displayed by their Process User IDs. Click on the column headers to sort the table list. Use the Search feature to view the list, as shown below.
View Last Login
The "Online Users" indicates the number of users online.
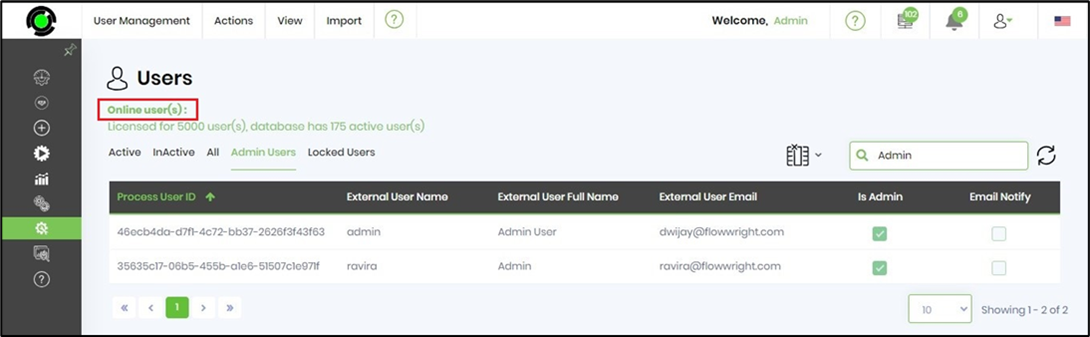
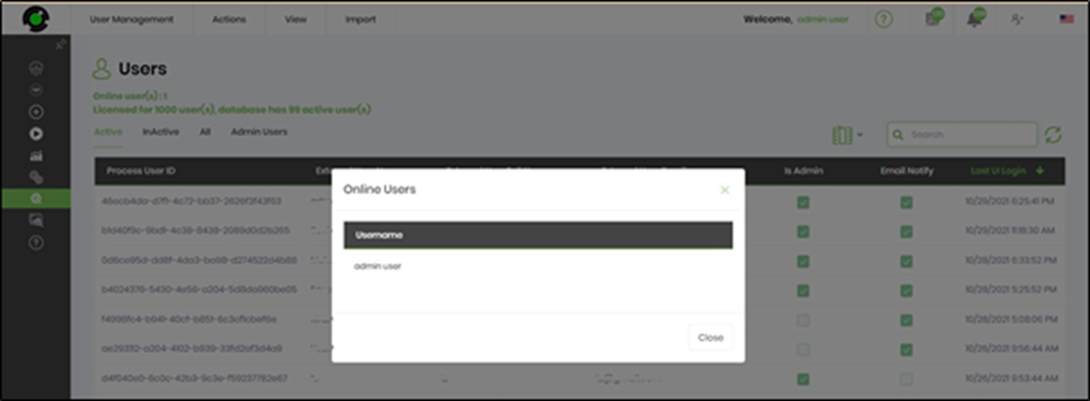
Click on the text link to view the online users list, as shown below.
The list of Active users is displayed as a table. Click on the column headers to sort the table list. Type in the user information to search across the list quickly.
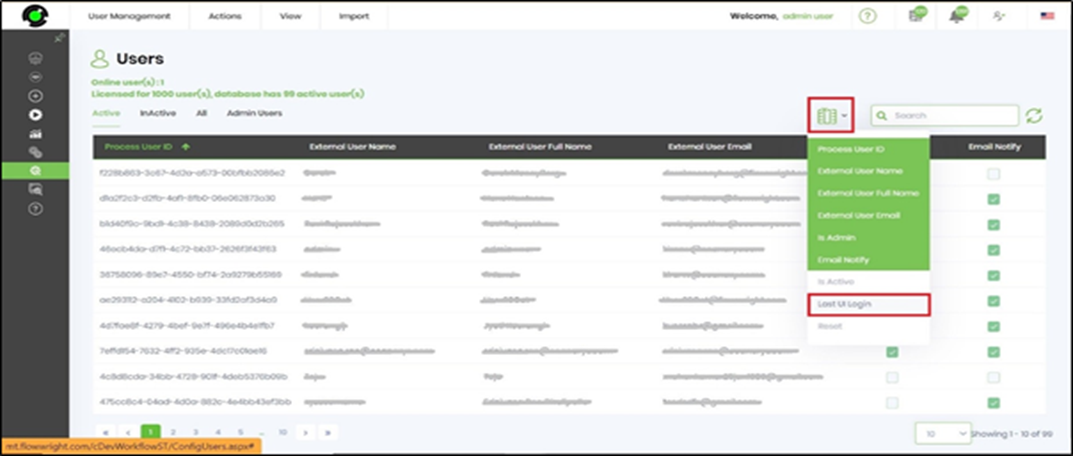
Click on the Columns selector drop-down menu and select the Last UI Login column, as shown below. The table list will be refreshed to include the new column. If this column is not visible, click again to unselect any other column.
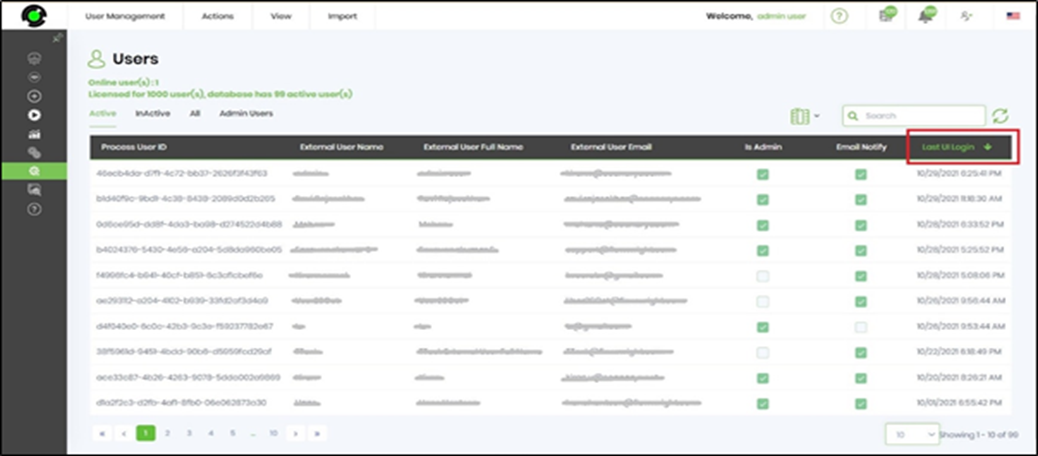
The list of users and their last UI login datetime are displayed as a table list. Click on the column headers to sort the table list.
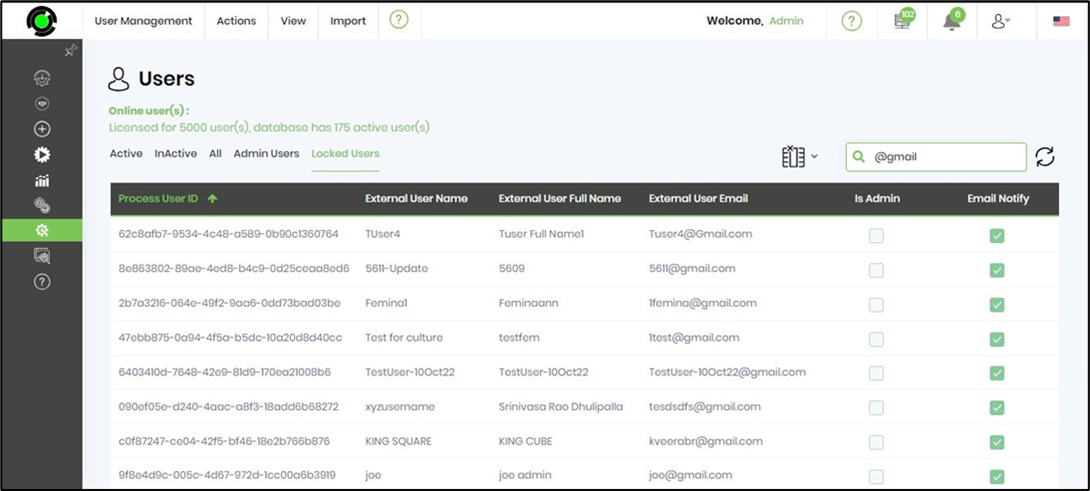
View Locked Users
The "Locked Users" tab indicates the number of users who thrice failed Form-based authentication using incorrect passwords. The users are locked out of the system for 30 minutes duration. The user may attempt again after this time limit or use forgot password option on the login screen.