RabbitMQ is a reliable, mature messaging and streaming broker that is easy to deploy in cloud environments, on-premises, and on your local machine. RabbitMQ is a commonly used open-source enterprise service bus for publishing and subscribing to events. The following UI allows users to create, update, remove, and test RabbitMQ connections.
To access the Integrations > Connections page, follow these steps: Navigate, click ‘Connections,’ and select the 'RabbitMQ' menu option, as demonstrated below.

The Manage RabbitMQ Connection page is displayed as shown in the example below.

Select the Actions to access the “Create, Edit, Remove, Test, and Copy” features.

Select the Utils to access the “Publish Messages” feature.

To learn more about RabbitMQ, visit the product site at https://www.rabbitmq.com
Create RabbitMQ Connection.
On the Manage RabbitMQ Connection page, click Actions > Create.

A pop-up window appears for configuration, as shown below. Enter the connection name, virtual host, hostname, port number, username, and password. Click the Test button to validate the configuration. A confirmation message appears in the top-right corner. Click the Create button to confirm.

Publishing messages to RabbitMQ.
For testing, messages can be published to RabbitMQ using the following user interface:
Select the connection from the table, then click the Utils > Publish Messages option.
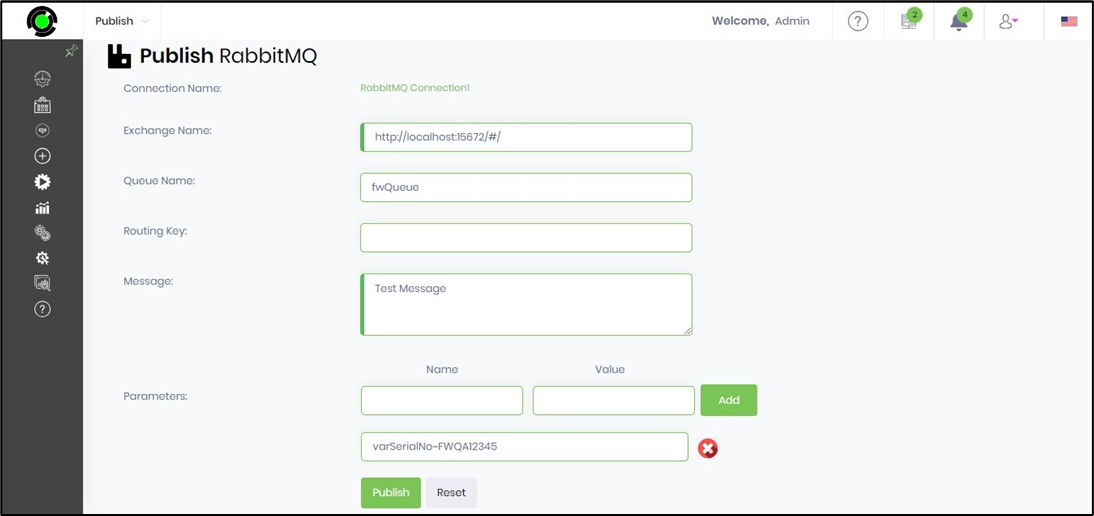
The Publish RabbitMQ page is rendered for configuration as shown below. Enter the Exchange Name, Queue Name, Routing Key, and Message text. Click the Add button to add key-value parameters. Click the Publish button to initiate the action. A confirmation message appears in the top-right corner.