Description:
The ExecuteNavigateTask widget is similar to the “Execute Workflow” widget. Use this Form to run any workflow. If the process has assigned Tasks or Forms to the current user, the system automatically navigates to the first assigned task.
Inputs
- ID/Name - Name of widget generated by FlowWright (read-only field)
- Execute Button Text - Enter description for Execute Button Text
- Select Workflow Definition - Select the existing workflow definition
- Pre-prompt message - Provide text information to pre-prompt after submit
- Input Mapping (Variables) - Identify input variables required in the workflow
- Input Mapping (Globals) - Identify input globals required in the workflow
- Output Mapping (Variables) - Identify output variables to hold the result in the workflow
- Output Mapping (Globals) - Identify output globals to hold the result in the workflow
- Hide - Select the checkbox to Hide (tick mark)
- Read Only - Select the checkbox to Read-Only (tick mark)
- Create Only One Instance - Create a process instance during run time
- Open New Window - Select the checkbox to open the page in a new window
- Tool Tip - Enter information to display on mouse hover on form render
- Styles - Enter the CSS scripts for widget styles
- Apply Classes - Select between custom classes defined
- Save - Save the input values
- Delete - Remove this form widget from the designer page
- Close - Close the input popup window
Design:
Example:
Let's build and execute the “ExecuteNavigateTaskDef” example.
- Create a Form definition called “ExecuteNavigateTaskDef.”
- Place the “BootstrapGrid, ExecuteNavigateTask, Label, Textbox, and Submit” controls on the canvas and arrange them as shown below.

- Double-click the “ExecuteNavigateTask” control to configure the “Settings”. A pop-up window appears for configuration. Provide a name for the control. Enter the Execution Button text. Select the process definition to execute from the drop-down list. Enter the pre-prompt and post-prompt messages to alert users during execution. You may use the checkbox to hide the form and mark it read-only at runtime. Select the checkbox to create a process instance during execution. Select the checkbox to navigate the task and open it in a new window. Click the Save button.

- Select the “Conditions” tab. Here, map the Form inputs to the process variables. Click the plus sign (+) to add an empty row for Globals Variables. Select the process variable from the drop-down list, then map it to the Form control using the second drop-down list. Click the Save button. You can map multiple variables and globals using the plus sign.

- Create a process definition called “ExecuteNavigateTaskDef.” Drag a “Task” step onto the canvas. Connect the Start step to the other steps as shown below.

- Select the “Task” step to configure the “Required” settings. Provide a name for this step. Then, select the “Task” step again to configure the “Optional” settings. Choose the users to route to and set up the target users. Enter the Task Detail Description using the variable reference that contains the Form value, as shown below. Finally, click the Save button.

- Save the Form definition. Choose Actions > Create Form Instance from the menu. Generate a new Form instance and check the box to edit it.

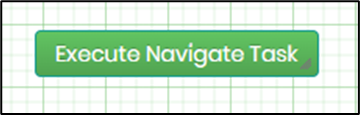
- The Form is displayed to the user as shown below. Provide your comments, then click the "Execute Navigate Task" button. The value from the Form field will be passed to the process variable.

- The pre-prompt message notifies the user, as shown below. Click the OK button to proceed.

- The process instance is created automatically as configured, and its status is set to “sleeping” because the task is pending completion.

- The page automatically navigates to the Task and displays it for the user, as shown below. The Form field value is now visible in the task detail description. Provide the task completion comments, then click the Complete or Reject Task button.

- The post-prompt message notifies the user, as shown below. Click the OK button to proceed.

- The page returns to the Form instance, enabling the user to submit and finish the Form.

Definition Sample:
You may download and extract the sample definition(s) from the link provided and later import them (drag-and-drop) into your FlowWright Process Definition (XML file) or Form Definition (HTML file) page.
Note: Please verify and complete the process steps for any missing configurations, such as file path references and database connections, after the import. Then, save the definition to confirm the changes.