AddFormFileAttachments Step
Description:
This step attaches a file to a Form Instance.
Inputs
- Name - Step Name
- formInstanceID-- Variable/Global/Form Variable to hold the form instance ID
- formDefID—Select form definition
- fileFieldMappings —Mapping of file Control ID to upload
- ignoreNotFoundFiles - Ignore not found files. Select (Yes/No)
Returns
- True – file uploaded successfully
- False - file not uploaded
Usage:
In this sample workflow, the user submits a Form with a file attachment. Next, the “addFormFileAttachment” step adds another file at runtime. The “getFileAttachments” step retrieves all file attachments for this Form Instance ID. The Form is then routed back to the user to view all file attachments before submission.

Example:
Let's build and execute the “addFormFileAttachmentsDef” example.
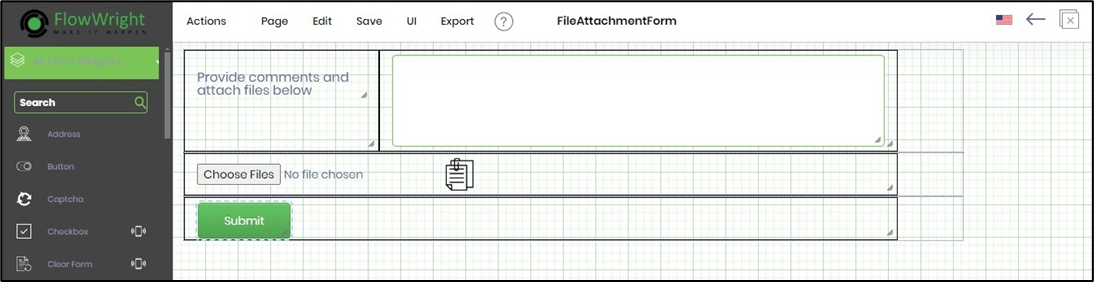
- Create a new Form definition called “FileAttachmentForm". Drag and arrange the Form controls “BootstrapGrid, Labels, TextArea, AttachFiles, FileList” as shown below.
- Create a new process definition named “addFormFileAttachmentsDef” and open it in designer mode.
- Drag the process steps above to the canvas and connect them as shown below.
- Click the “routeForm” step to configure its “Required” properties. Provide a name for the step and a task description. Select a Form Definition from the drop-down list. Provide a variable or global to store the Form instance ID. Click the Save button. Note: Click the "AI Predict" button for the Copilot to add new process steps that match your process description.

- Click the “routeForm” step to configure its “Optional” properties. Provide a task description. Click the button to configure the users who route the form. Click the button to configure the application role users who route the form. Select the task priority from the drop-down list. Provide the task completion duration using the UI fields.

- Click the “addFormFileAttachments” step to configure its “Required” properties. Set the variable.formID to the Form instance GUID.

- Click the “addFormFileAttachments” step to configure its “Optional” properties. Select the Form definition from the dropdown list. Map the file list to the file Control ID to upload at runtime. Provide the file path on the application server as shown below. The “addFormFileAttachments” step attaches this file to the form instance at runtime.

- Use the "getFileAttachments" step to fetch all file attachments from the Form Instance to confirm the “addFormFileAttachments” step. Click the “getFileAttachments” step to configure its “Required” properties. Provide a name for the step. Provide a variable or global reference to hold the Form Instance ID. Provide a variable or global reference to store the file attachment paths. Provide a variable or global reference to store the file attachment names.

- Click the “getFileAttachments” step to configure its “Optional” properties. Select the Form Definition from the dropdown list. Click the button to map the file list to the file Control ID for upload at runtime. Click the button to map the file list to the file Control ID for upload at runtime.

- Save the process definition, create a new instance, and execute it. Render the process instance. Click the process step to view its properties. The step should route the Form to the user. In this example, the user attaches a file and submits the Form.
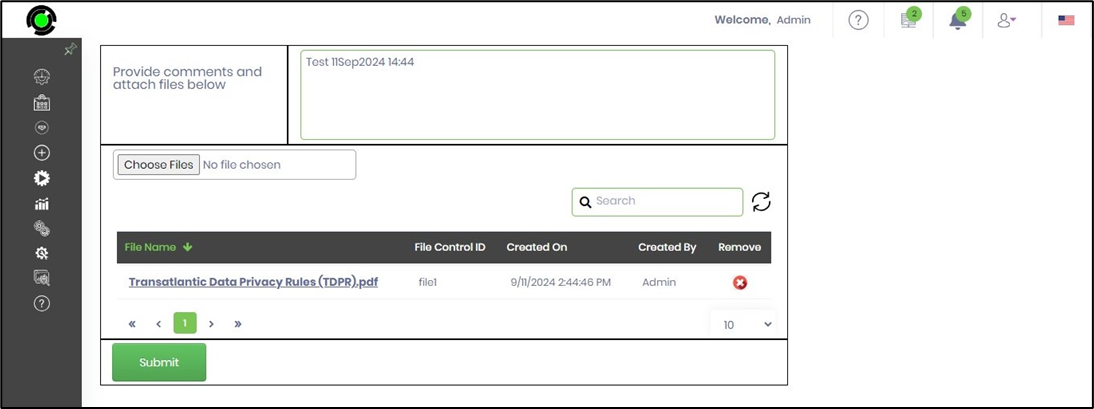
- The "addFormFileAttachment" step shall add the file list to the Form instance. The file list is retrieved using the "getfileattachments" step.

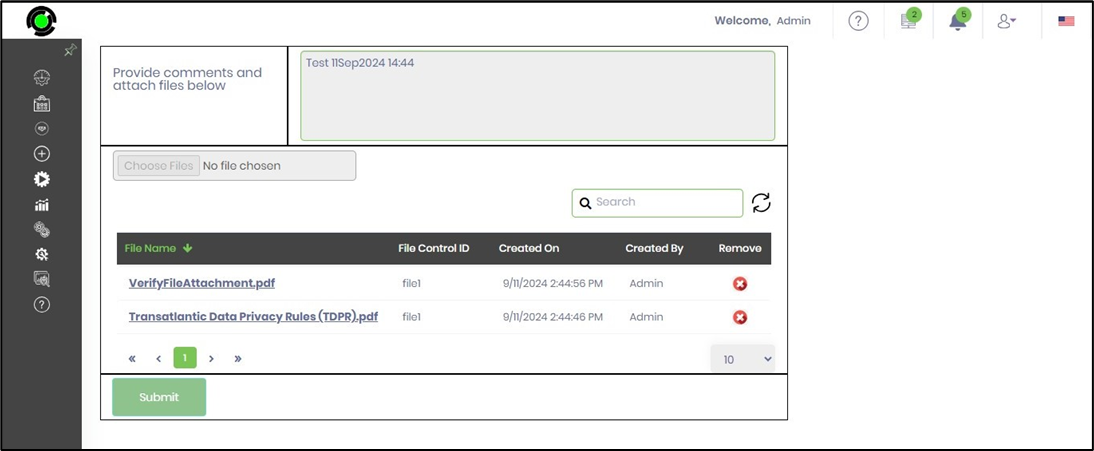
- The “routeForm” step redirects the Form back to the user. In this example, a new file is added to the Form Instance, as shown below.
Definition Sample:
You may download the sample definition(s) from the link provided and later import them (drag-and-drop) into your FlowWright Process Definition (XML file) or Form Definition (HTML file) page.
Note: Please verify and complete the process steps for any missing configurations, such as file path references and database connections, after the import. Then, save the definition to confirm the changes.
Click here to download the sample XML file.
Click here to download the sample HTML file.