MakeUserActiveInactive Step
Description:
This step marks a selected user active or inactive.
Inputs
- workflowUserID – id of the user
- markActive – make the user active or inactive
Returns
- True – step executed successfully
- False – step failed to execute
Usage:

Example:
Let’s build and execute the “makeUserActiveInactiveDef” example.
- Create a new definition called “makeUserActiveInactiveDef”
- Select the definition and click the “design” button
- Drag a " getWorkflowUserID, makeUserActiveInactive” step to the canvas
- Connect the Start and other steps as above
- Define a variable/global to store the UserID and UserName

- Click the “getWorkflowUserID” step to configure its “Settings” properties. Provide a name for the step, the user name to fetch, and the variable/global to hold the user ID after execution.

- Click the “makeUserActiveInactive” step to configure its “Settings” properties. Provide a name for the step. Provide the variable/global which holds the user ID from the previous steps. Select the value “Yes” to mark the user inactive.

- Alternatively, you may provide the workflow User ID value from the User Management page by copy-paste.

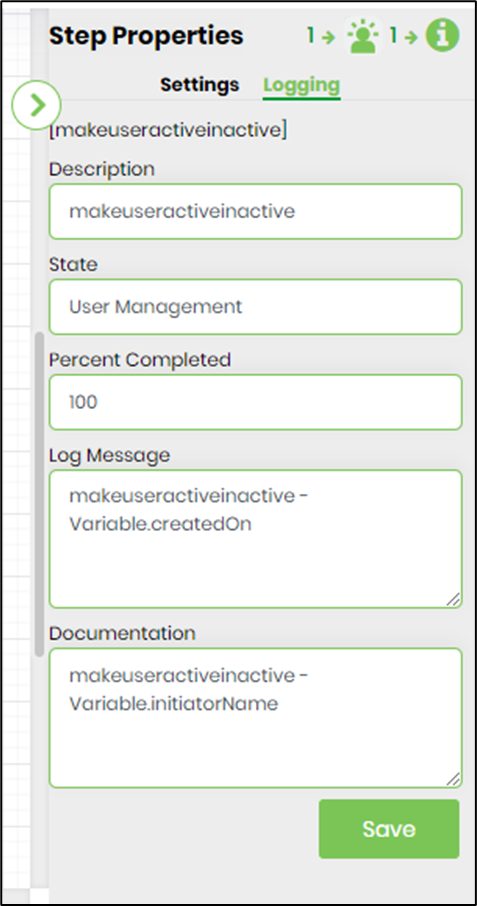
- The “Logging” setting configuration is necessary for documentation and also measures the workflow progress and the percent complete. This is achieved by configuring the step state and percent fields individually, as shown in the images below. Configure the “Logging” using the following properties.
- Save the process definition, create a new process instance, and execute. Check the step properties by rendering the process instance. The step configures the user as active or inactive according to the configuration.
Definition Sample:
You may download the sample definition(s) from the link here and later import it (drag-drop) to your FlowWright Process Definition (XML file) or Form Definition (HTML file) page.
NOTE: Please verify and complete the process steps for any missing configurations, such as file path references and database connections after import. Then, save the definition to confirm the changes.