A task is designed to capture the following information in its table schema at runtime.
| Acknowledged | deTaskChoices | deTaskRouteType |
| AcknowledgedOn | deTaskComment | deTaskSelectedChoice |
| deHideRejectButton | deTaskCompleted | deTaskStarted |
| deInstanceID | deTaskCompletedBy | deTaskStatus |
| deInstanceName | deTaskDelegationID | deTaskTemplateID |
| deIteration | deTaskDueDate | deTaskURL |
| dePriority | deTaskID | deUserReAssign |
| deRoutedItem | deTaskLockedTo | deWaitForAll |
| deStepID | deTaskName | sendExpireEmail |
| deTaskApprove | deTaskOwnerID | |
| deTaskAssignedTo | deTaskPercentComplete | |
| deTaskBody | deTaskReject |
Not all columns are relevant when the task is assigned to specific users (grouped by application role). The table column feature is designed to address this.
Navigate to Manage > Table Columns.

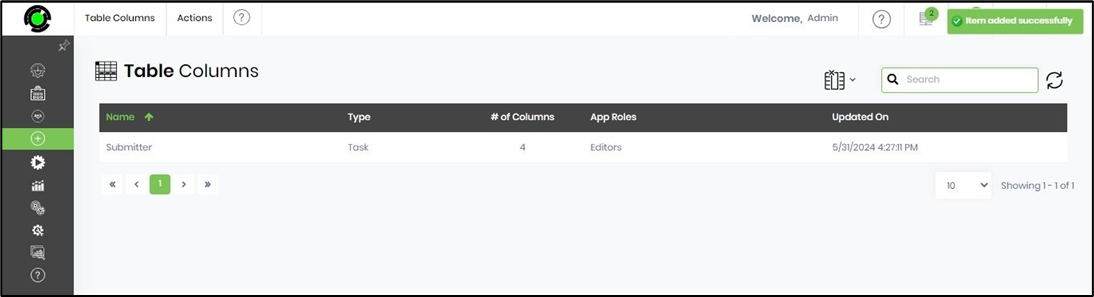
The existing “Table Columns” are listed in the table below.

Create a new table column using the menu option.

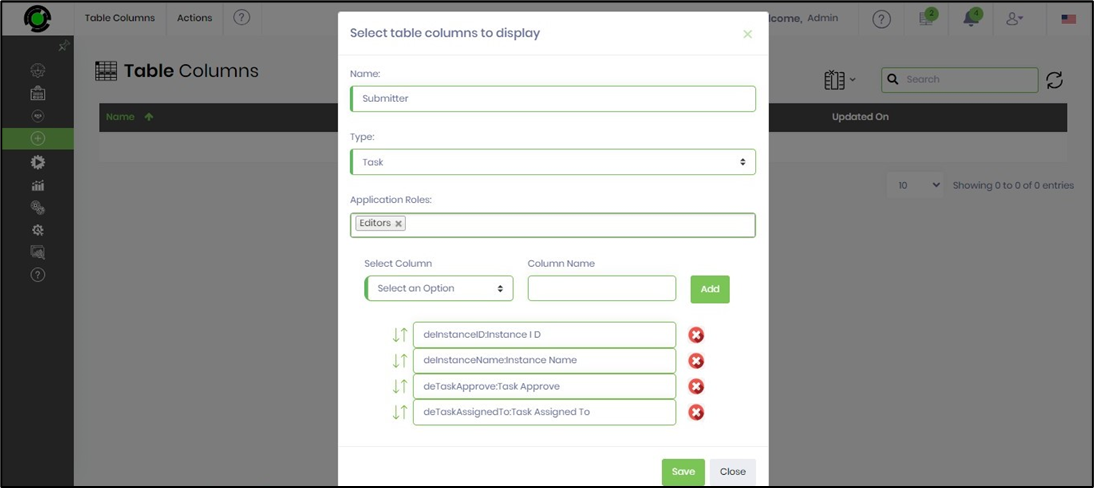
A pop-up window is displayed. Provide a “table name, select Task type from the dropdown, select application users, and select relevant columns to add to this table column configuration”. A sample image is shown below. Click the “Save” button to confirm.
The table column configuration is saved, and a confirmation message appears in the top-right corner.
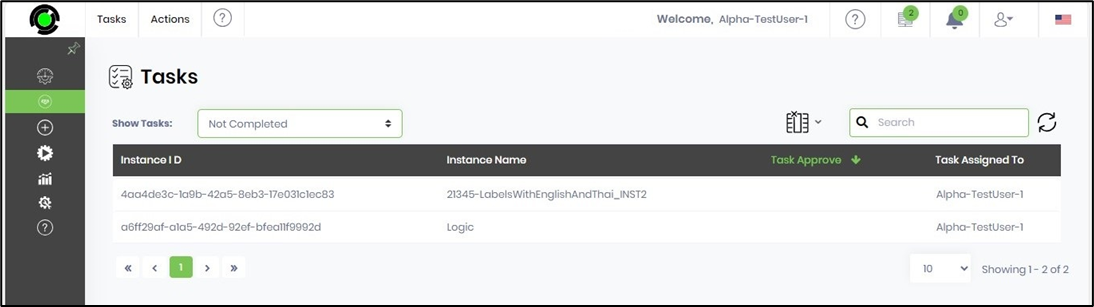
Here's how the task columns are displayed to application role users when they access tasks from the Engage page.
Select the column design on the table columns page, then click Actions > Edit.

Here's how the task columns are displayed when you edit the design. Make the necessary changes, then click the “Update” button to confirm.

The table column design updates, and a confirmation message appears in the top-right corner.
