Description:
Use this inline dynamic grid view control on the form to add table of controls in run time. The table of controls can be configured during the form design time.
Inputs
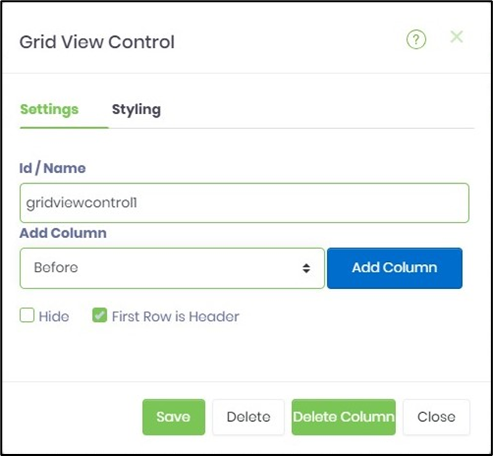
- ID/Name - Name of widget generated by FlowWright (read-only field)
- Add Column - Construct the grid by adding columns before or after the selection
- Hide - Select checkbox to Hide (tick mark)
- First Row is Header - Select checkbox to configure first row of the grid is header
- Save - Save the input values
- Delete - Remove this form widget from the designer page
- Delete Column - Remove the desired column from the grid
- Close - Close the input popup window
Design
Example
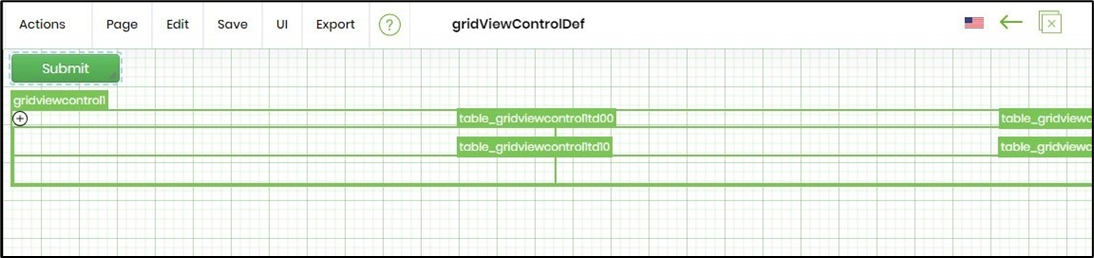
Let’s build and execute the “GridViewControlDef” example.
- Create a new form definition called “GridViewControlDef”
- Select the Open Designer checkbox and click the “Create” button
- Drag a GridViewControl and Submit widget to the canvas

- Double-click on the widget to configure the inputs as shown in the below graphic. Click on “Add Column” to add required columns by positioning before or after the existing columns. Select checkbox to hide this grid during run time. Select checkbox to configure first row of the grid is header or not.
- Drag and drop labels and other controls into the grid view's columns to create an interface where users can input data.

- Save the change. Navigate to Run - Form Instances - Create form instance for the above form definition and Edit.
- The form is displayed with the grid as configured. Click on the plus sign (+) to add new rows. Provide the inputs to the grid view controls.

- Click on delete sign to remove rows. Click on “Submit” to complete the form.
