Render process instance execution view.
This function provides an execution view of the process instance, a serialized execution of the workflow steps rendered as a sequential diagram.
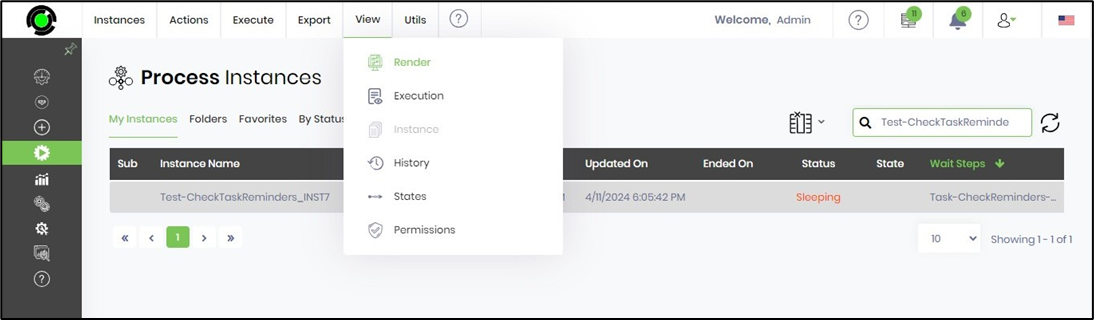
On the Process Instance page, select the process from the table and click on the View - Execution menu option.
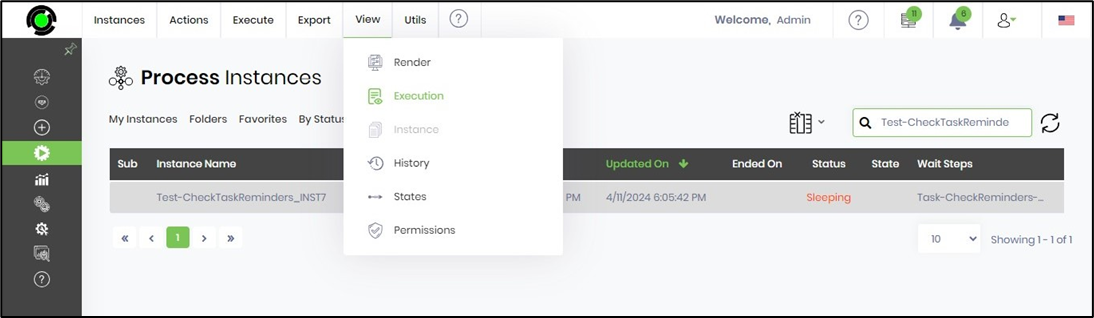
The Process Instance Execution view is shown below.
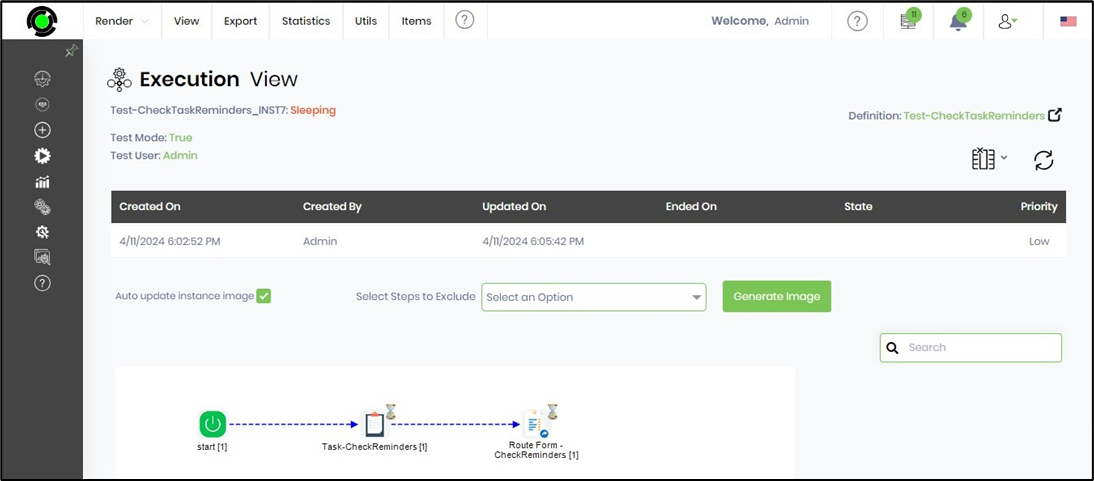
All dates/times are stored within the database as UTC and displayed based on the user's local timezone.
Note: Engine runtime data are in ISO + UTC format.
Render process instance
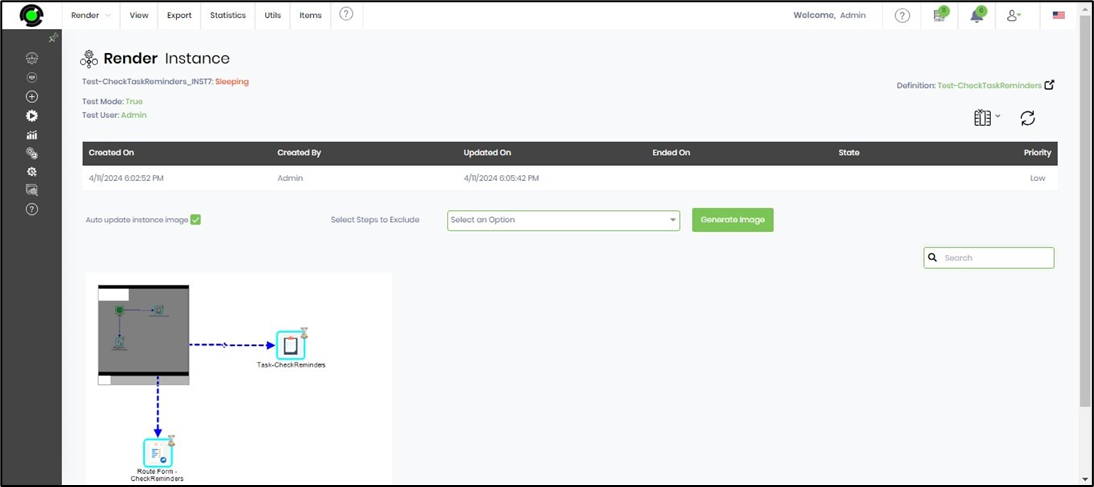
This function renders a process instance on the new page.
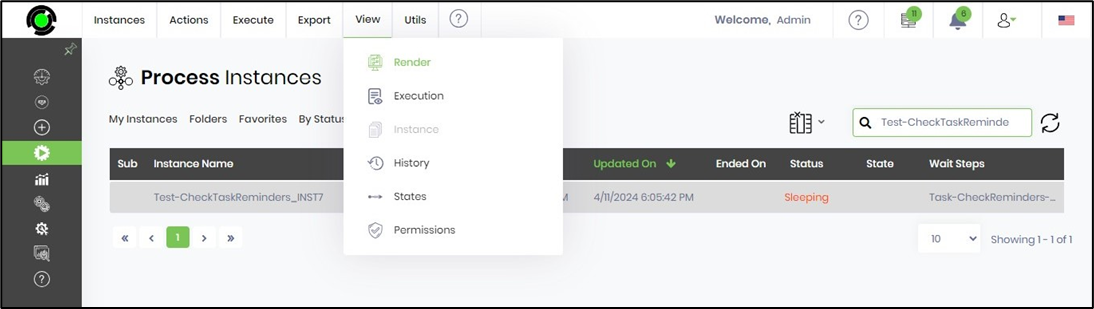
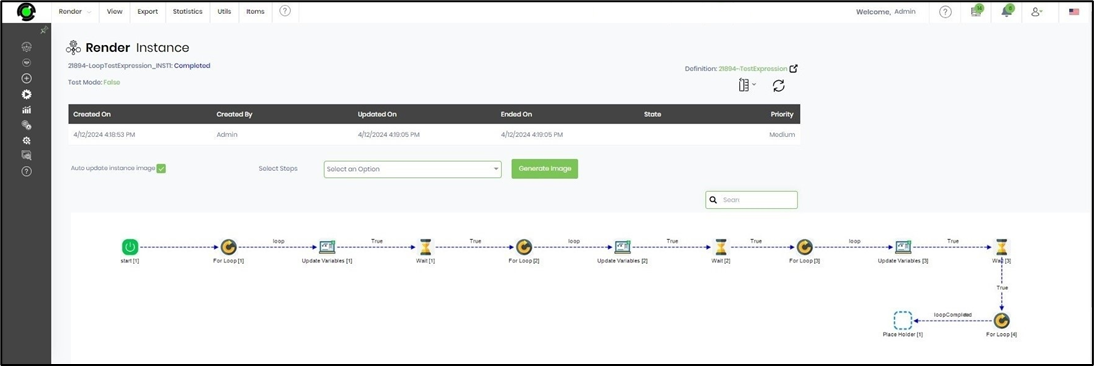
On the Process Instance page, select the process from the table and click on the View—Render menu option. A rendered instance will display its execution path relative to the workflow design.
A rendered execution is shown below.
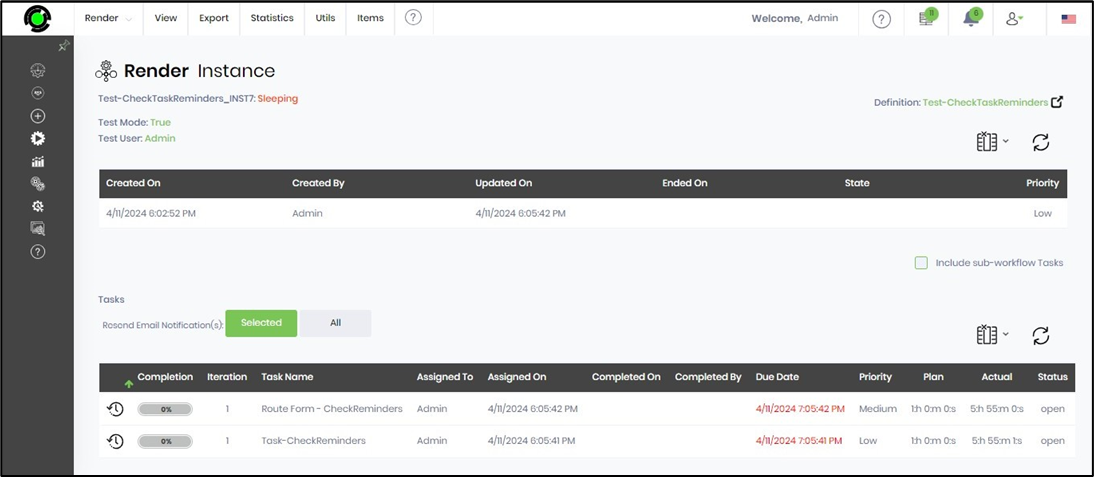
Select the Items - Tasks menu option to view the task list for the instance rendered, as shown below.
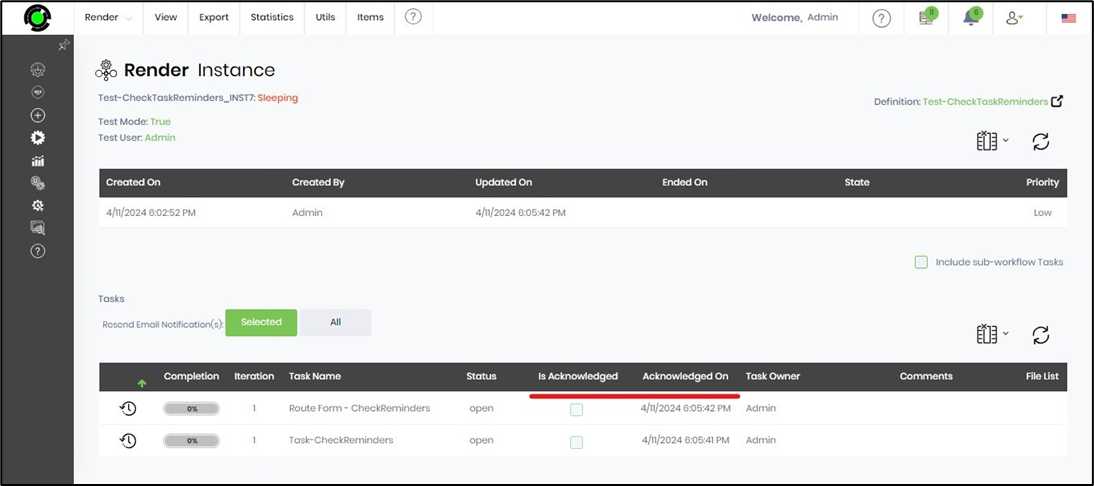
The columns IsAcknowledged, and AcknowledgedOn is provided, and they may be included in the view by selecting the Column list icon, as shown below.
The critical path for a process instance
Users can view the critical path of the process instance execution based on the configuration of the process definition. The critical path displays the longest path taken by the execution of the process instance. Below is an example of a crucial path display:
On the Process Instance page, select the process from the table and click on the View - Render menu option.
The process instance is rendered on the new page. Select View - Instance Critical Path menu option.

The critical path is highlighted in red, as shown below. Select Display Dates as “ON” to render the plan start and plan end dates.
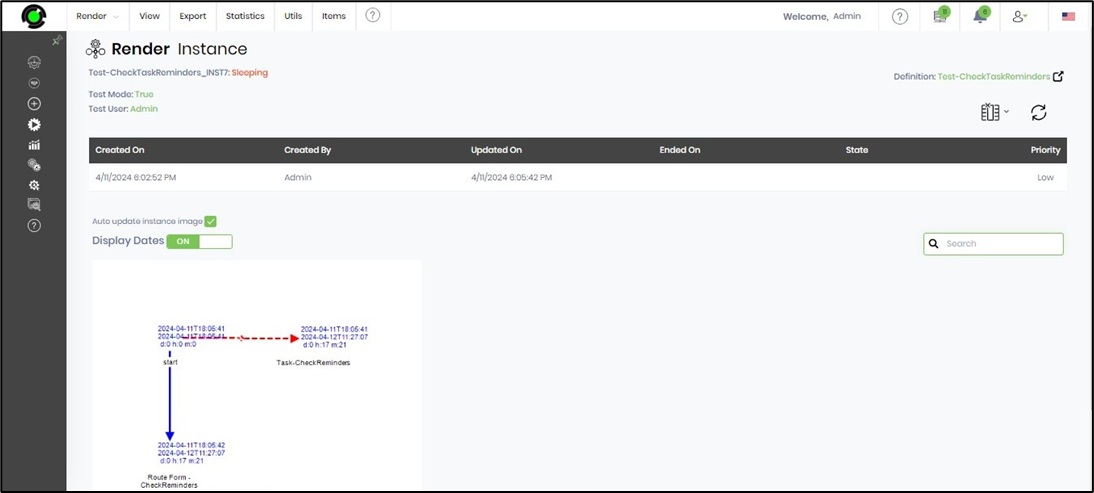
The instance is configured with 2 task steps, each with a “N” number of minutes. “Critical Path” displays the longest path taken by the process instance.
Note: The critical path calculation for definitions and instances is based on timezone for steps like milestone and waitForDatetime. When the time zone calculation is null (a difference between getdate and getutcdate), the calculation considers the UTC date for the current date for all steps.
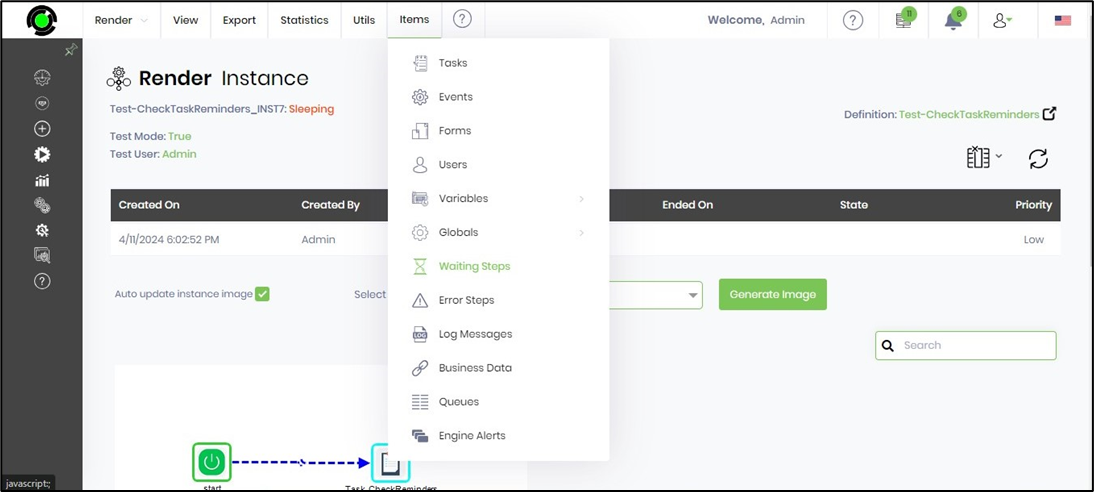
Tasks in render instance
This function displays the task information executed within the process instance.
On the Process Instance page, select the process from the table and click on the View—Render menu option. The process instance is rendered on a new page. Select the Items—Tasks menu option.

The tasks are listed in the table below. Select a task from the list and click on the Resend Email Notification button to repeat the notification email.

Click on the Clock icon to view the task history. The information is displayed in the popup window below.

Navigate to Error and the Wait steps.
This function navigates to the process instance's Wait and Error steps.
On the Process Instance page, select the process from the table and click on the View—Render menu option. The process instance is rendered on a new page. Select the Items—Waiting Steps menu option.
A popup with URL links helps navigate the specific selection waiting step.

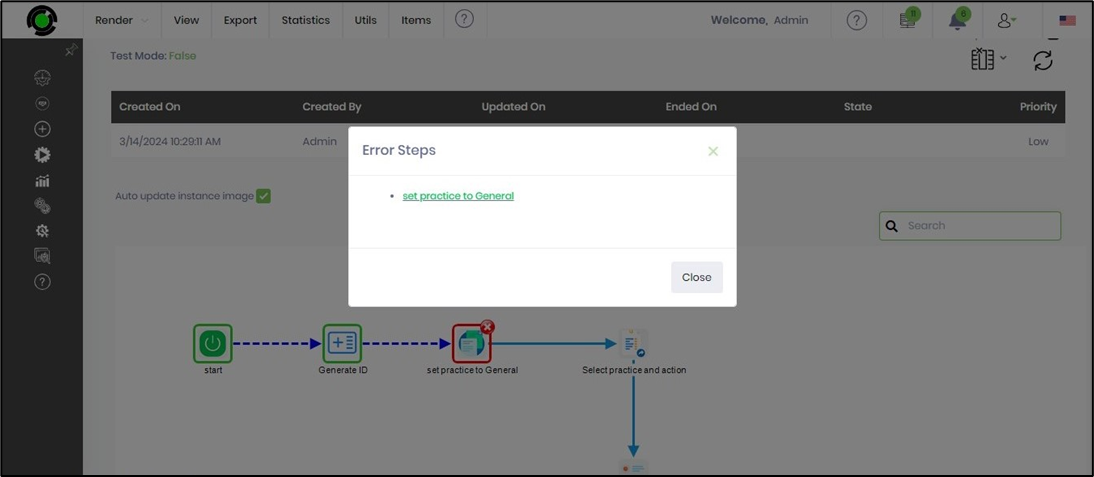
On the Process Instance page, select the process from the table and click on the Items - Error Steps menu option.

A popup with URL links helps navigate to the specific error step during selection. Note: This works only when error steps are encountered during run time.
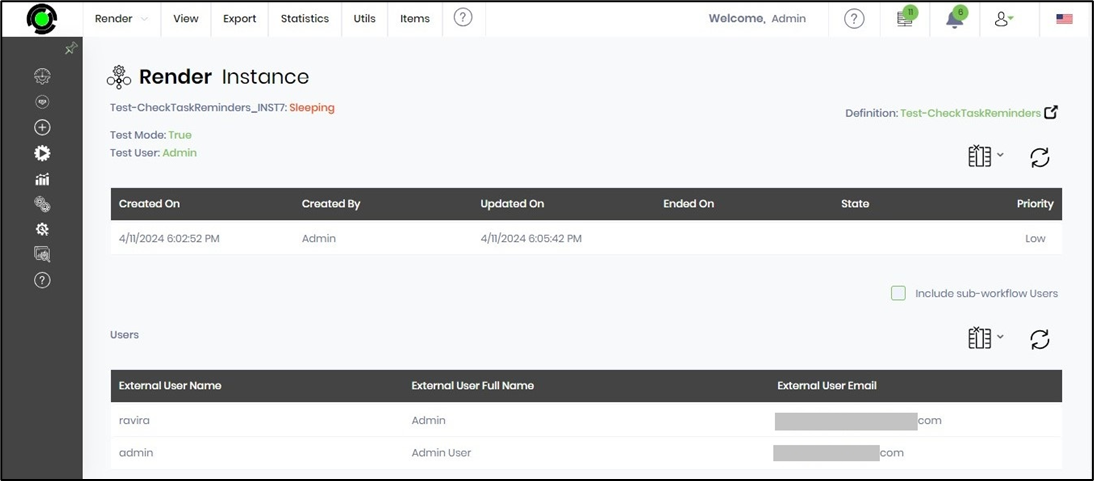
Users in the render instance
This function displays the users who are involved in the process instance.
On the Process Instance page, select the process from the table and click on the View—Render menu option. The process instance is rendered on a new page. Select the Items—Users menu option.
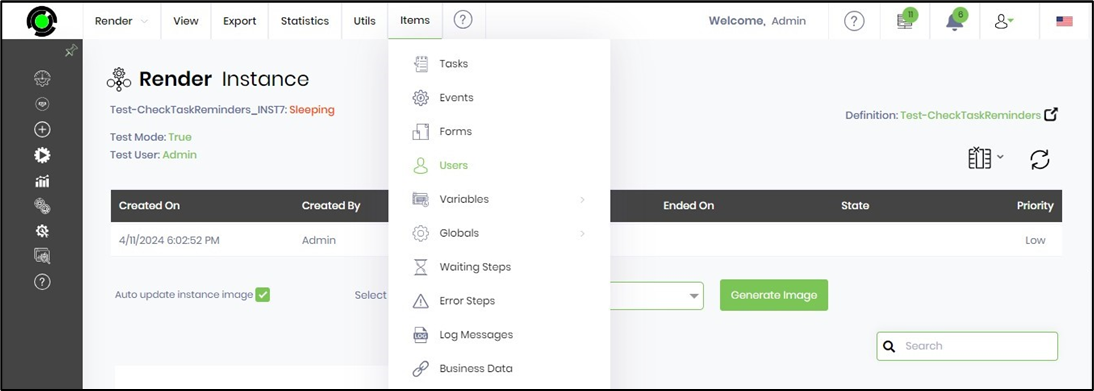
The users are listed in the table below.
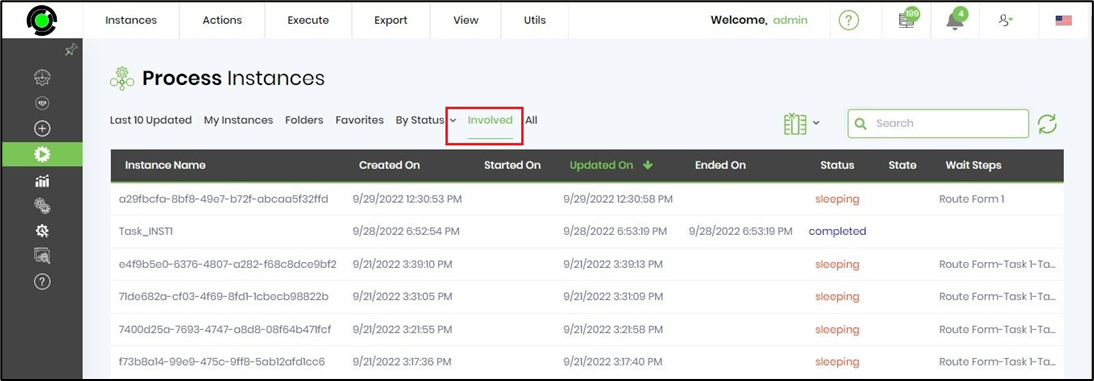
User involved in process instances.
The Process Instances page displays both the instances the user has initiated and the instances for which the user has completed a task or received tasks in the new "Involved" tab.
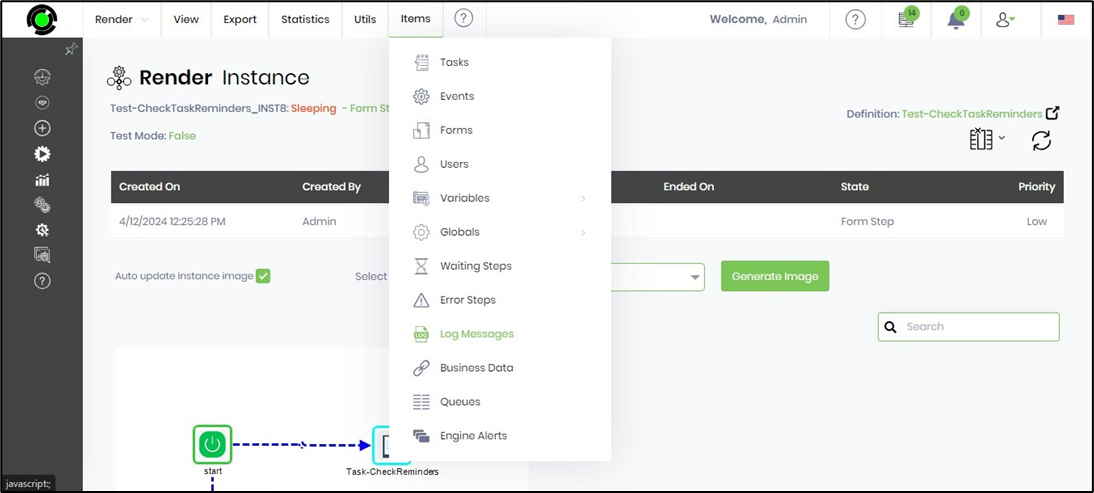
Logs in render instance
This function displays the log details defined for each step within the definition.
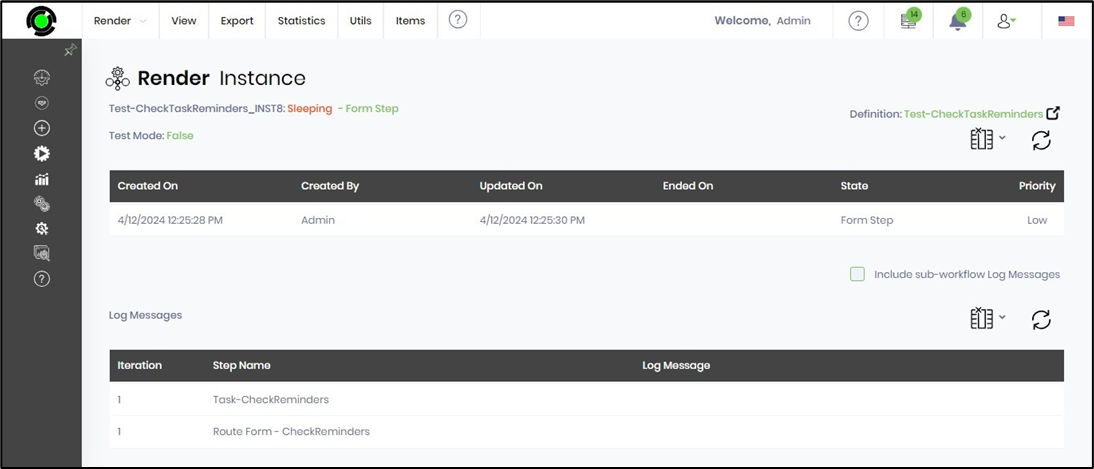
On the Process Instance page, select the process from the table and click on the View—Render menu option. The process instance is rendered on a new page. Select the Items—Log Messages menu option.
The Log Messages are listed in the table below.
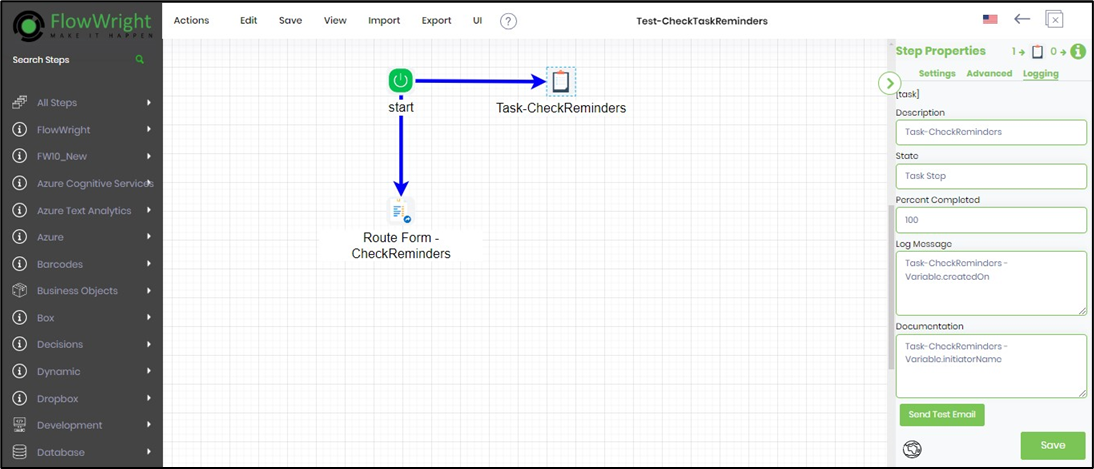
Note: On the process step, navigate to the Logging tab and configure the workflow to enable logging, as shown below.
Business data in render instance
This function displays all linked business data used within the execution.
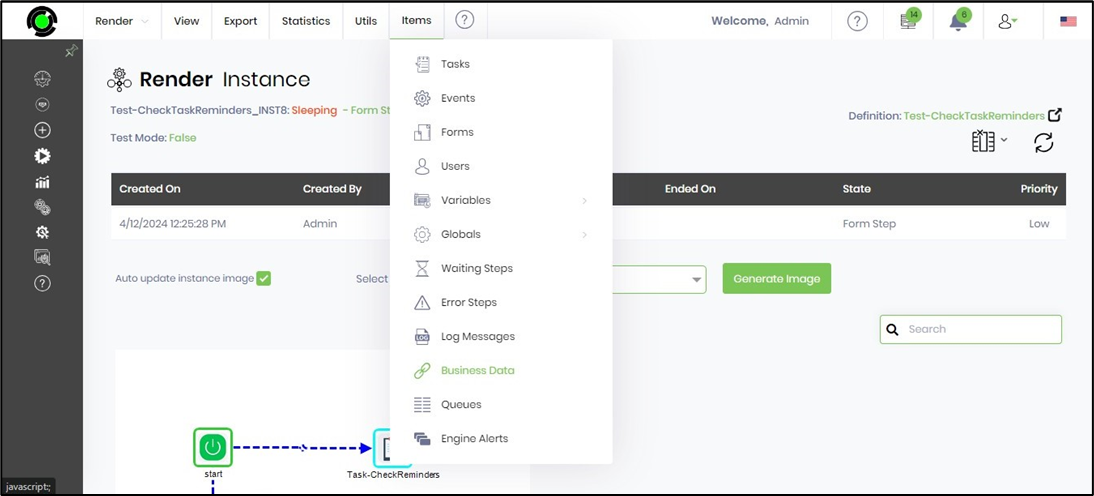
On the Process Instance page, select the process from the table and click on the View—Render menu option. The process instance is rendered on a new page. Select the Items—Business Data menu option.
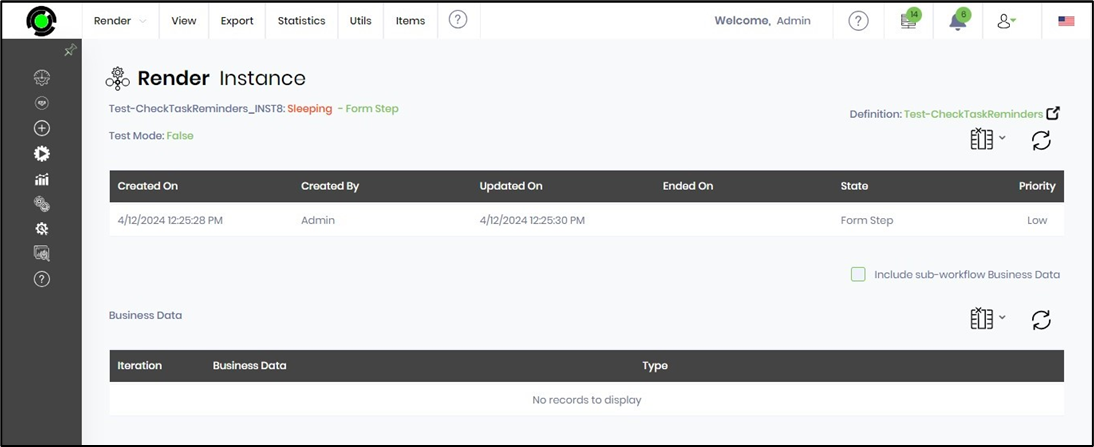
The business data (if any) is listed in the table below.
Queues in render instance
This function displays all the queues that are involved in the selected instance.
On the Process Instance page, select the process from the table and click on the View—Render menu option. The process instance is rendered on a new page. Select the Items—Queues menu option.

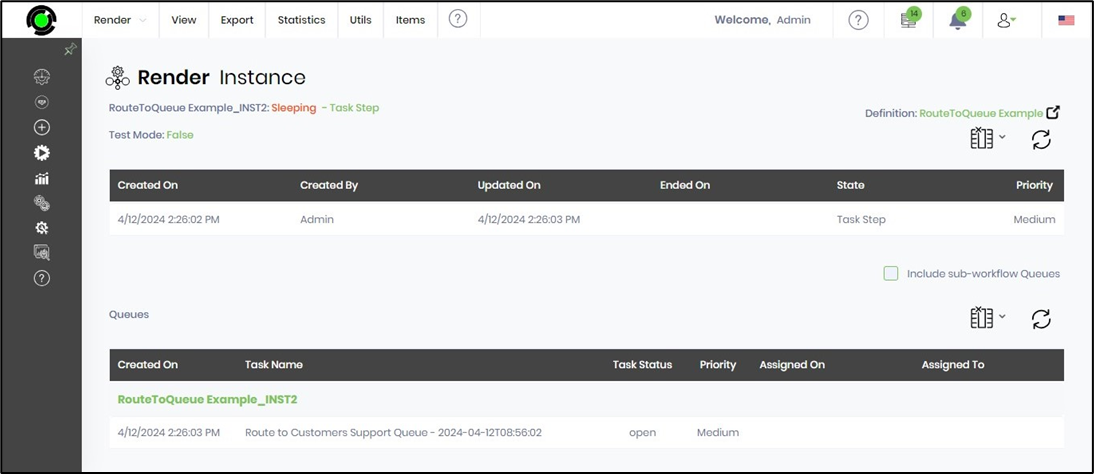
The queue information is listed in the table below.
Engine Alerts
This function displays the engine alerts logged by the process steps during the execution.
On the Process Instance page, select the process from the table and click on the View—Render menu option. The process instance is rendered on a new page. Select the Items—Engine Alerts menu option.
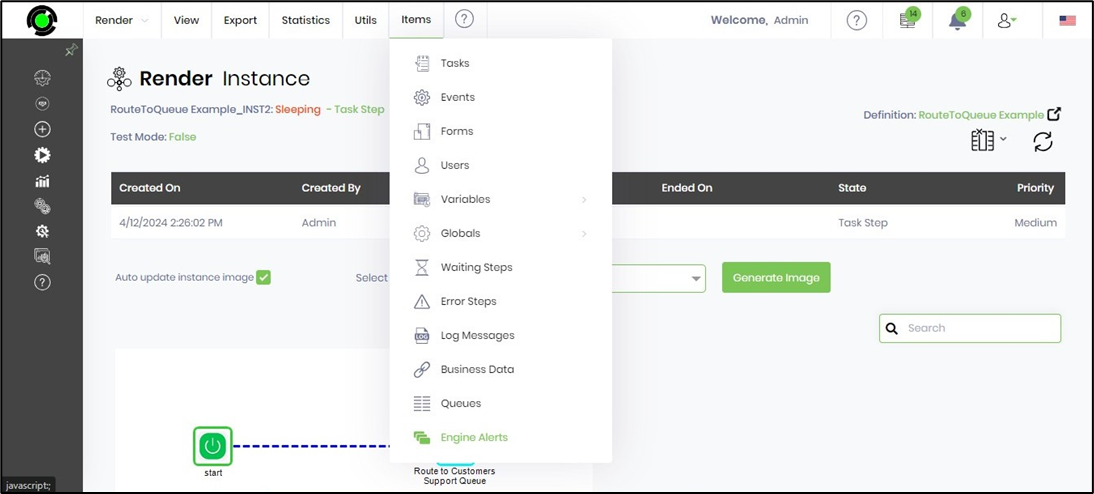
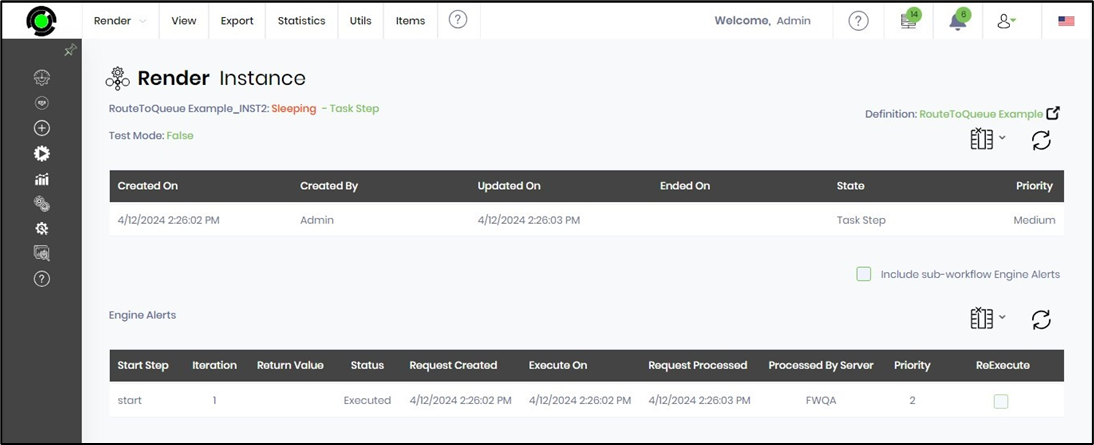
The Engine Alerts information is listed in the table below.
History in render instance
This function displays the history details of the process instance rendered.
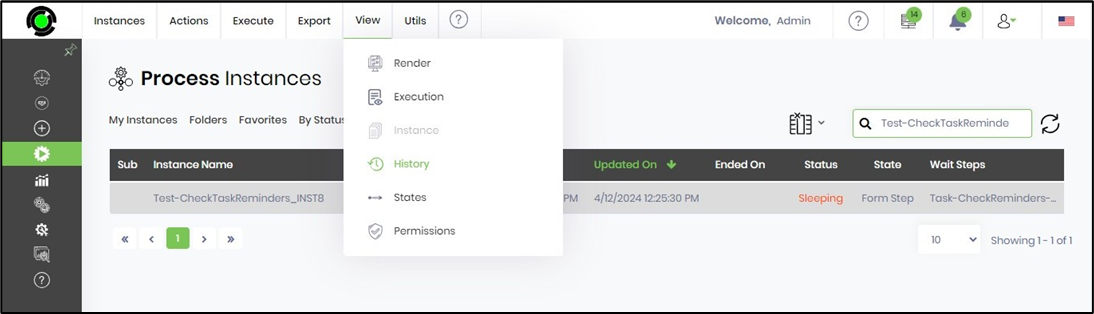
On the Process Instance page, select the process from the table and click on the View - Render menu option. The process instance is rendered on the new page. Select Items - History menu option.
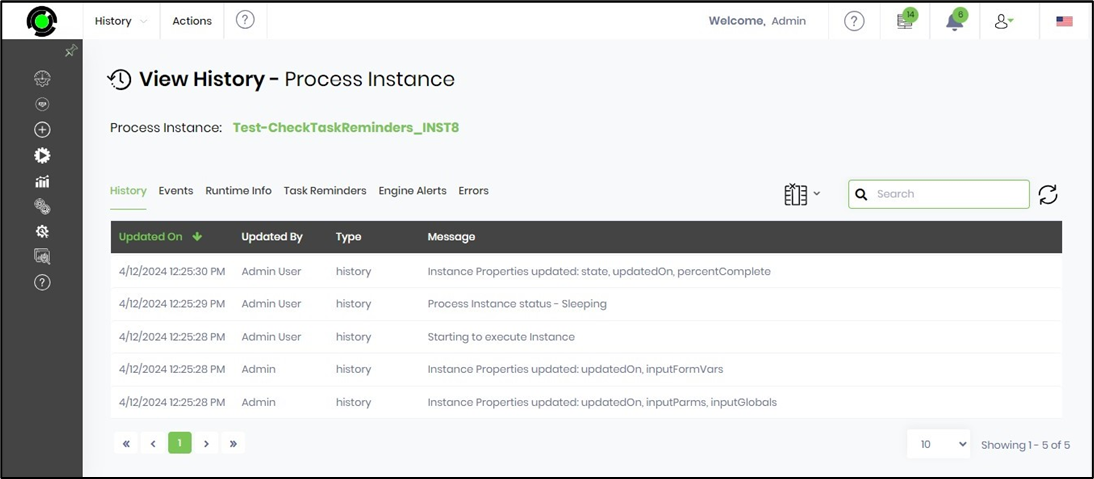
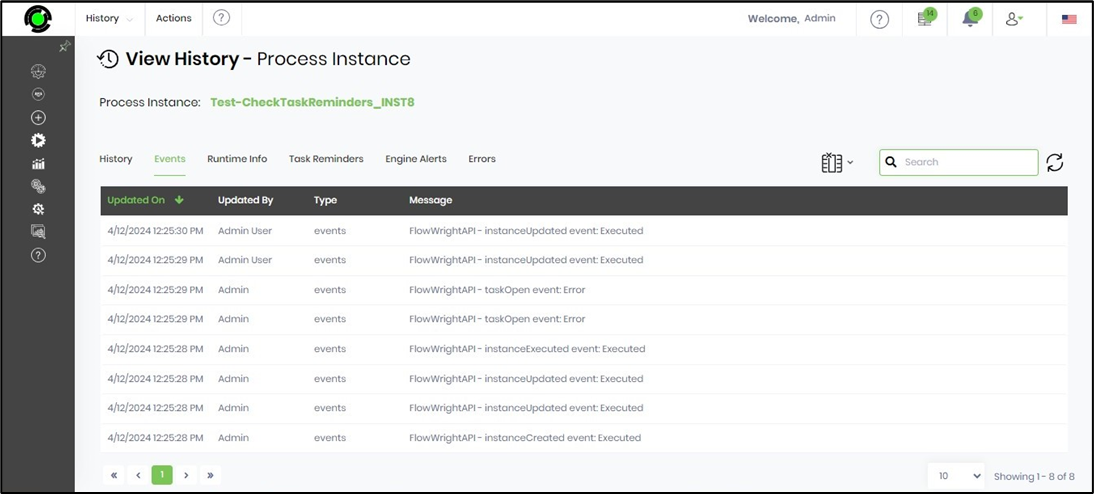
The history information is listed in the table below. Navigate through the tabs to view Events, Runtime Info, Task Reminders, Engine Alerts, and Errors information of the process instance
The Events tab information is listed in a table as shown below.
The Runtime tab information is listed in the table below.

The Task Reminders tab information is listed in the table below.

The Engine Alerts tab information is listed in the table below.

The Errors tab information is listed in a table as shown below.

Statistics in render instance
This function displays the statistics of steps, steps by execution, elapsed time by each step, and elapsed time by each engine alert of the process instance rendered.
On the Process Instance page, select the process from the table and click on the View - Render menu option. The process instance is rendered on the new page. Select the Statistics - Step menu option.
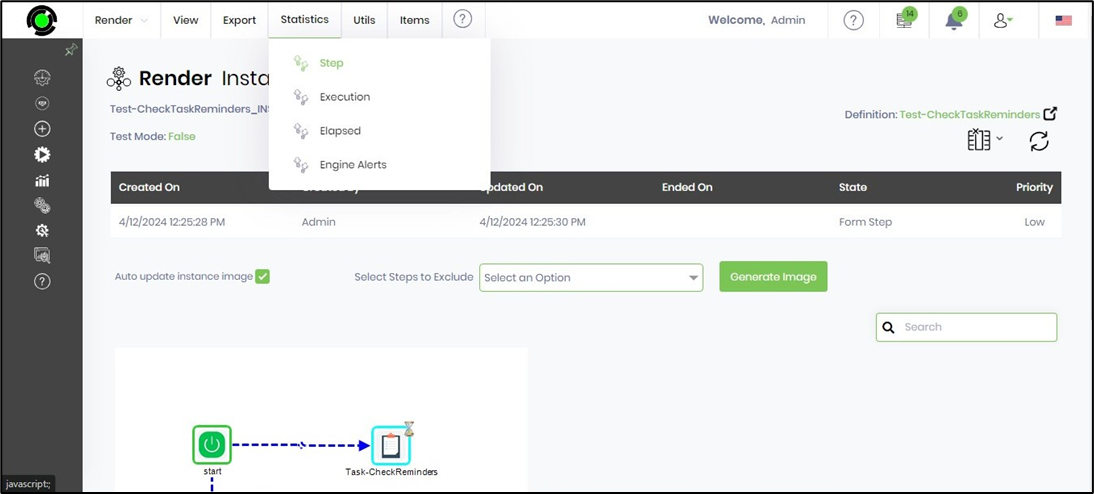
The step-by-step statistics information is listed in a table as shown below.

The step-by-execution statistics information is listed in the table below.

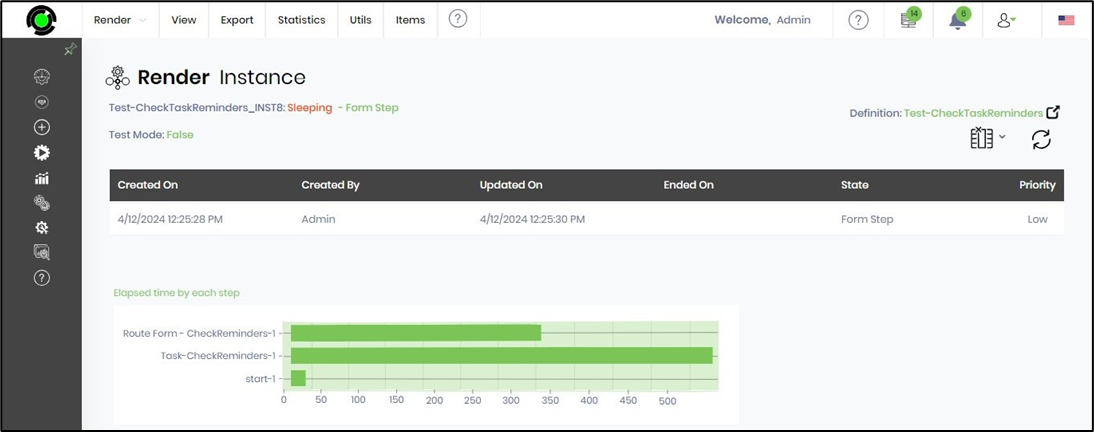
The elapsed-time-by-each-step statistics information is listed in a table as shown below.
The information on the elapsed-time-by-each-engine-alert statistics is listed in the table below.

Execution view in render instance
On the Process Instance page, select the process from the table and click on the View—Render menu option. The process instance is rendered on a new page. Select the View—Execution View menu option.

The process instance execution view is rendered on the new page below. You may observe the process flow along the execution path.
Use the Select Step drop-down list to select two or more steps. Click on the Generate Image button.
The application renders a new process instance execution view between the two process steps, as shown below. This concise view should help understand the execution of an extensive process in segments.

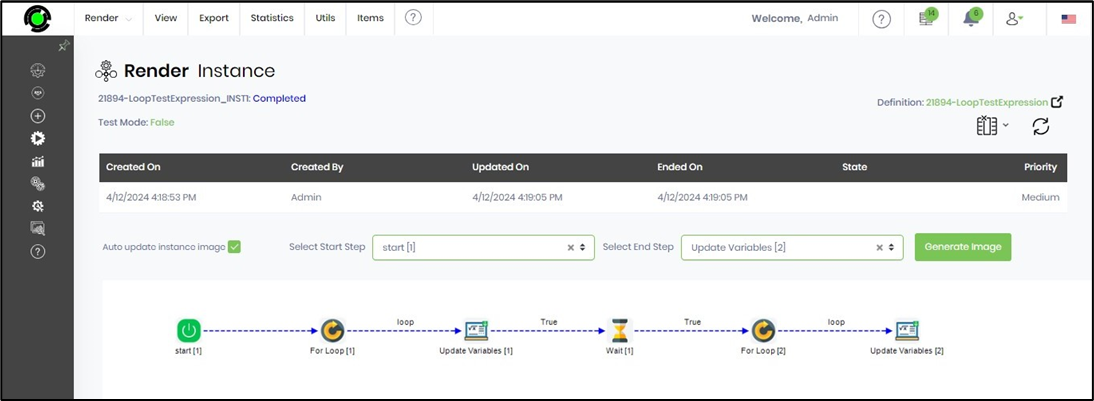
Start-End execution in render instance
This function makes the process instance between the Start and End steps according to the user's choice. This concise view should help understand the execution of an extensive process in segments.
On the Process Instance page, select the process from the table and click on the View—Render menu option. The process instance is rendered on a new page. Select the View—Start End execution menu option.

Select a start step and end step from the dropdown list and click the Generate Image button to render the execution path between the two selected steps in the workflow.
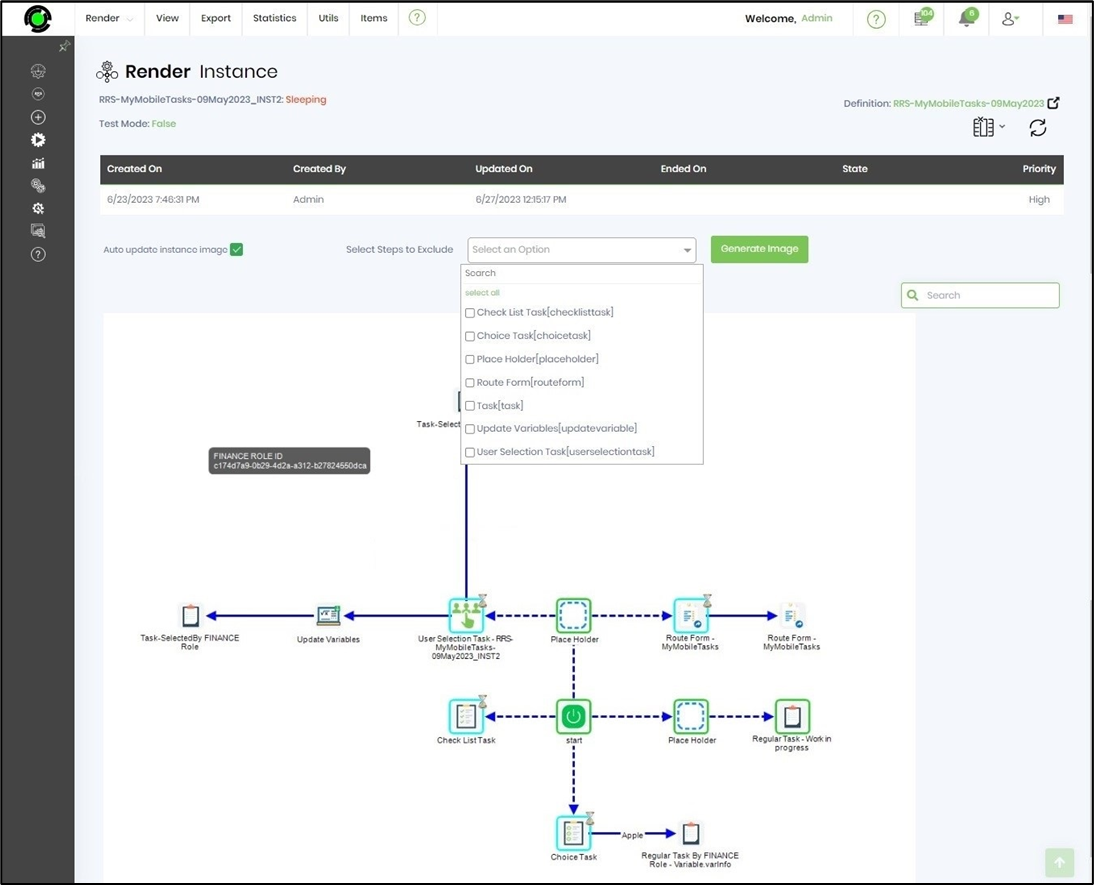
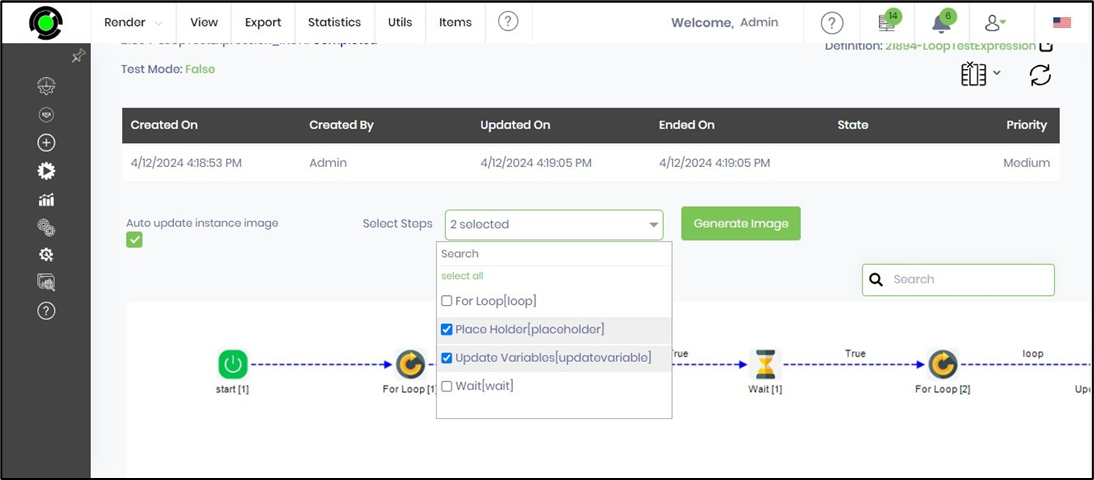
Select steps to exclude in the render instance view
This function renders the process instance without the selected steps. This concise view should help understand the execution of an extensive process in segments.
On the Process Instance page, select the process from the table and click on the View—Render menu option. The process instance is rendered on a new page. Select the View—Start End execution menu option.
Use this feature to exclude steps from the render instance view, helping you focus on the selected steps only.
Click on the “Select Steps to Exclude” drop-down menu and use the check box to select the steps from the list. When ready, click on Generate Page. The process instance is rendered again without the selected steps.