userSelectionTask Step
Description:
In the "User Selection Task" step, select users and/or application role (users) and route tasks accordingly, during run time.
Inputs
- routeTo – list of users to route the task
- routeToRoles – select roles to route to
- configureUsers--configure user list
- taskDesc – description for the task
- priority – priority of the task
- daysToComplete - # of days, minutes, hours, months to complete the task by
- expireType – task expire type
- includeWeekends – include Weekends
- taskRoutingRules- task routing rules types
- taskReminder- set task reminder to send reminder mails
- waitForAll – Yes = all users must act on the task, No = requires only 1 user to act on the task
- storeRouteToUsers – variable to store what users the task was routed to
- sendEmailNotifications – Yes = email notification will be sent to each user for the task
- sendSeparateEmails - Yes to send separate emails for multiple users
- fromEmail – from email address
- emailSubject – subject of the email message
- emailBody – body of the email message
- emailFiles – email file attachments
- emailCCList - list of email address (separate by semicolon)
- sendExpireEmail - send expired email notification
- sendAckLink - send acknowledgement link
- approveButtonLabel--label for approval button
- rejectButtonLabel--label for reject button
- hideRejectButton--hide reject button
- userCanReAssign – Yes = user can re-assign task to another active users
Returns
- completed – task was approved and completed
- rejected – task was rejected
- timeout – task timed out
Usage:

Example:
Let’s build and execute the userSelectionTaskDef example.
- Create a new definition called “userSelectionTaskDef”
- Select the definition and click the “design” button
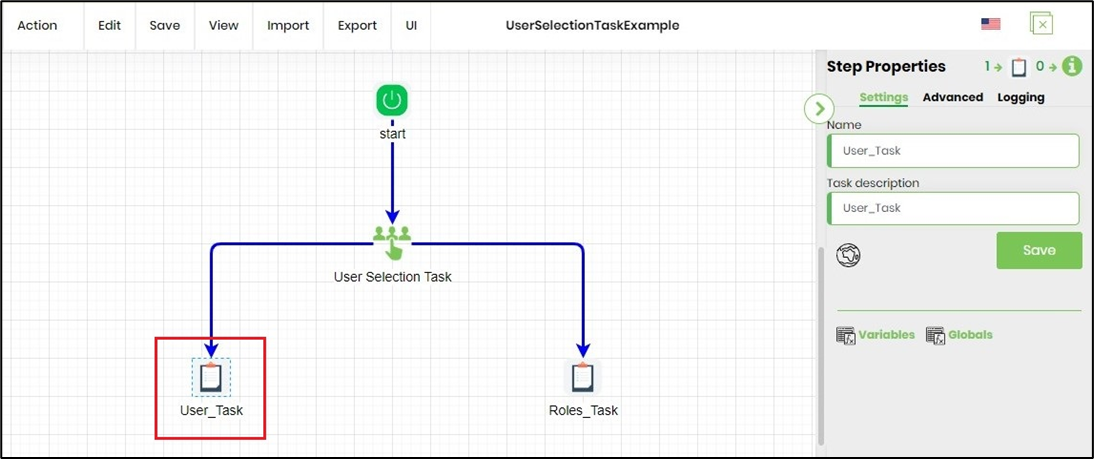
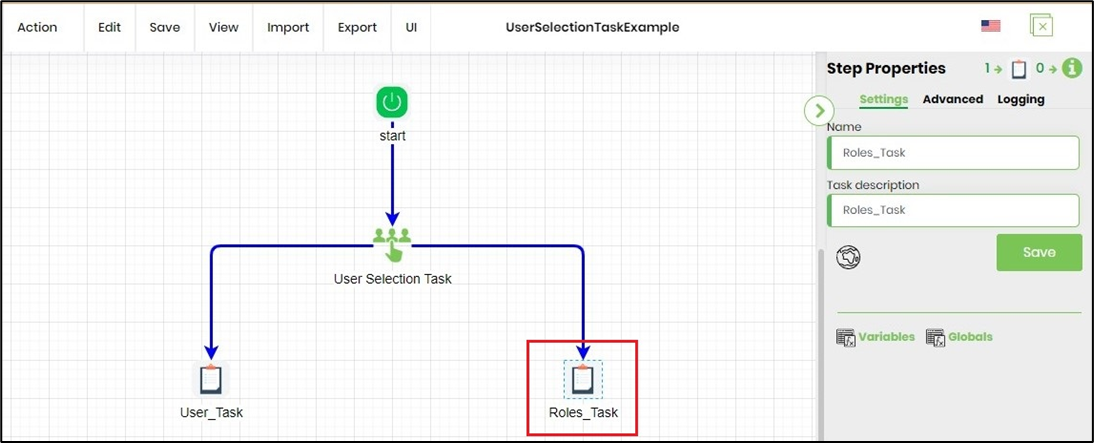
- Drag an “userSelectionTask” step and regular task step to the canvas
- Connect the steps as shown on the above graphic
- Define the variables as shown on the below graphic

- Click on the “userSelectionTask” step to configure its “Settings” properties. Provide the name to the step. Provide the task description. Click on the globe icon to globalize this step properties.

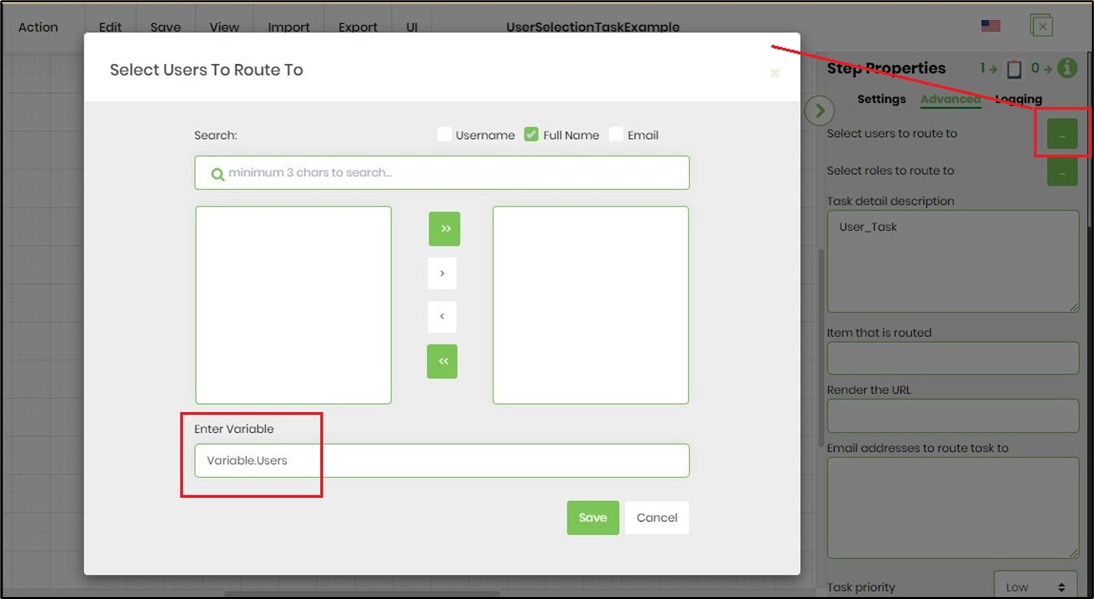
- Click on the “userSelectionTask” step to configure its “Advanced” properties. Click on the button to configure the users to route to. Click on the button to configure the application role (users) to route to. Click on the button to configure the user selection. Provide task detail description. Configure task priority - low, medium, high, normal, urgent. Configure the task expiration duration in days, months, hours and minutes. Configure YES if weekends are to be accounted for task expiration calcuation.

- Click on the “userSelectionTask” step to configure its “Advanced” properties. Configure task routing rules - default, task locking, least # of tasks in total, least # of tasks by definition. Configure task reminders schedule. Configure YES if the task should wait for all users to complete this task. Provide a varible/global to store the routed list of users. Configure YES to send email notification. Configure YES to send separate emails to recipients. Provide FROM email address if mails are to be sent from different mail box instead of the default (email settings). Provide email subject text. Click on the button to configure email body. Click on the button to configure email attachments on the app server.

- Click on the “userSelectionTask” step to configure its “Advanced” properties. Provide the email CC (list separated by semicolon). Configure YES to send expired email notification. Configure YES to send acknowledgement links. Provide a different lable names for Approve and Reject buttons. Configure YES to hide Reject button during run time. Configure YES to reassign task to another user during run time.

- Click on the button to configure the user selection. Click on Add Row button to add new rows. Select USERS from the radio button. Provide the label text for the task. Provide the variable/global to store list of user IDs after execution.

- Click on the button to configure the user selection. Click on Add Row button to add new rows. Select ROLES from the radio button. Provide the label text for the task. Provide the variable/global to store list of application role user IDs after execution.
- Click on Task reminder to set task reminder intervals. Enable "Send Email Notification" to ON.Task reminders configured with a positive value is calculated from the task created date. Task reminders configured with a negative value is calculated by reducing that duration from the task due date. The task reminder message body supports line breaks.

- Click on Email body and use the existing template (you can edit existing template as well) as email body or create custom template as email body. Provide the message text in the email body. Click on the “Replace Links” button to select information links from the list to be included in the message. Click on the “Variables” or “Globals” button to select variables and globals to be included in the message.

- Click on the “Task 1” step to configure its properties to route to users. Variable.Users stores all user GUIDs (comma separated) on selection and is mapped to input field as shown below.
- Click on the “Task 2” step to configure its properties to route to roles. Variable.Roles stores all user names (comma separated) on selection configured for that application role and is mapped to input field as shown below.

- Save the process definition, create a process instance and execute. The user selection step routes the task to the user to make an appropriate user and role selection as shown below.

- On user selection task completion, the "Task 1" and "Task 2" are routed to appropriate users and app role (users) by the process step. This is visible when the process instance is rendered, click on Items - Tasks menu option.

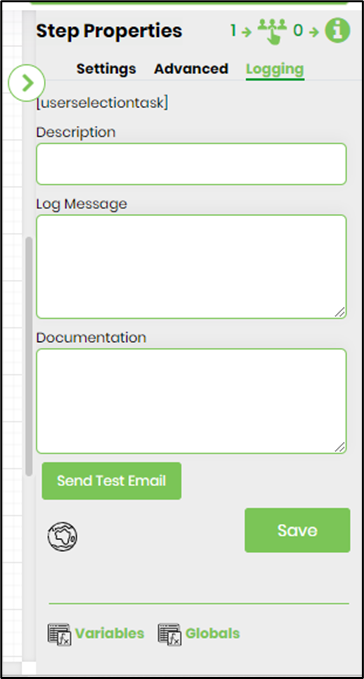
- Navigate to Logging settings. The "Send Test Mail" feature is provided to send a test email with the contents configured in the email body, to the current (logged in) user.