Description:
This widget closes the rendered Form.
Inputs
- Button Type - Select between Default and other types
- Identifier/Name - Name of widget generated by FlowWright (read-only field)
- Button Label - Change the button label
- Hide - Select the checkbox to Hide (tick mark)
- Read Only - Select the checkbox to Read-Only (tick mark)
- Tool Tip - Enter information to display on mouse hover on the form render
-
Styles - Enter the CSS scripts for widget styles
Apply Classes - Select between custom classes defined - Save - Save the input values
- Delete - Remove this form widget from the designer page
- Close - Close the input popup window
Design:
Example:
Let’s build and execute the “CloseFormDef” example.
- Create a Form definition called “CloseFormDef.”
- Drag the “BootstrapGrid, Label, TextArea, Close, and Submit” controls to the canvas and arrange them as shown below.

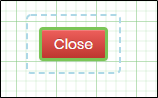
- Double-click the “Close” widget to configure its “Settings” properties. The application displays the control’s name. Select the button type from the drop-down list. Enter the button label text. Check the “Hide” checkbox to hide this widget at runtime. Check the “Read-Only” checkbox to view the button without triggering any click event.

- Double-click the “Close” widget to configure the “Styling” properties. Enter the CSS syntax. Select the classes to apply from the global drop-down list. Click the Save button.

- Double-click the “Close” widget to configure the “Other” properties. Enter the tool tip text. Click the Save button.

- Double-click the “Close” widget to configure the “Globalize” properties. The application will notify you if there is nothing to globalize, as shown below. If not, select a language from the drop-down list, then click the Translate button. Click the Save button.

- Save the Form definition. Then, select the Actions > Create Form Instance menu option. Generate a new Form Instance, and then check the box to edit this Form Instance.

- The Form is displayed to the user as shown below. Enter the user input, then click the Close button. A confirmation pop-up window appears. Click the “Yes” button to continue.

- A browser alert is displayed as shown below. Click the “Leave” button to discard changes.

Definition Sample:
You may download and extract the sample definition(s) from the link provided and later import them (drag-and-drop) into your FlowWright Process Definition (XML file) or Form Definition (HTML file) page.
Note: Please verify and complete the process steps for any missing configurations, such as file path references and database connections, after the import. Then, save the definition to confirm the changes.